This popup form can be accessed via the  add menu in the top header area of the selected asset view page (e.g.
  organisation,
  programme,
  project,
  sub-project,
  task group or
  change request view pages, as shown in Figure 1. Alternatively you can access the add popup form at the bottom of the Schedule tab at these same view pages, as shown in Figure 2. You may also add a task directly to a task group from the actions column menu of that task group in the Schedule tab, as shown in Figure 3.
task for the selected parent asset.
change request view pages, as shown in Figure 1. Alternatively you can access the add popup form at the bottom of the Schedule tab at these same view pages, as shown in Figure 2. You may also add a task directly to a task group from the actions column menu of that task group in the Schedule tab, as shown in Figure 3.
task for the selected parent asset.
NOTE: If you accidentally try to add a new task with the same reference as an existing task for your parent asset then you will get a warning message.
You will not be able to add this task until the Reference field has been filled in.
The details for the task can be assigned by clicking on the tab indicated in Figure 5 above. Each of the fields available to be customised in this tabbed view are described in the following table:

 users this task is allocated to by clicking on the tab indicated in Figure 7 above.
Select the users you want to allocate this task to from the Not allocated to list.
You may select multiple users or roles by holding the CTRL or SHIFT keys and clicking on the name of the additional user(s). To de-select, click on the highlighted name while still holding the CTRL or SHIFT keys so as not to lose all other selected users.
Once you are happy with your selection, click on the down arrow to transfer these users to the Allocated to list.
You may edit the users who are allocated to this task by shifting the users between the allocated and unallocated lists using the down and up arrows.
The users who belong in the allocated list will be able to log expense items on their timesheets against this task.
users this task is allocated to by clicking on the tab indicated in Figure 7 above.
Select the users you want to allocate this task to from the Not allocated to list.
You may select multiple users or roles by holding the CTRL or SHIFT keys and clicking on the name of the additional user(s). To de-select, click on the highlighted name while still holding the CTRL or SHIFT keys so as not to lose all other selected users.
Once you are happy with your selection, click on the down arrow to transfer these users to the Allocated to list.
You may edit the users who are allocated to this task by shifting the users between the allocated and unallocated lists using the down and up arrows.
The users who belong in the allocated list will be able to log expense items on their timesheets against this task.

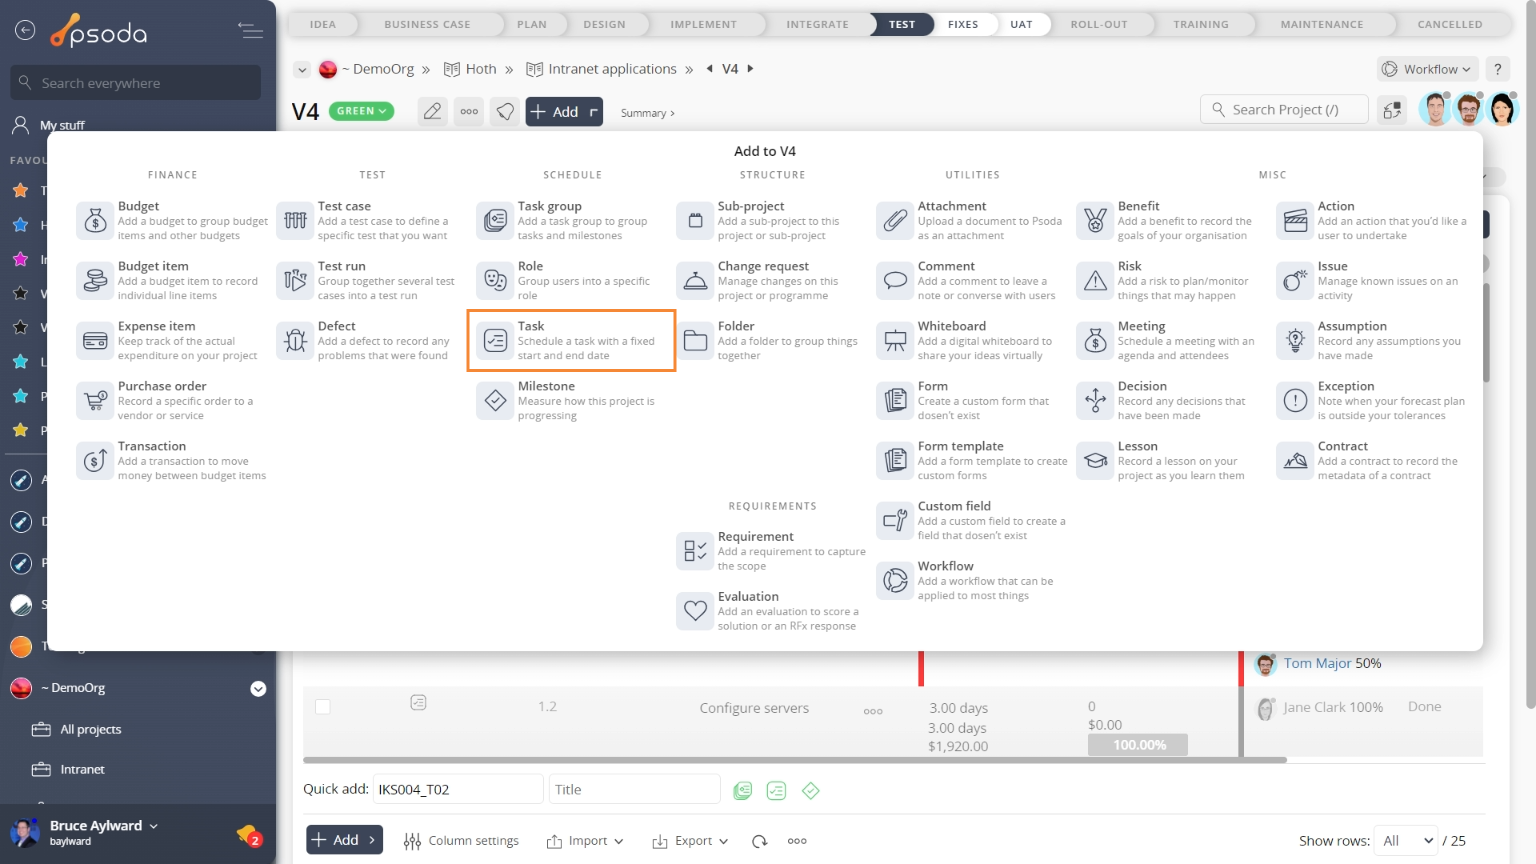
Figure 1 – Access via add menu
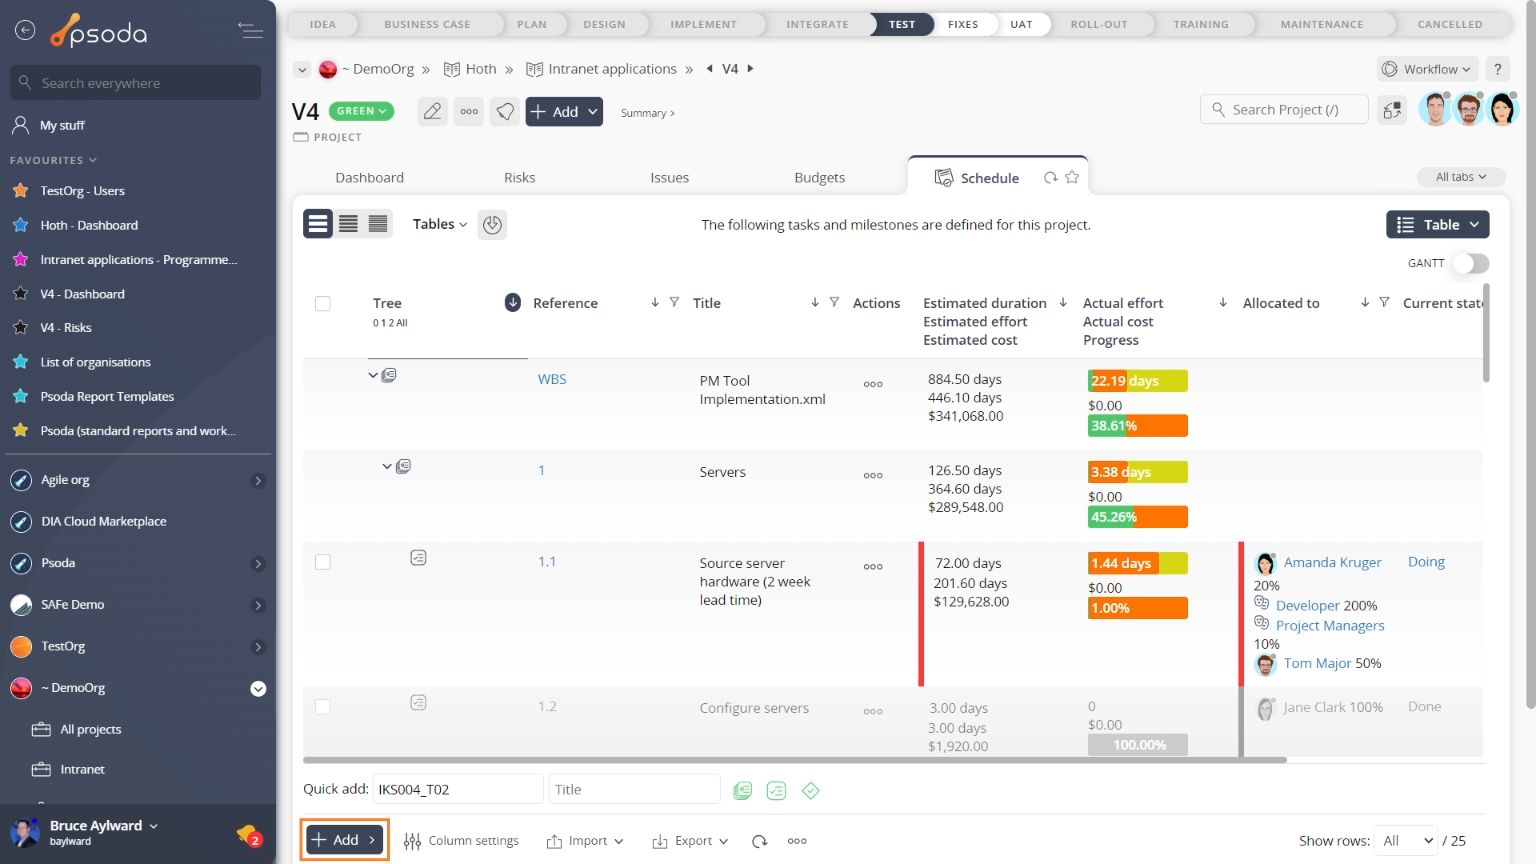
Figure 2 – Access via schedule tab
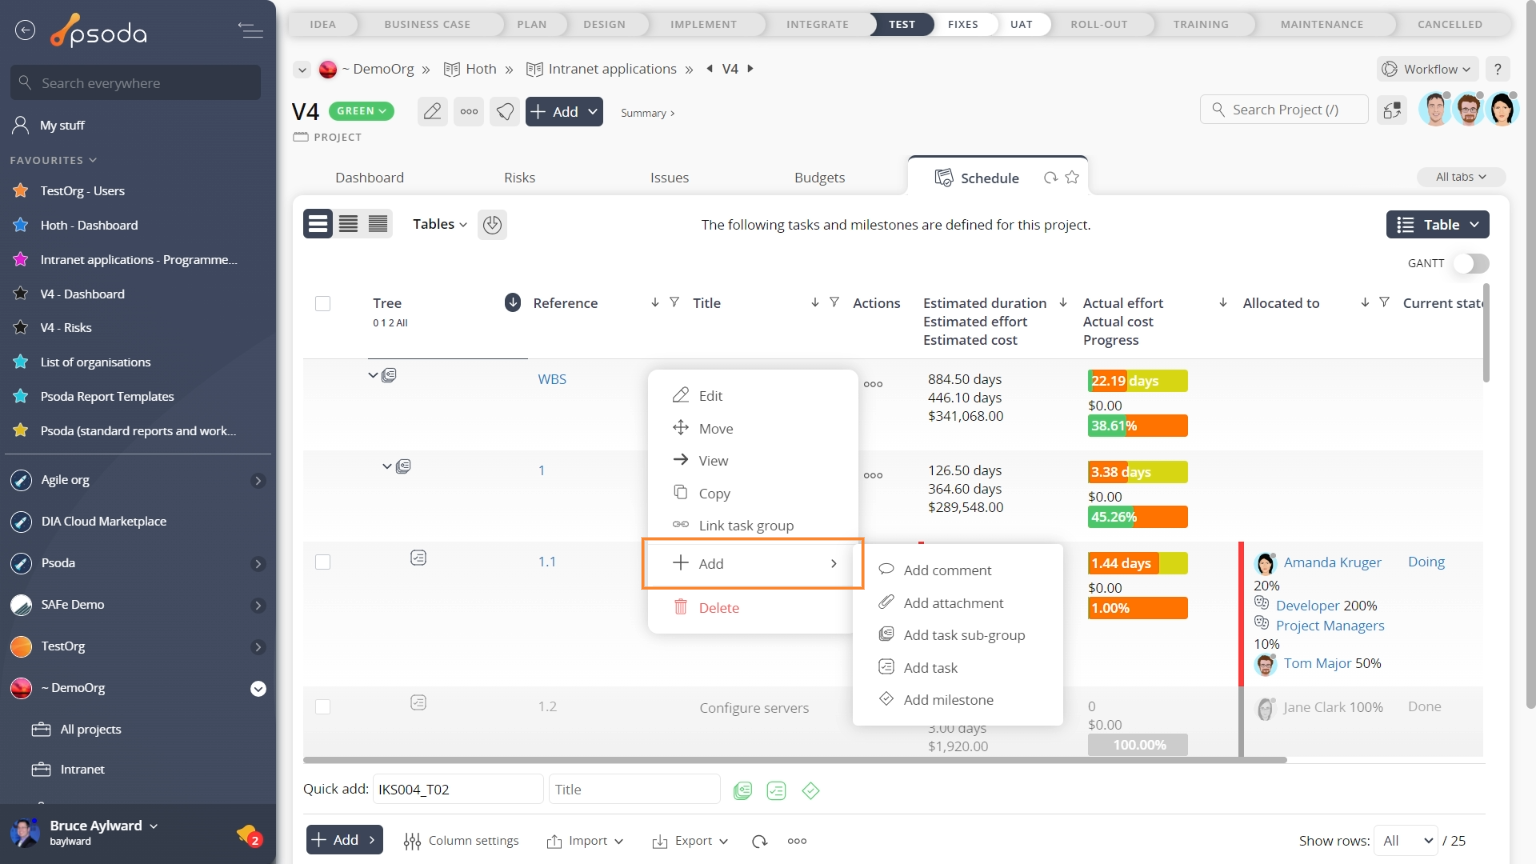
Figure 3 – Access via ![]() actions column menu
actions column menu
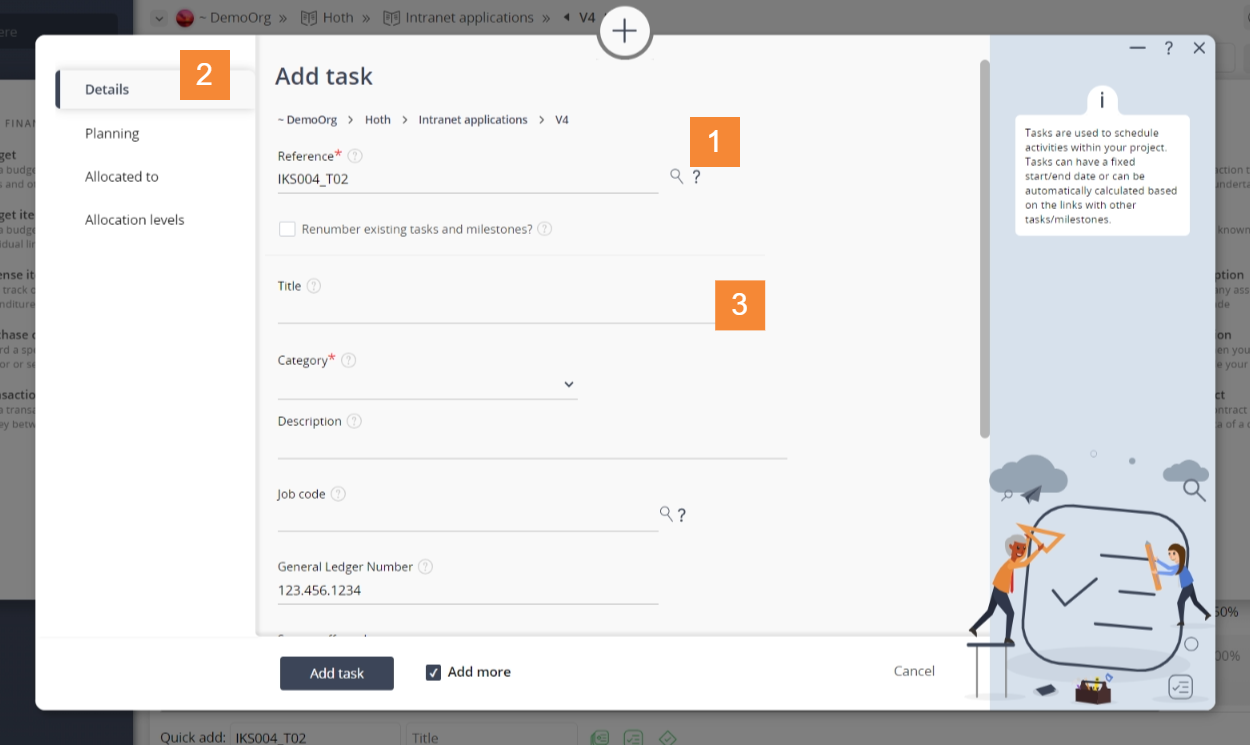 Figure 4 – Add task form
In Figure 4 above, the form has been broken down into three sections:
| Section 1 | This section contains a selection of important top fields:
Parent assets: This read-only field shows which organisation, programme, project, sub-project and/or lower level you are adding this new task to. This provides a breakdown of the asset hierarchy so that you can see how many levels down this task is being added.
Reference*: This is a mandatory field where a unique reference for this task must be entered.
Renumber existing tasks & milestones: Select this check box if you want to insert this task and renumber any existing task groups, tasks or |
|---|---|
| Section 2 | These are the tabs that you can cycle through to edit each section of the task.When you navigate to a new tabbed view in this popup, any information entered in Section 3 from the previous tabbed view will be saved. This means you do not need to click on any buttons to save each tab, but can instead click on the Add button at the bottom of the popup when you wish to add your new task with the set details. |
| Section 3 | This information will change as you cycle through the tabs shown in Section 2, and the available fields will change accordingly. A breakdown of the field information for each tab is provided below. |
Tab breakdown
The following information provides a breakdown of each of the tabbed views that may be available for you to set the task’s details under each section.Details
 Figure 5 – Add task details tab
The details for the task can be assigned by clicking on the tab indicated in Figure 5 above. Each of the fields available to be customised in this tabbed view are described in the following table:
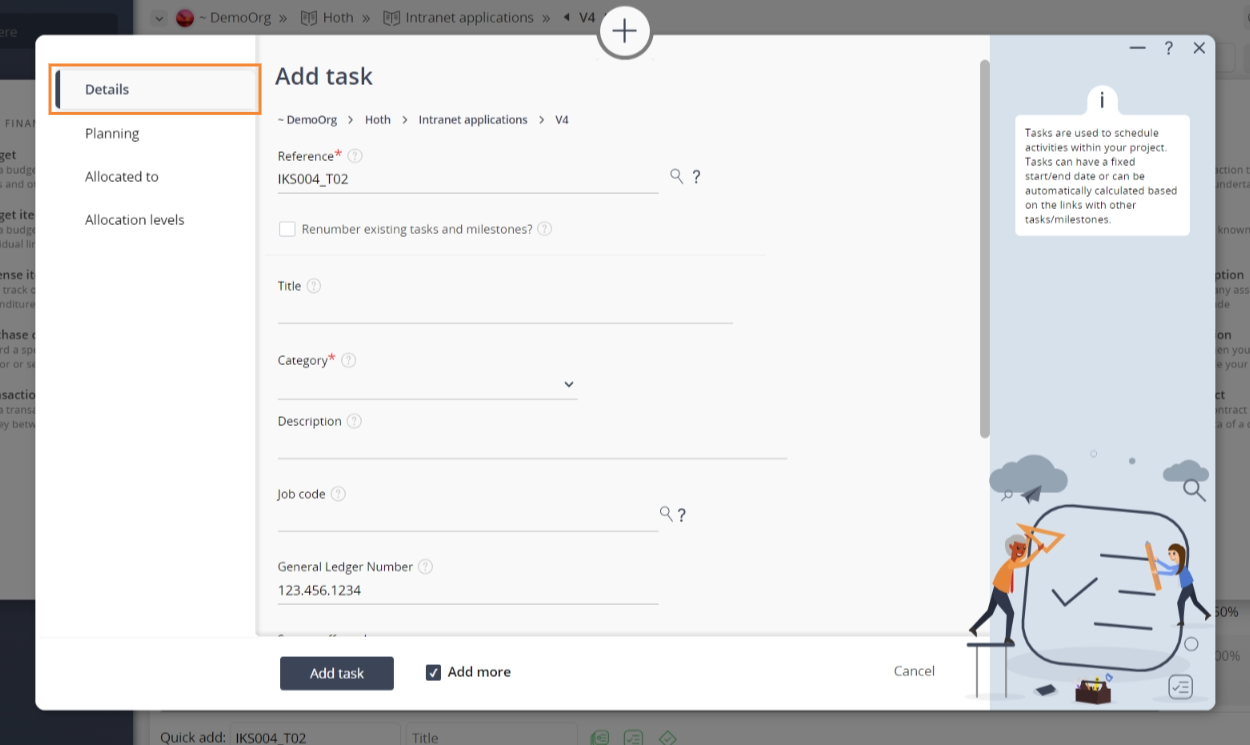
| Category*: | Use this drop-down to select a category for the new task. |
|---|---|
| (Add a new category): | This field will only be available if you have selected the “Add new category” option in the Category field above. Use this field to enter a new category for this task. |
| Title: | Enter a short title for this new task here. |
| Description: | Enter a longer description for this new task here. |
| Job code: | Enter the job code for this new task here. If you have set a job code prefix for your programme then the |
| General Ledger Number: | Enter the GL number for this new task here. |
| Deliverable: | Select this check box if you want this task to represent a deliverable. |
| Core R&D Activity: | Select this check box if you want this task to be part of your core R&D activity for tax purposes. |
| Supporting R&D Activity: | Select this check box if you want this task to be part of your Supporting R&D activity for tax purposes. |
| Approved: | Select this check box if this task has been approved and is available to resources to add to their |
| Archived: | Select this check box if you want to set this task as archived so that it is no longer available to resources to add to their timesheets. |
 Planning
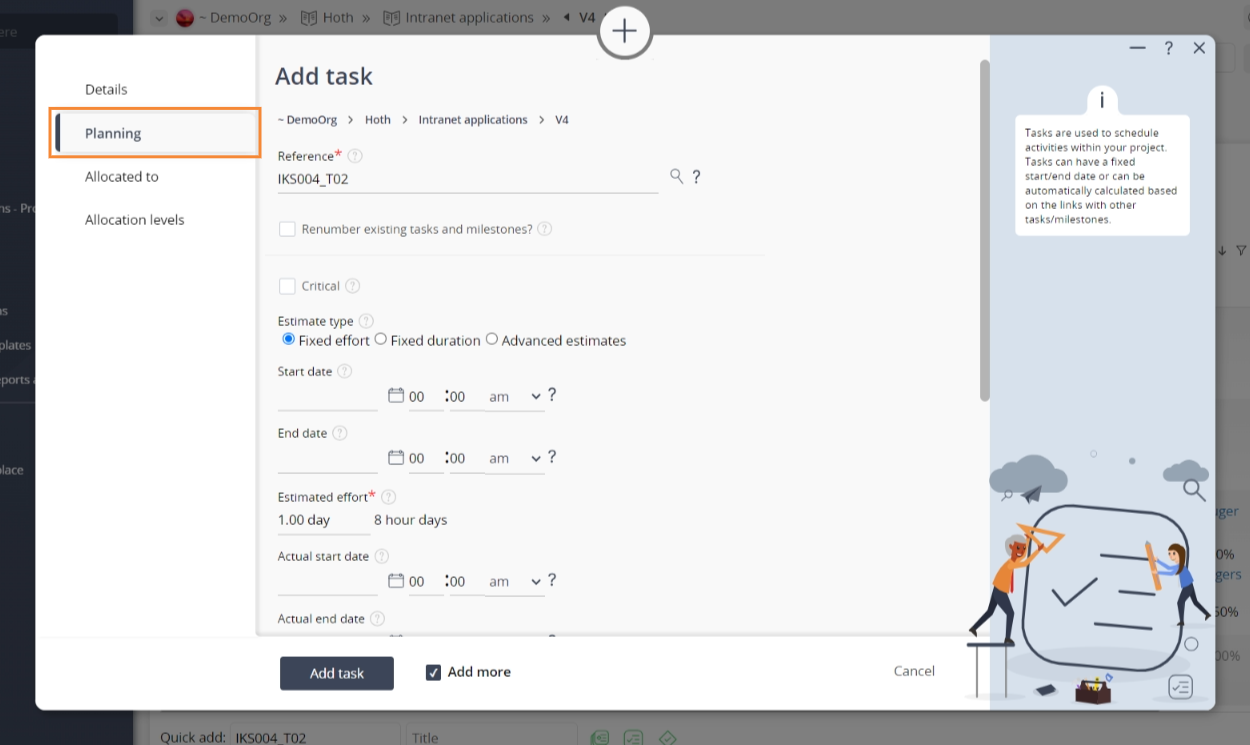
Figure 6 – Add task planning tab
| Critical: | Select this check box if you wish to mark this task as part of a critical pathway. |
|---|---|
| Estimate type: | Select whether this task is a fixed effort or fixed duration task. If you select Fixed effort then Psoda will calculate the duration for based on the allocation levels. If you select Fixed duration then Psoda will calculate the required effort based on the allocation levels. If you select Advanced estimates then the start date, end date and estimate fields will be hidden, and you can come back and edit these estimates after this task has been created. |
| Start date: | Enter the earliest start date for this task using one of the supported date formats or by selecting the desired date using |
| End date: | Enter the latest end date for this task using one of the supported date formats or by selecting the desired date using |
| (Estimated duration): | This field will be visible if you selected the “Fixed duration” option in the Estimate type field above. Enter the estimated duration for this task as a number of 8 hour days. For example 1.5 will be 8 + 4 hours. You can also use 1:30 or 1h 30m. |
| (Estimated effort): | This field will be visible if you selected the “Fixed effort” option in the Estimate type field above. Enter the estimated effort for this task as a number of 8 hour days, for example 1.5 or 1:30 or 1h 30m. |
| Priority: | Enter the priority for this task as a number from 0 to 1000000. |
| Estimated progress: | Enter the estimated progress for this task as percentage. 0% means the task has not been started and 100% means the task has been completed. If you leave this field blank then Psoda will estimate the progress based on the estimated effort, the actual effort and the estimated effort to complete the task. |
| Charge model: | This field will only be visible if you have sufficient permissions.Use the drop-down list to select the charge model for this task. The following options are available:
|
| Charge rounding: | This field will only be visible if you have sufficient permissions.Use the drop-down list to select how timesheets will round the charges for this task. The following options are available:
|
| Rate override: | Fill in a new rate in this field if you want to override the |
Skills
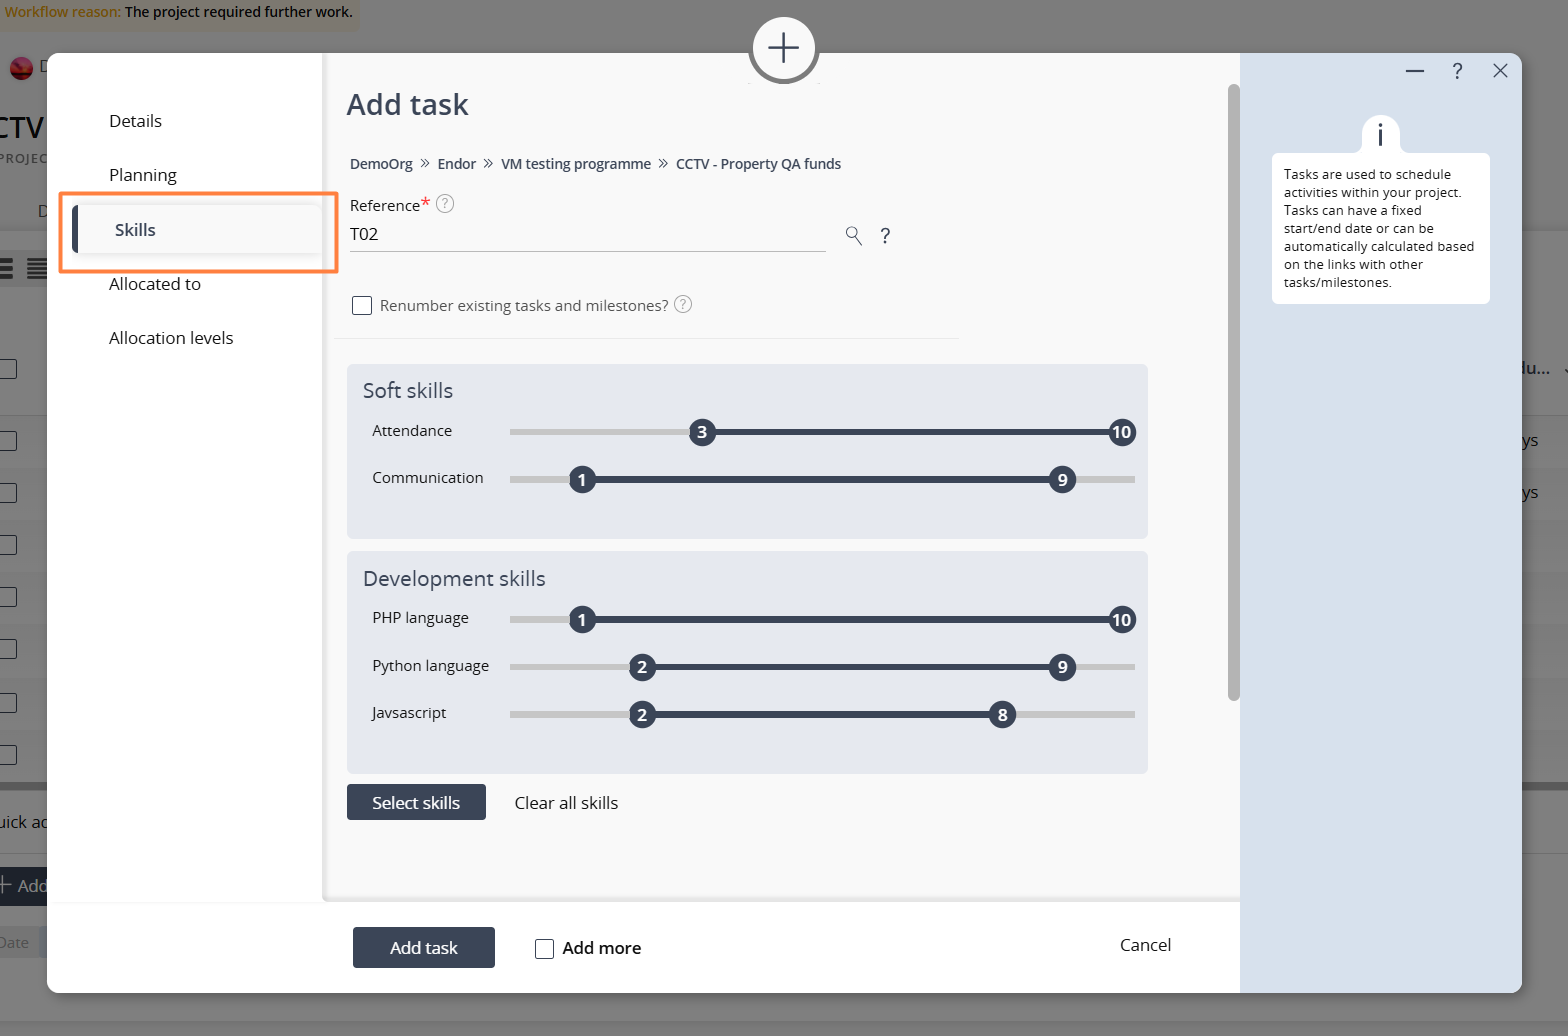
Figure 8 – Add task skill tab
This task can have organisational skill ratings saved by selecting the skills tab in Figure 8 above. By saving an assortment of skills with accompanying ranges, you can then utilize this to filter out users for allocation. See Task skills here for more details on how to save and utilize task skill ratings. Allocated to
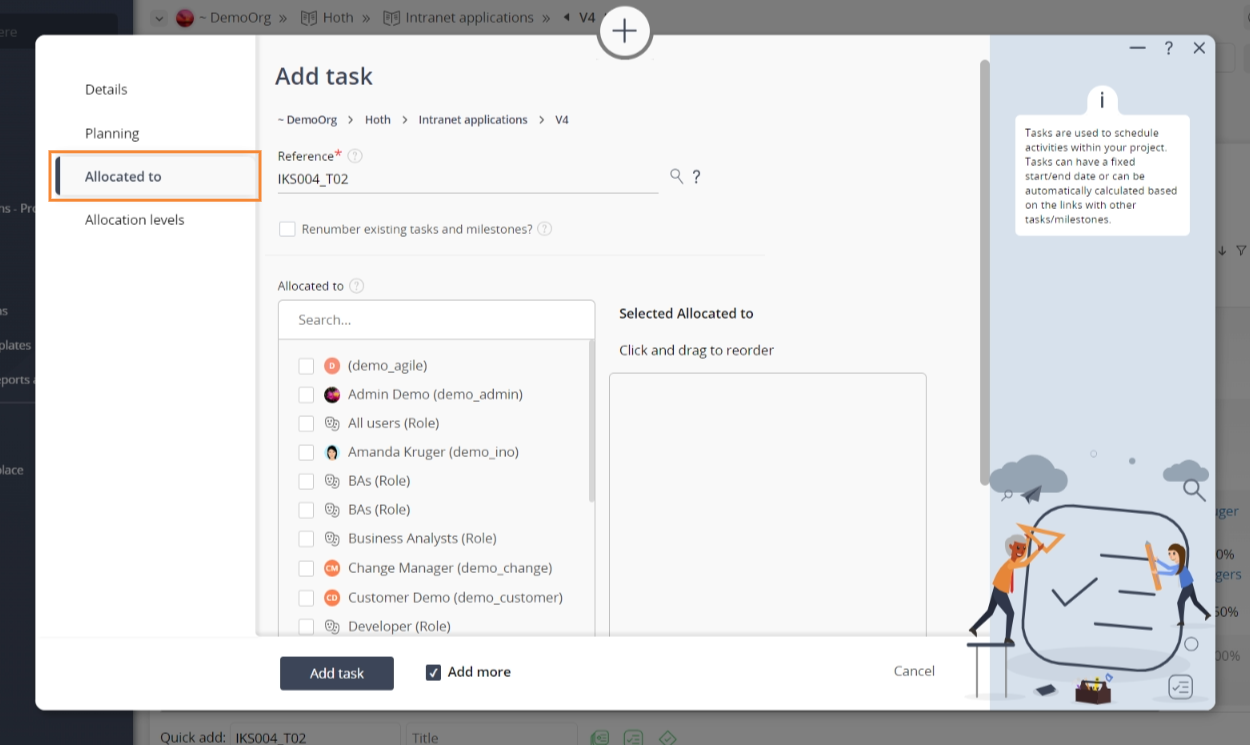
Figure 7 – Add task allocated to tab
You can assign which Allocation levels
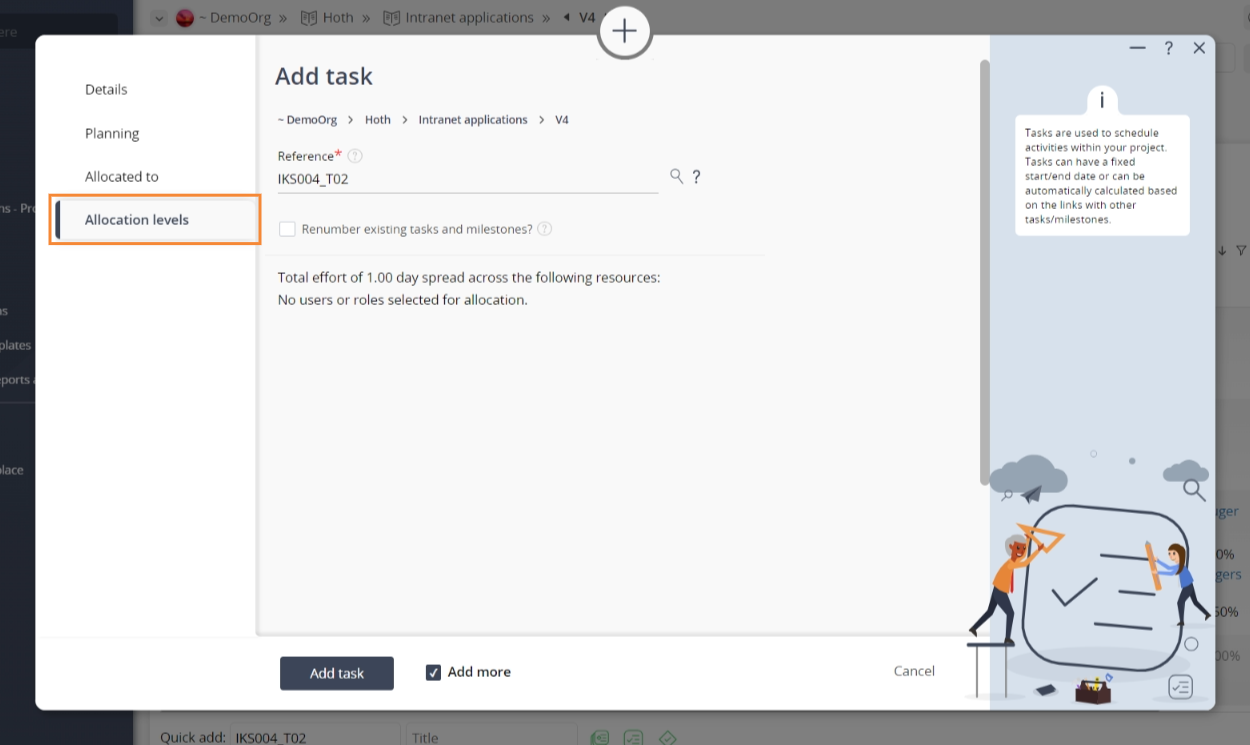 Figure 8 – Add task allocation levels tab

Figure 9 – View from Schedule tab
Click the “Cancel” button if you no longer want to add a new task.