This popup form can be accessed via the  add menu in the top header area of a selected asset view page (e.g.
  programme,
  project,
  sub-project,
  task group, task,
  milestone,
  requirement,
  decision,
  evaluation etc), as shown in Figure 1. Alternatively you can access the
  add popup form at the bottom of the Attachments tab at these same view pages, as shown in Figure 2. You may also add an attachment via the actions column menu if you are viewing an asset listing (for example, if you are looking at a list of task groups, tasks and milestones in a project’s Schedule tabbed view you may wish to add an attachment to a selected task group), as shown in Figure 3.
Additionally, you can use the drag-n-drop at the bottom of this tabbed view, by selecting the attachment from your computer’s file system or another location and dragging it into the drop section of the Attachments tab. This will bypass the popup form and add the file directly to the attachment listing.
add popup form at the bottom of the Attachments tab at these same view pages, as shown in Figure 2. You may also add an attachment via the actions column menu if you are viewing an asset listing (for example, if you are looking at a list of task groups, tasks and milestones in a project’s Schedule tabbed view you may wish to add an attachment to a selected task group), as shown in Figure 3.
Additionally, you can use the drag-n-drop at the bottom of this tabbed view, by selecting the attachment from your computer’s file system or another location and dragging it into the drop section of the Attachments tab. This will bypass the popup form and add the file directly to the attachment listing.
*The short name field is mandatory and either the Link URL or file must be specified, but all others are optional.
Once you are happy with your entries click the “Add attachment” button at the bottom of the form. This will add the new attachment with the details that you supplied.
The new attachment can be viewed in the Attachments tab at the parent asset’s view page, as shown in Figure 5.
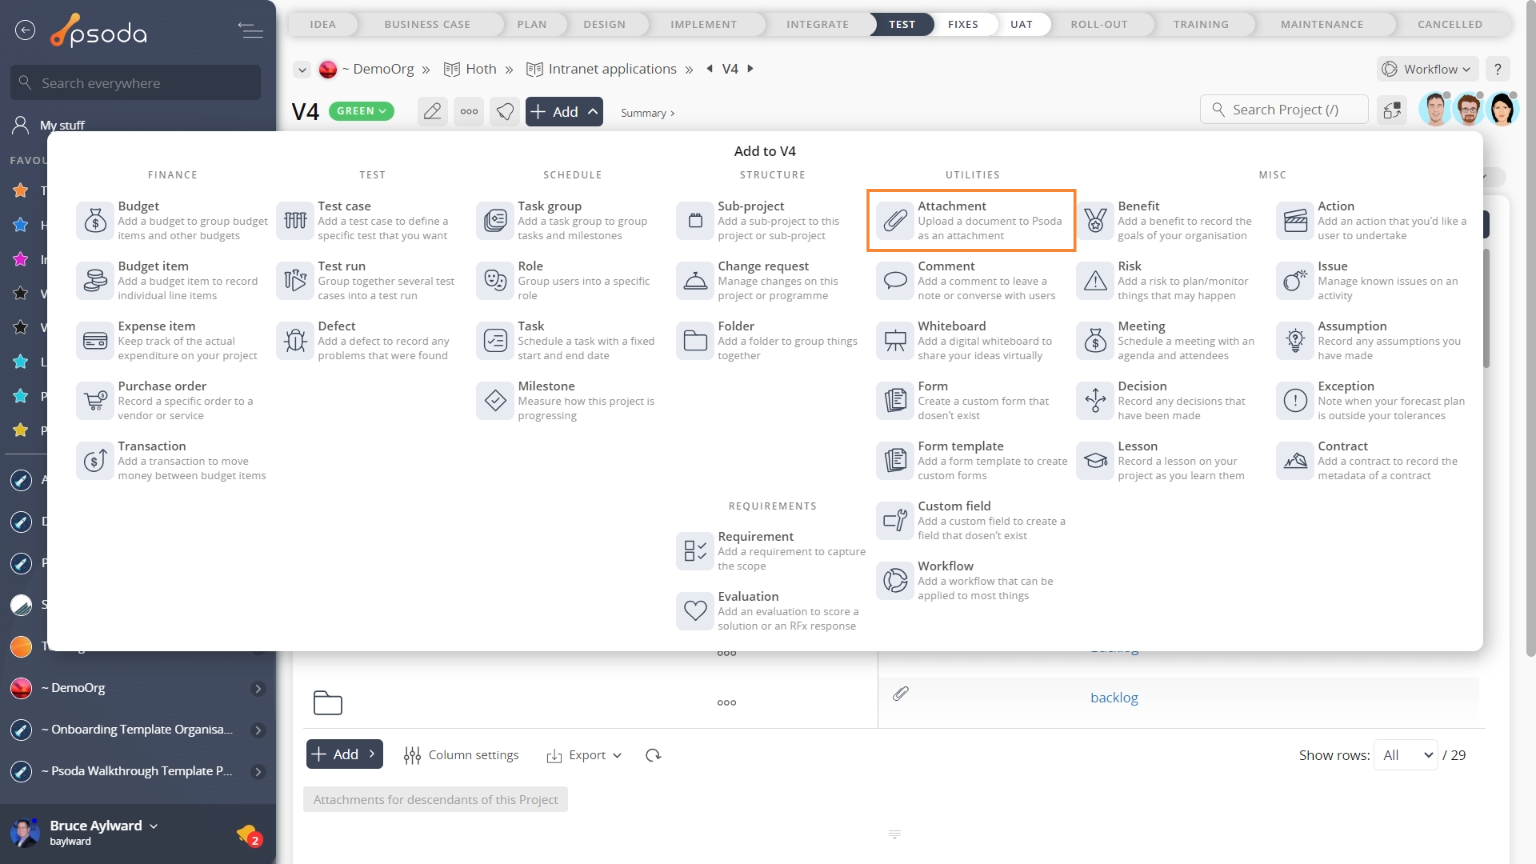
Figure 1 – Access via add menu
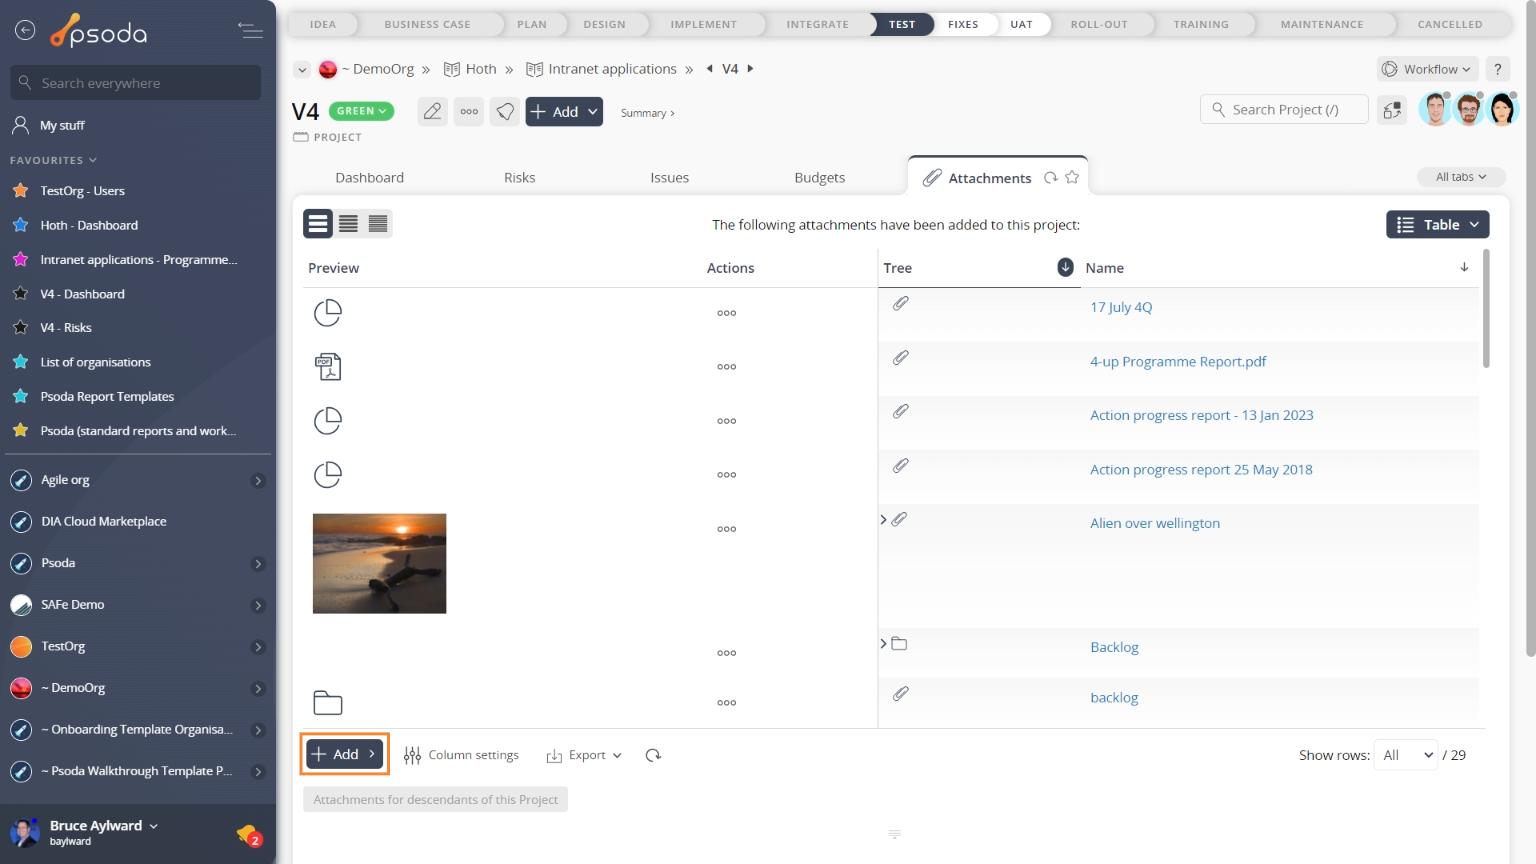
Figure 2 – Access via attachments tab
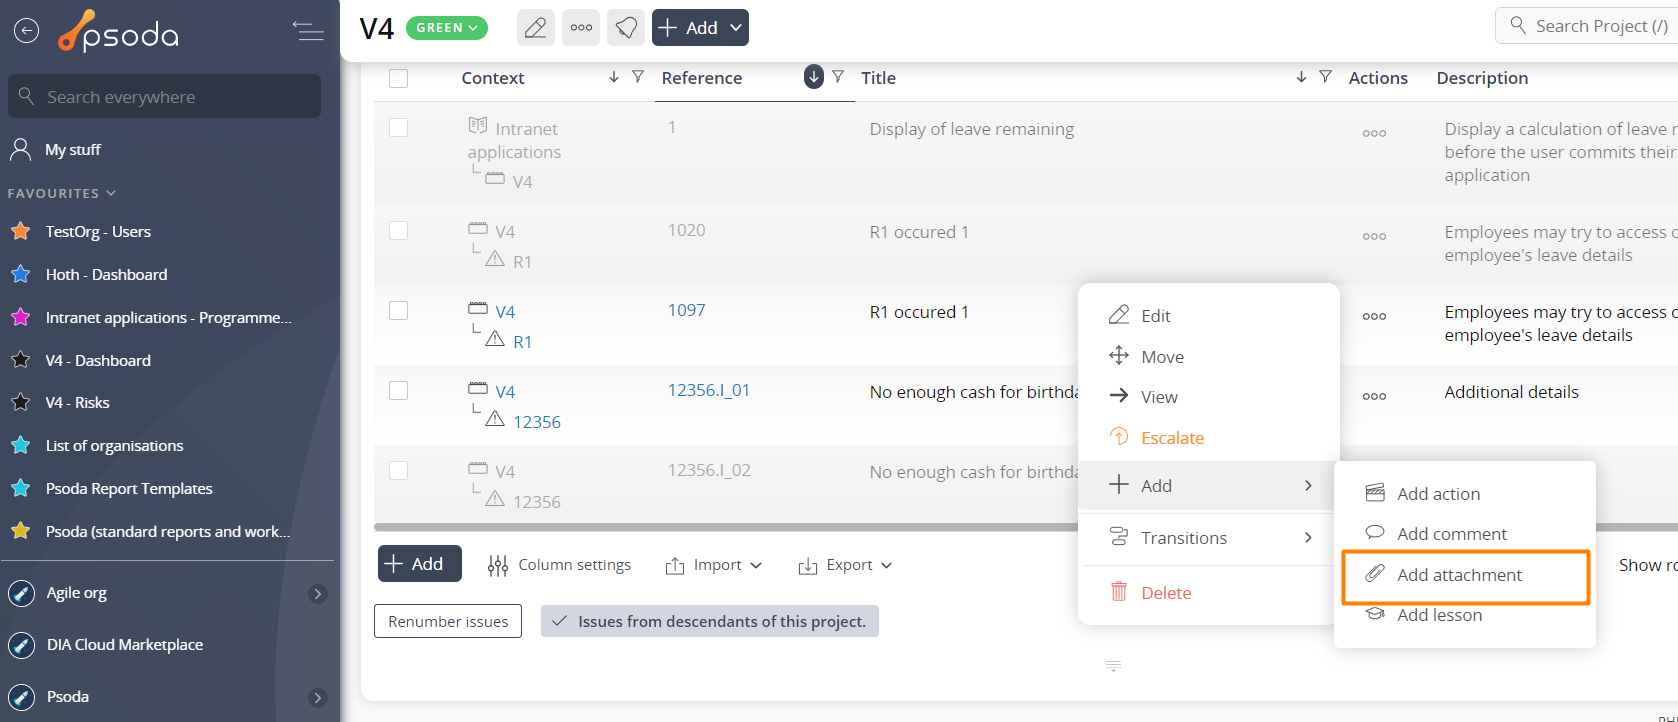
Figure 3 – Access via ![]() actions column menu of asset listing
actions column menu of asset listing
This popup is shown in Figure 4 and is used to add a new ![]() attachment to the selected asset.
attachment to the selected asset.
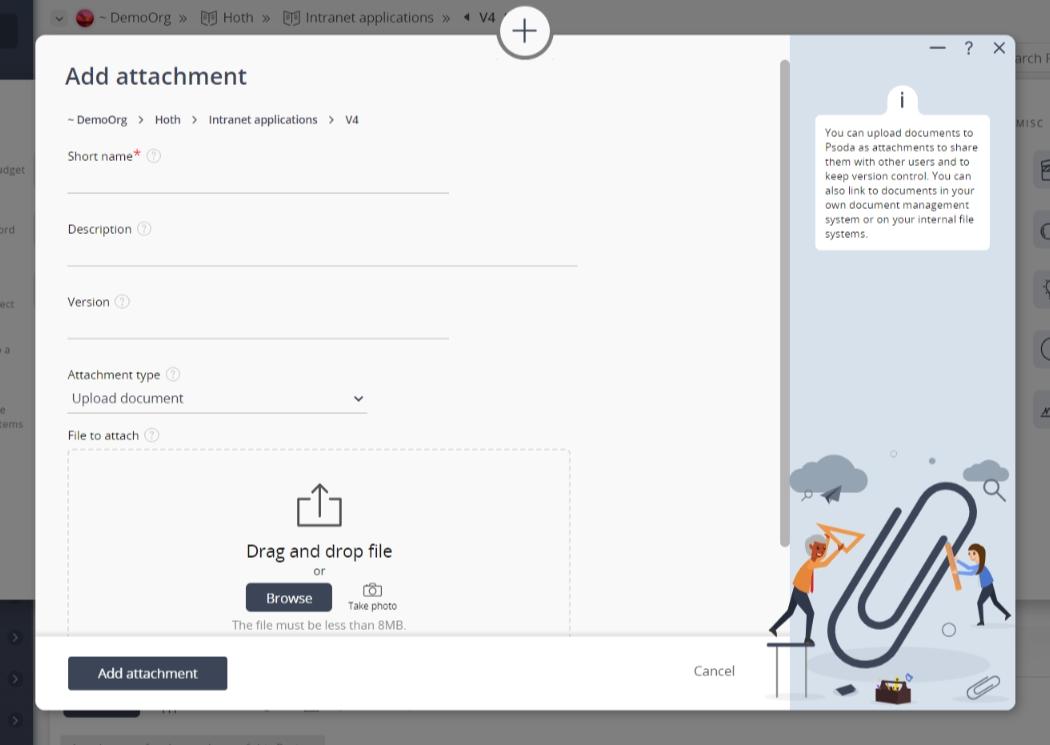
Figure 4 – Add attachment form
You can either attach a link to your document or upload your document to the Psoda server. If you attach a link URL then your users will need access to the destination of the link. If you upload the document to the Psoda server then your users will be able to download the document directly from Psoda. This form has the following fields:| Parent Assets: | These read-only fields show the asset hierarchy of which assets this new attachment sits under. The lowest level shows where this attachment is being added to. |
|---|---|
| Short name*: | Enter a short name for this new attachment. This field is mandatory. |
| Description: | Enter a longer description for this new attachment here. |
| Version: | Enter the version of the attachment here. |
| Attachment type: | Use this drop-down list to select the type of attachment you want to add. One of the next three fields will be displayed depending on the type that you select. |
| (File to attach): | If you have selected the “Upload Document” option from the Attachment type field above, you will be presented with this field. Select the browse button to choose the file you want to upload to the Psoda server. |
| (Link URL): | If you have selected the “External Link” option from the Attachment type field above, where you can enter the link URL in this field. If you don’t include the link type in the URL, e.g. http://, https:// or file:// then Psoda will automatically add http:// to the front of the URL. |
| (Internal shortcut): | Use the tree navigation layout to select the asset you want to link to. You can show or hide levels or sub-levels by clicking on the |
| Workflow: | Select the applicable |

Figure 5 – View from attachments tab
Click the “Cancel” button if you no longer want to add the new attachment.