Microsoft Project integrates with Psoda’s scheduling system where you can import from Microsoft Project to Psoda, or export schedules from Psoda to Microsoft Project.
In Psoda, navigate to the schedule tab where you want to import to Microsoft Project.
Scroll to the bottom of the table and click the import menu located in the footer of the table. Click the “Import WBS from MSProject XML file” button in the menu. This is shown in Figure 1.
If you want your new tasks from Microsoft Project to be advanced estimates in Psoda, check the “Mark all tasks as advanced estimates” checkbox in Figure 2.
If you want to import the start and end dates from Microsoft Project, check the “Import start/end dates” checkbox in Figure 2. If you do not check this, Psoda will automatically calculate the start and end dates for you.
Microsoft Project can contain rates against roles/users. If you want to update these rates on existing roles/users in Psoda, check the “Update rates on existing roles/users” checkbox in Figure 2.
Select the WBS or task group you would like to update in Psoda in the “Update WBS or task group” dropdown in Figure 2. If you select “None”, it will automatically create a new one for you.
If you want to baseline your WBS or task group in Psoda before you import the Microsoft Project data, then check the “Baseline WBS before update” checkbox in Figure 2.
If you have permission, you can select add a new role/user from the dropdown and this will create this resource for you.
Lastly, click “Import MS Project file” to complete the import.
Scroll to the bottom of the table and click the export table options menu located in the footer of the table. Click the “Export to MSProject XML format” button in the menu. This is shown in Figure 4.
Import from Microsoft Project
In Microsoft Project make sure to save your project in XML format. To do this click File > Save As > Browse. Then click the Save as type dropdown and choose XML.In Psoda, navigate to the schedule tab where you want to import to Microsoft Project.
Scroll to the bottom of the table and click the import menu located in the footer of the table. Click the “Import WBS from MSProject XML file” button in the menu. This is shown in Figure 1.
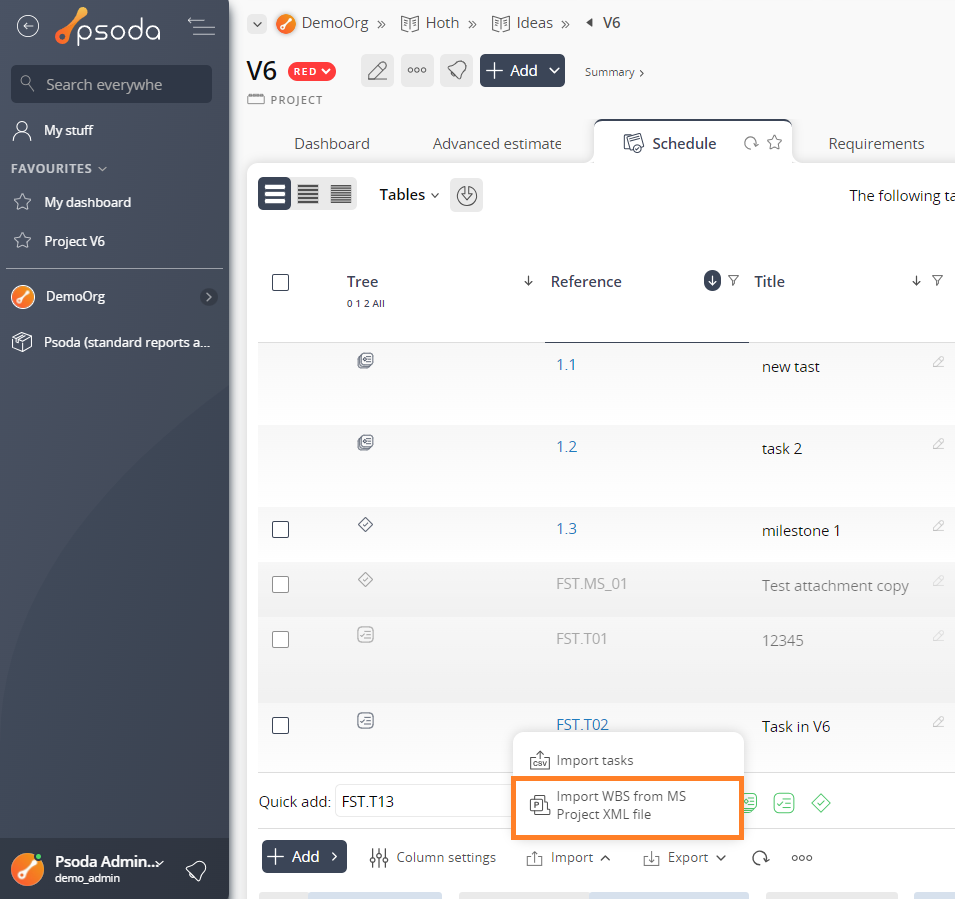
Figure 1 – Schedule options menu import from MSProject
This will open an import popup as shown in Figure 2.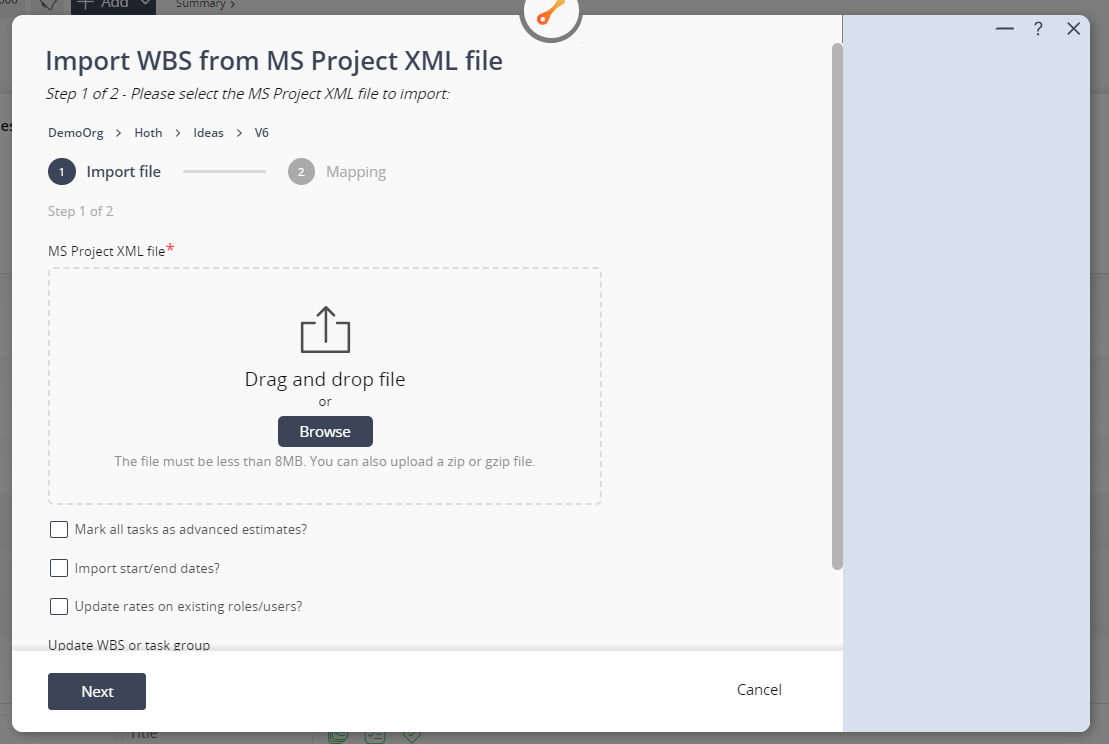
Figure 2 – Import from MSProject popup phase 1
Choose the XML file you saved from Microsoft Project earlier.If you want your new tasks from Microsoft Project to be advanced estimates in Psoda, check the “Mark all tasks as advanced estimates” checkbox in Figure 2.
If you want to import the start and end dates from Microsoft Project, check the “Import start/end dates” checkbox in Figure 2. If you do not check this, Psoda will automatically calculate the start and end dates for you.
Microsoft Project can contain rates against roles/users. If you want to update these rates on existing roles/users in Psoda, check the “Update rates on existing roles/users” checkbox in Figure 2.
Select the WBS or task group you would like to update in Psoda in the “Update WBS or task group” dropdown in Figure 2. If you select “None”, it will automatically create a new one for you.
If you want to baseline your WBS or task group in Psoda before you import the Microsoft Project data, then check the “Baseline WBS before update” checkbox in Figure 2.
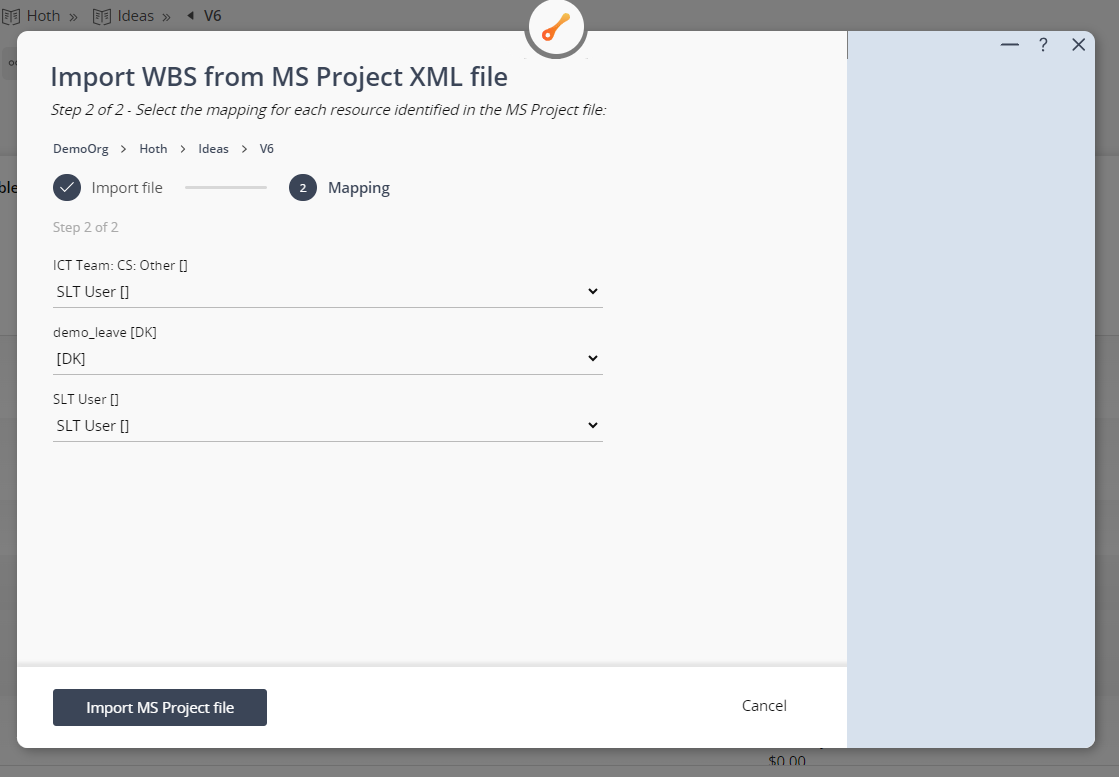
Figure 3 – Import from MSProject popup phase 2
As shown in Figure 3, the next phase is where you can map each resource identified in the Microsoft Project file. This could be a role or a user in Psoda. Make sure these are all mapped to the correct person/role before moving on. Psoda automatically tries to best match the resources by the initials.If you have permission, you can select add a new role/user from the dropdown and this will create this resource for you.
Lastly, click “Import MS Project file” to complete the import.
Export to Microsoft Project
Navigate to the schedule tab where you want to export to Microsoft Project.Scroll to the bottom of the table and click the export table options menu located in the footer of the table. Click the “Export to MSProject XML format” button in the menu. This is shown in Figure 4.
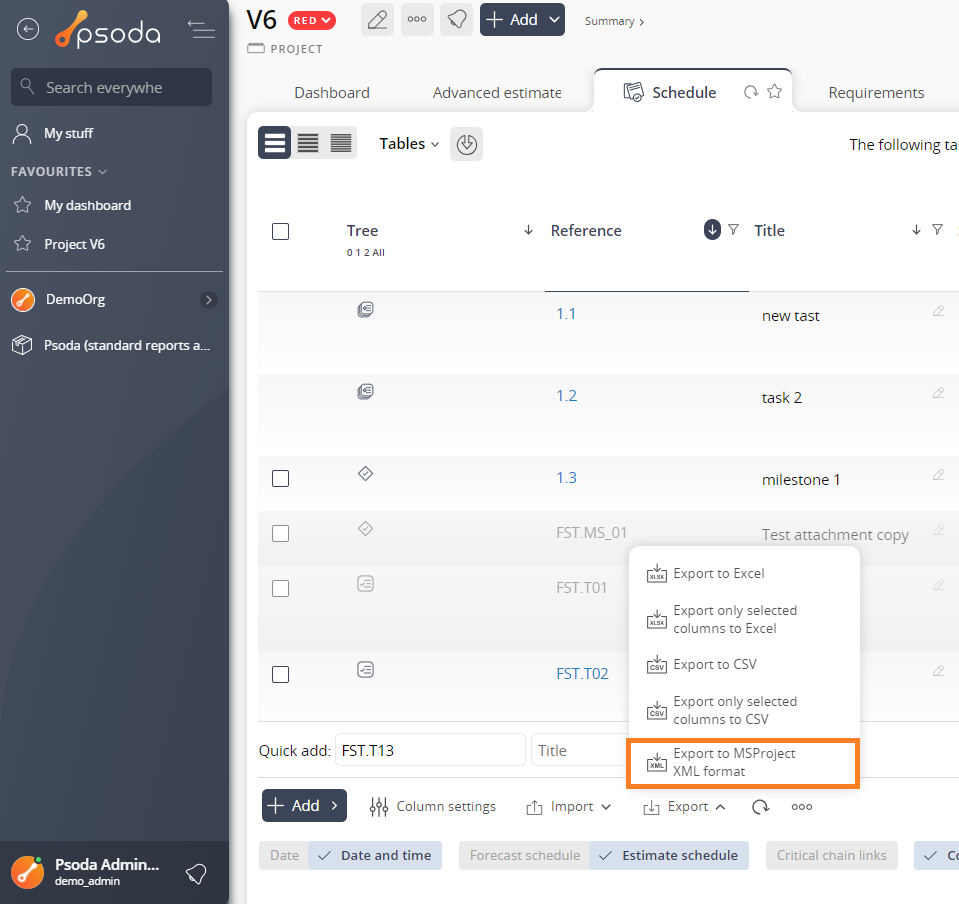
Figure 4 – Schedule options menu export to MSProject
This should automatically download the Microsoft Project XML file for you. Once the download completes, you will be able to then import that file into Microsoft Project.