Export tables to CSV
Most tables in Psoda can be exported to CSV format, which can be opened in multiple applications.To export a table to CSV in Psoda, first you will need to navigate to the tab in which the table you want to export is on. Once you are viewing the table you want to export, click on the grey export to CSV icon found at the bottom left of the table. This is shown in Figure 1.
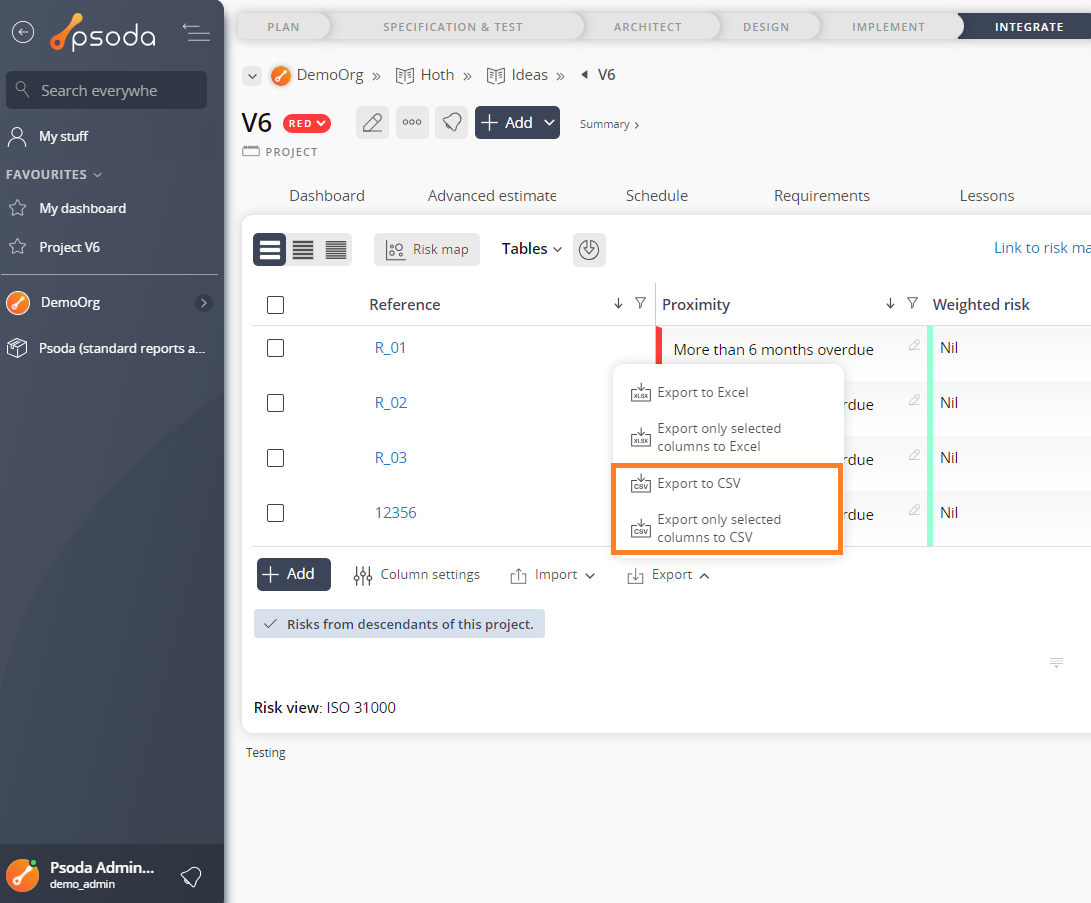
Figure 1 – Export CSV icon on a table
Click on this icon and the file should automatically be downloading for you. You can now open this CSV file in your desired application such as Microsoft Excel, Google Sheets, Apple Numbers, Text Editors etc.
Import tables from CSV
You can import a CSV file to the following tables: Actions, Assumptions, Benefits, Budgets, Change Requests, Contracts, Decisions, Dependencies, Features, Forms, Issues, Lessons, Milestones, Programmes, Projects, Risks, Roles, Advanced Estimates, Schedules, Users and Vendors.To import a CSV file into Psoda, first you will need to navigate to the tab in which the table you want to import. Once you are viewing the table you want to import, click on the grey import to CSV icon found next to the add button at the bottom left of the table. This is shown in Figure 2.
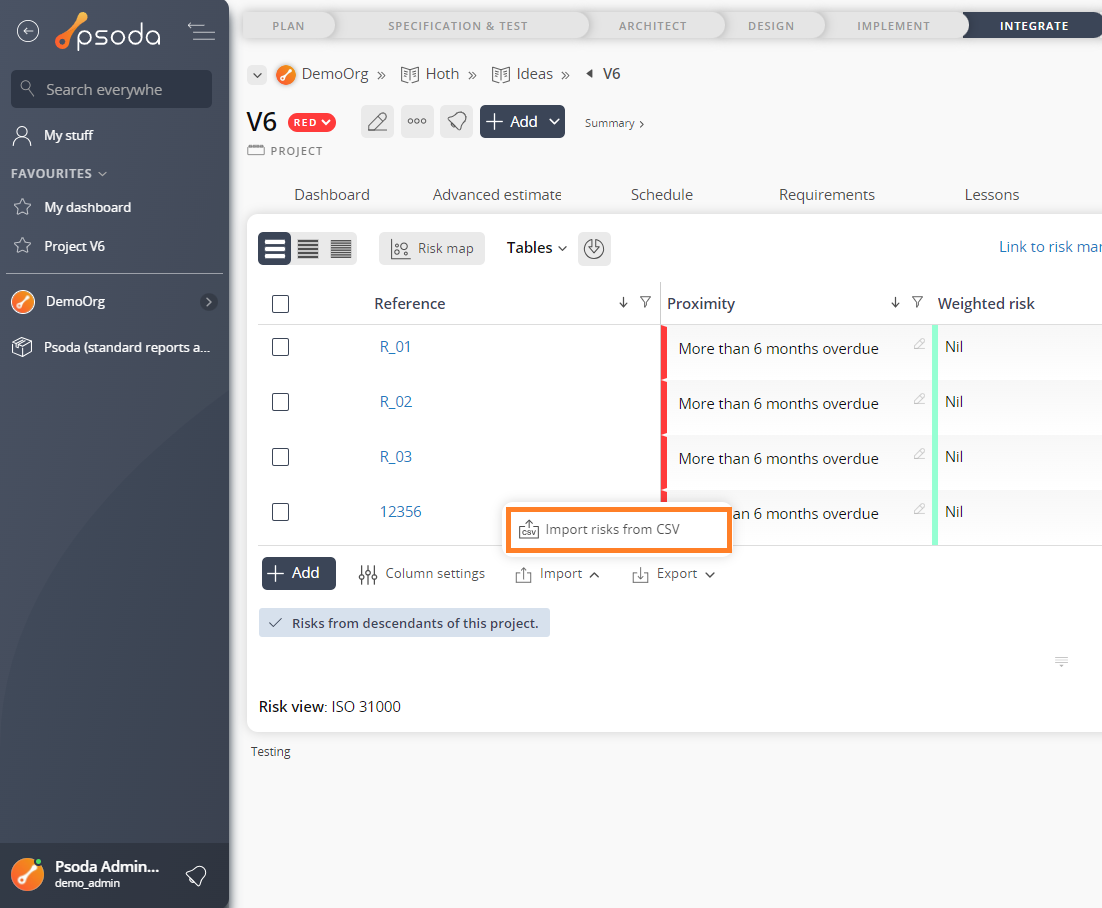
Figure 2 – Import CSV icon on a table
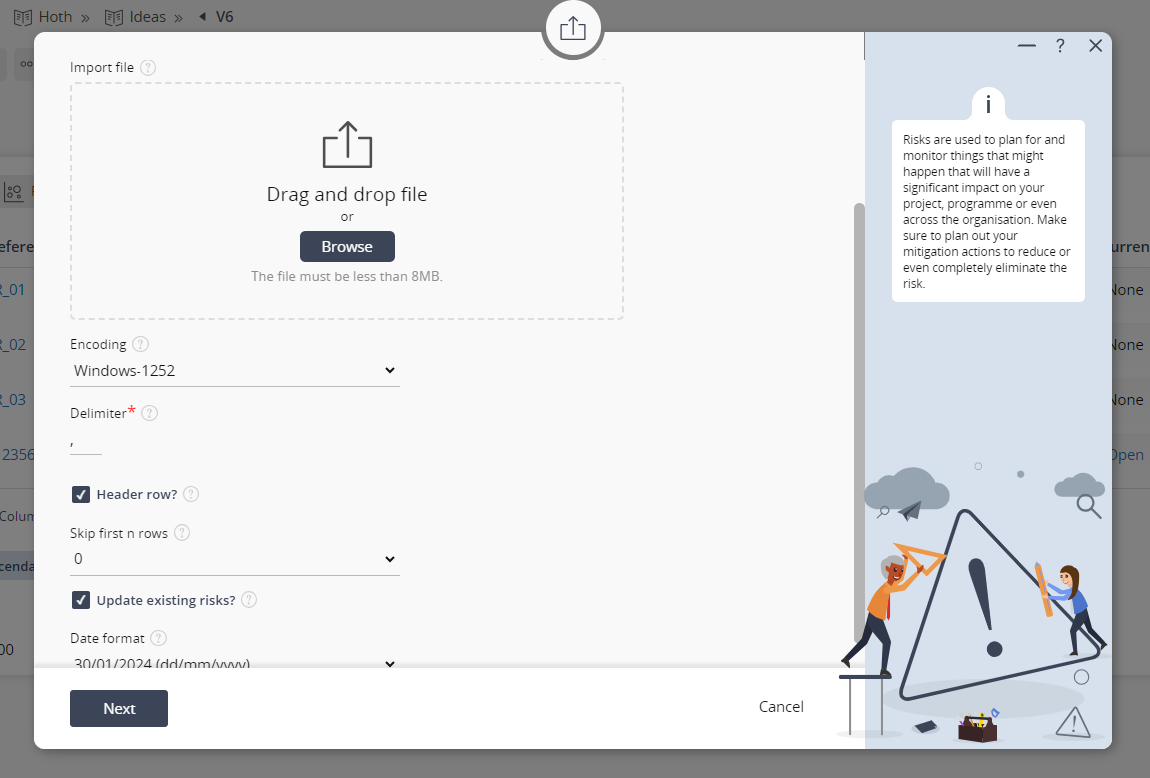
Figure 3 – Import CSV popup phase 1
Choose the CSV file from your computer you wish to import.For the “Encoding” dropdown, different languages may use different encoding, for example UTF-8 and UTF-16 are commonly used. Make sure you that when you originally exported your CSV file from Excel, that you use the same encoding option in this encoding dropdown as well. Windows-1252 is the standard and default encoding used. Use this if you have not manually changed the encoding.
The “delimiter” field can be used to specify the delimiter used in the import file between fields. Normally this would be a comma but it can be any character you prefer.
The “header row” checkbox should be set if your import file contains a header row. Unset the checkbox if there are no header rows and you want to import the first row as a requirement as well.
Normally your header row is the first row in the file. If you have anything above the header row, use the “skip first n rows” option to skip the n number of rows required.
If “update existing” is checked, this means that if there is an item with the same reference it will update the original item rather than creating a new item.
Press the next button to move to the next step.
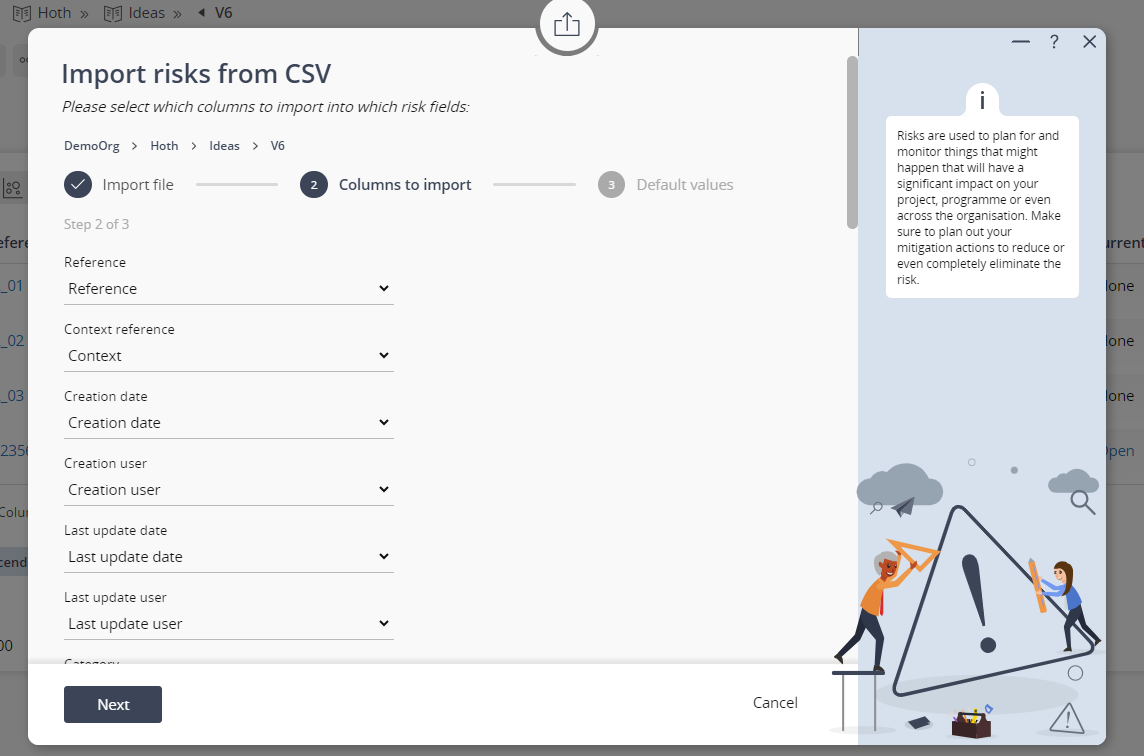
Figure 4 – Import CSV popup phase 2
The second step allows you to specify which columns from the import file should go into which fields of the new asset. For example, the first field allows you to select which column to import into the reference field. The second field allows you to select the description column, and so on.If you do not want to import a particular column from the file, just select the “Do not import” option from the list. You will be given an opportunity in the next step to specify default values for any fields you do not want to import.
The reference field must be unique for every requirement in your project so you cannot select not to import the reference.
Select the Next button to move to the next step. If you have selected columns for all the fields then you will skip over the next step and go straight to the last step.
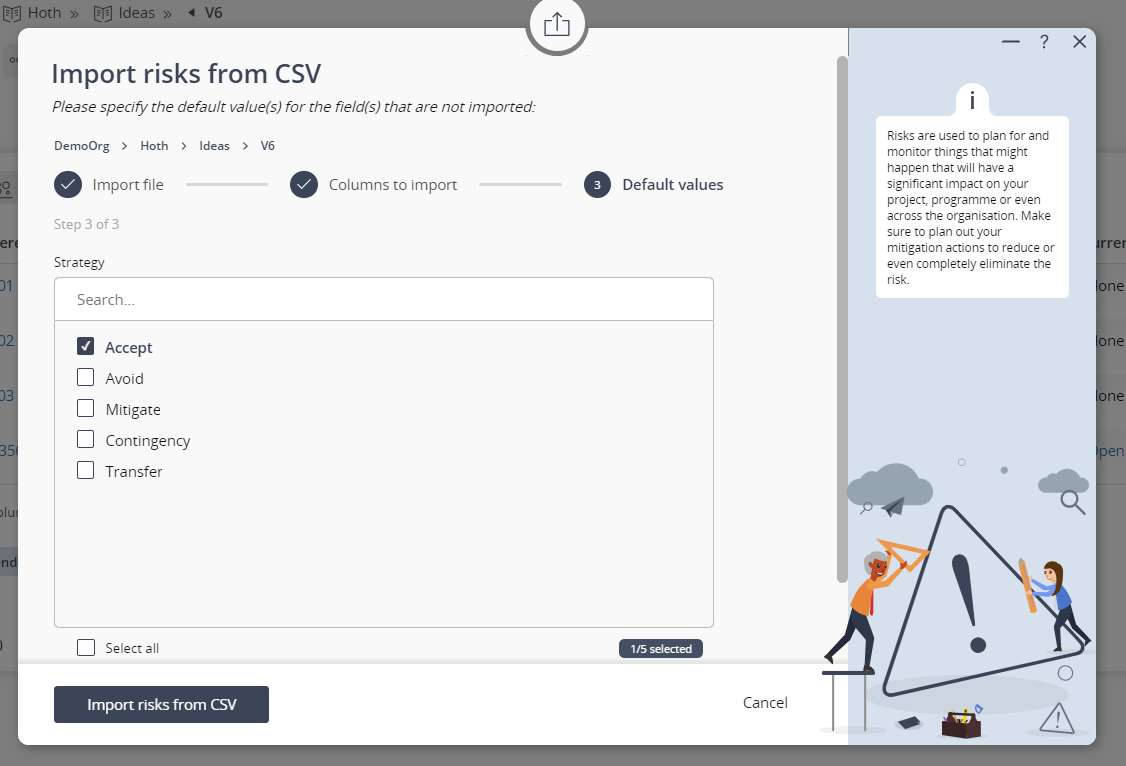
Figure 5 – Import CSV popup phase 3
This step allows you to specify the default values to use for fields that you selected not to import.Select import to move onto the last step.
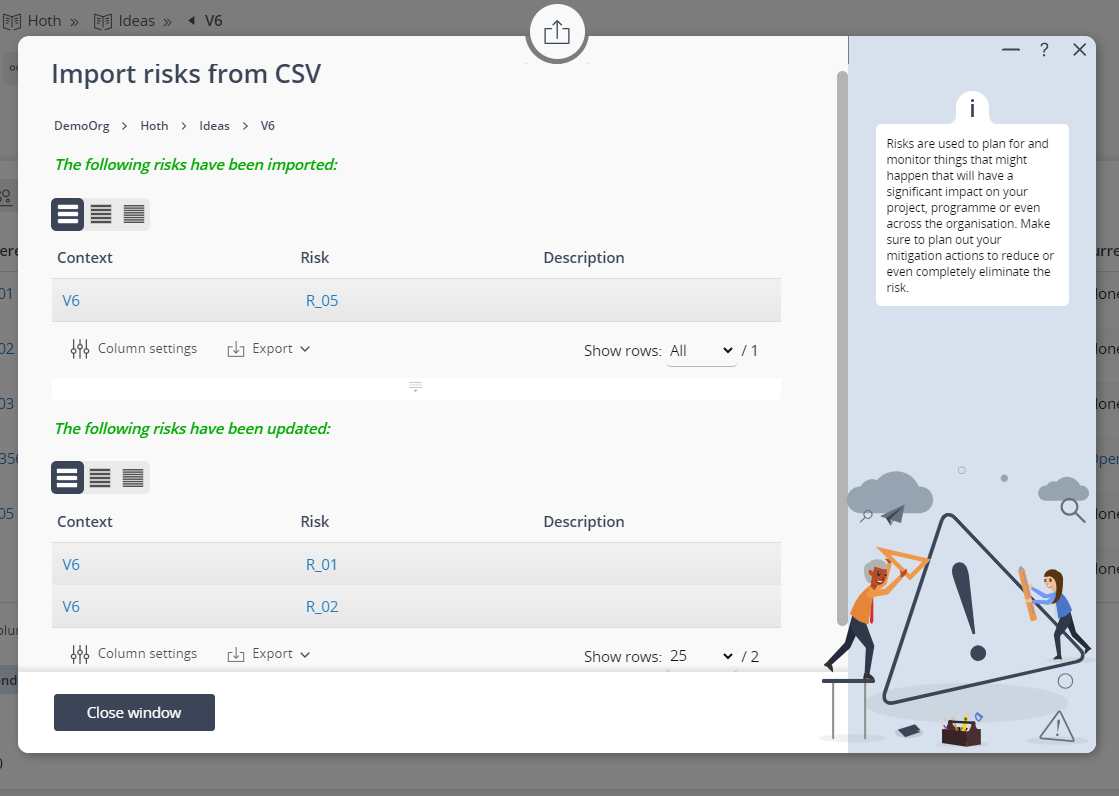
Figure 6 – Import CSV popup phase 4
The last step is to import the data from the file into the project.If there were any failures while importing a table will by shown listing all of the failures including the line where the failure occurred, descriptions of the failures and the first 20 characters of the line to make it easier to identify.
If any requirements were successfully imported they will be listed in a table with links allowing you to easily view the new requirements.