This popup form can be accessed via the bottom of the ‘Expenses’ table in the Expenses tab at any of the parent view pages (e.g.  organisation,
  programme,
  project or
  sub-project) , as shown in Figure 1.
 import consists of a number of phases:
The import popup is shown in conjunction with each phase below, and can be used to import a number of expense items from a Comma Separated Values (CSV) file into the selected parent asset.
There are four steps when importing expense items:
import consists of a number of phases:
The import popup is shown in conjunction with each phase below, and can be used to import a number of expense items from a Comma Separated Values (CSV) file into the selected parent asset.
There are four steps when importing expense items:
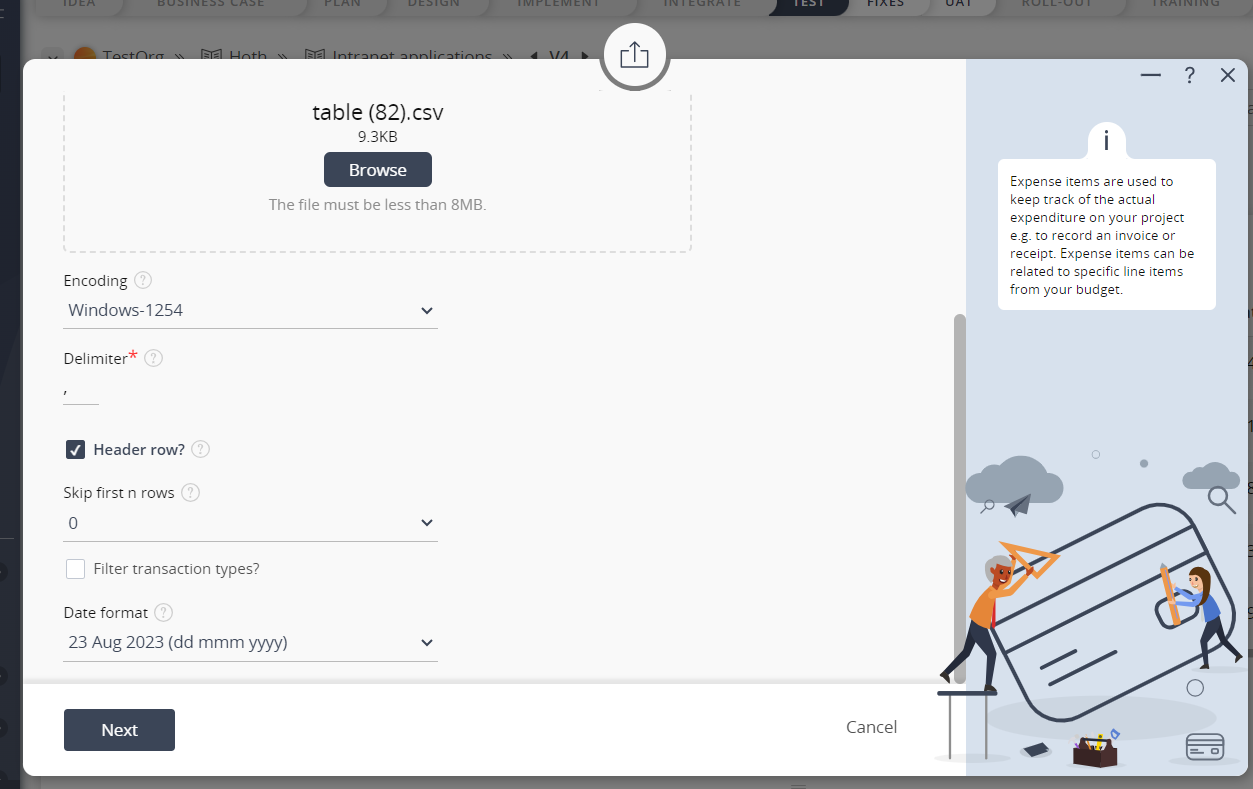
The first phase is to select file you want to import and some details about the file, using the browse option of the import file field. You can also set the delimiter used in the file, whether the file contains a header row and whether you want to skip a certain number of rows (e.g. if you have a surplus of lines before the header).
If you are importing expense items into the organisation or a programme (as indicated in the top read-only field in this popup) then you will get this option to match the expense item to one of the projects underneath the organisation or programme. The three options are:
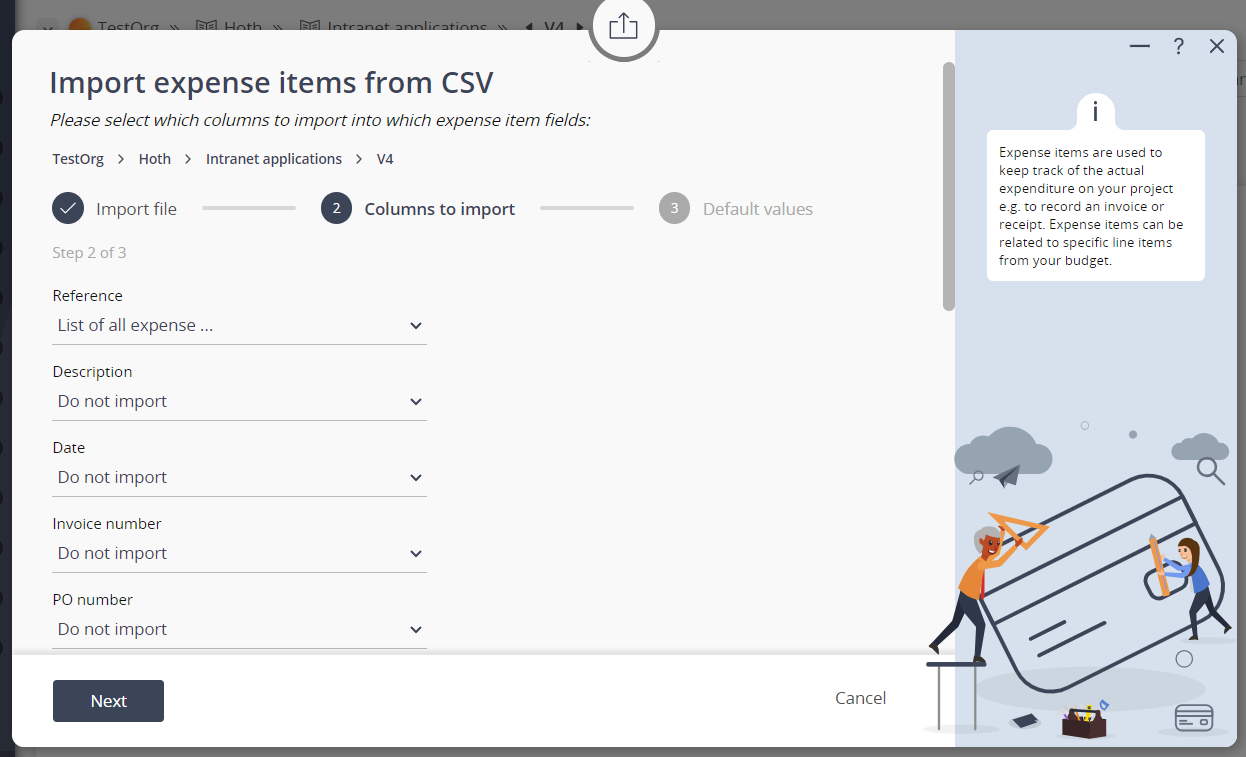
Phase 2 allows you to map or specify which columns from the import file should go into which fields of the new expense items. For example the Reference field allows you to select which column to import into the reference field. The Category field allows you to select the category column, and so on. If the column headers already match the field names then Psoda will automatically select those.
There is one special option on this page to Invert amount – if you set this check box then the amount from the import file will be inverted, i.e. positive amounts will be made negative and visa versa.
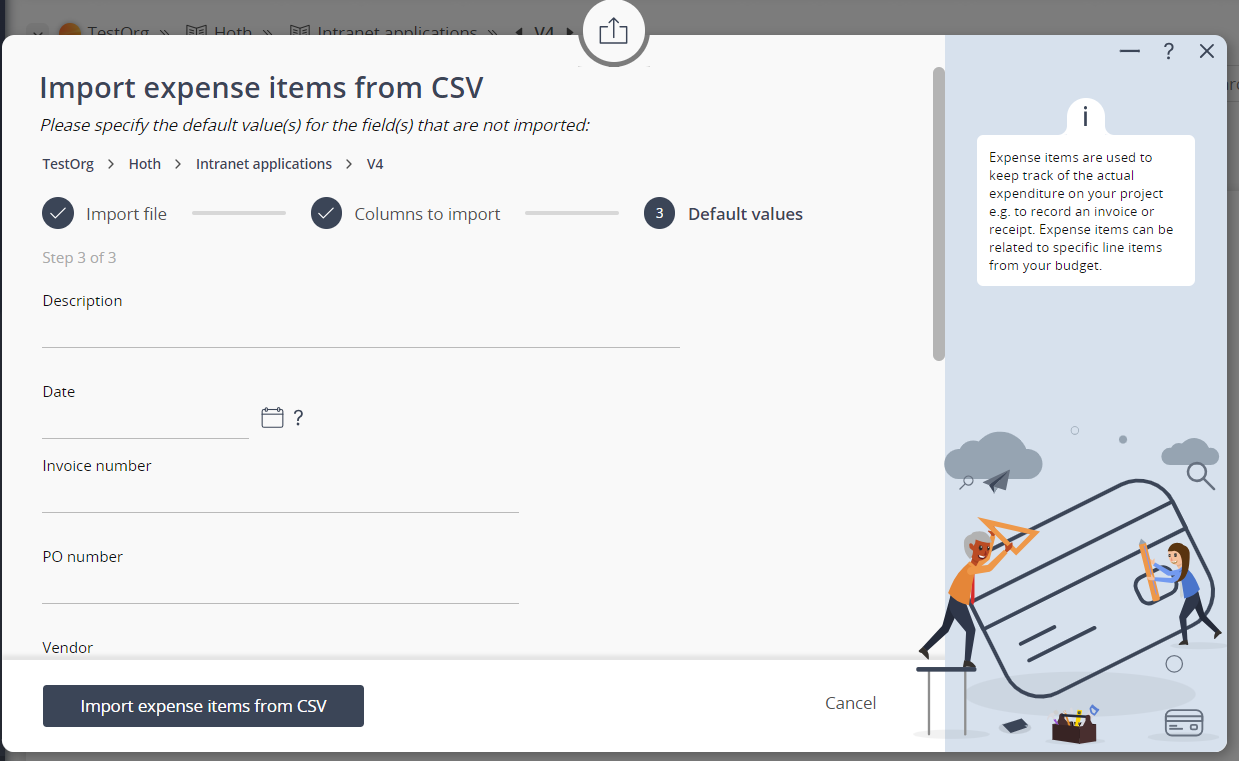
If you do not want to import a particular column from the file the just select the “Do not import” option from the list. You will be given an opportunity in the next step to specify default values for any fields you do not want to import.
NOTE: The reference field must be unique for every expense item in your project so you cannot choose not to import the reference.
Select the Next button to move to the next step. If you have selected columns for all the fields then you will skip over the next phase (default values) and go straight to the last phase (results).
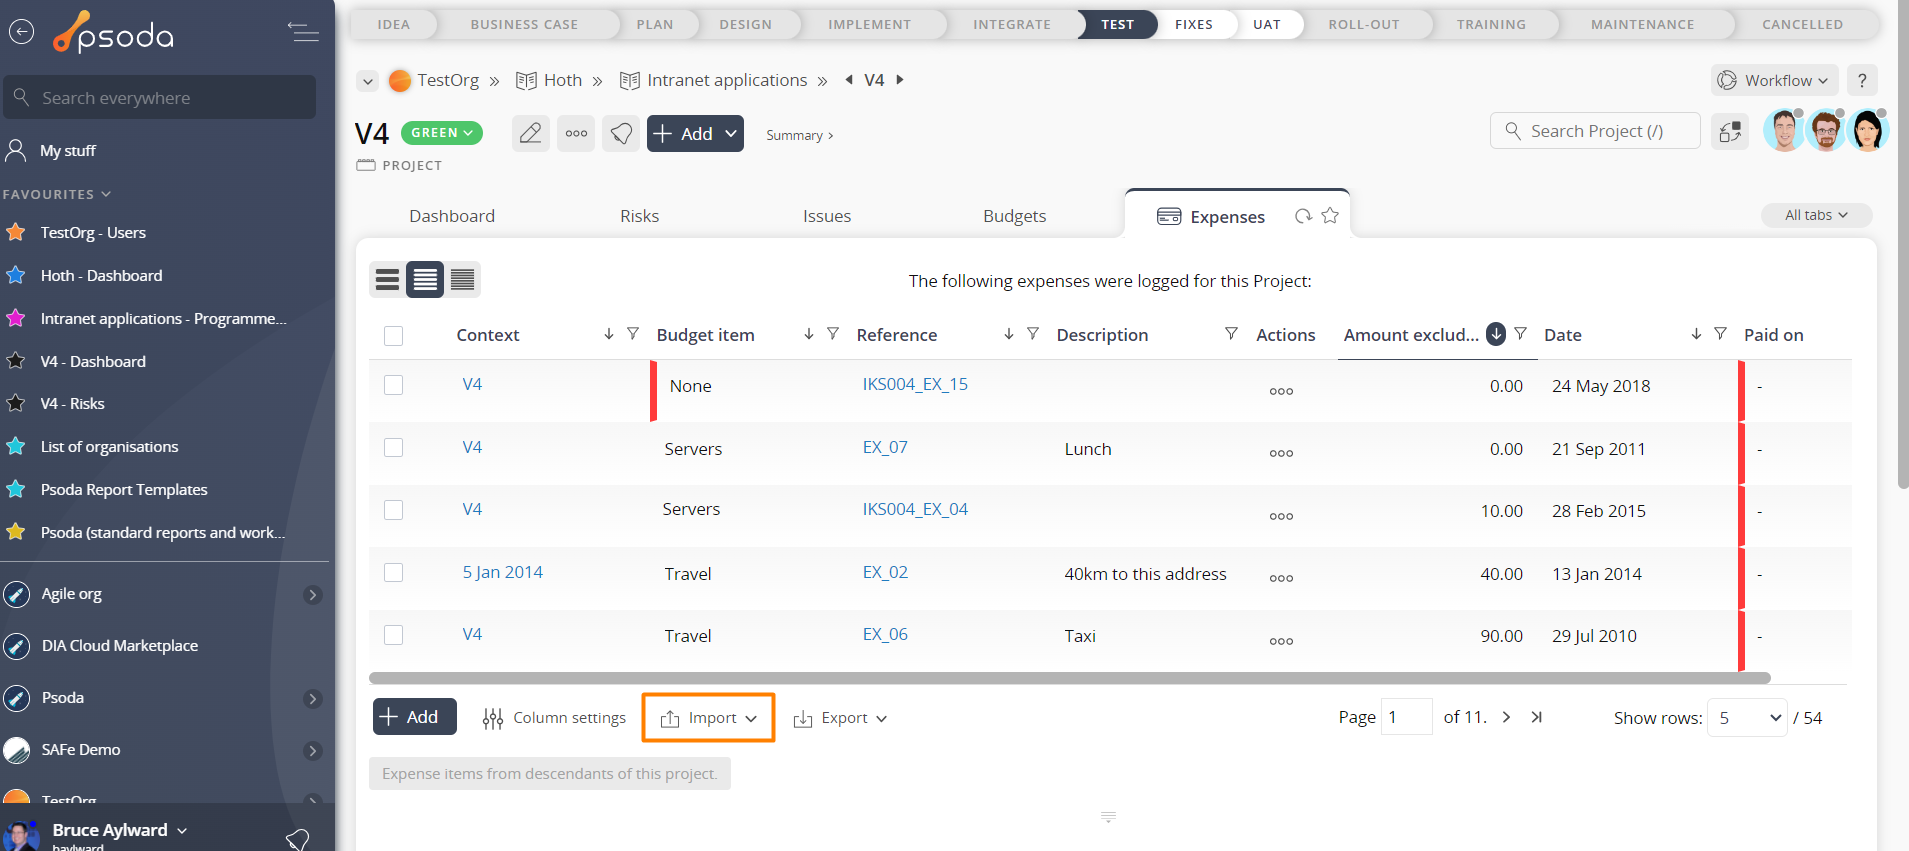
Figure 1 – Access via expenses table
Completing the expense itemsPhase 1 – Import file
 Figure 2 – Import expense items form (1)
The first phase is to select file you want to import and some details about the file, using the browse option of the import file field. You can also set the delimiter used in the file, whether the file contains a header row and whether you want to skip a certain number of rows (e.g. if you have a surplus of lines before the header).
If you are importing expense items into the organisation or a programme (as indicated in the top read-only field in this popup) then you will get this option to match the expense item to one of the projects underneath the organisation or programme. The three options are:
- Do not match projects, i.e. import all of the expense items into the selected organisation or programme.
- Match project by the default GL number – this option will add the expense items to the projects with the match GL number
- Match project by name – this option will add expense items to the projects where the project name matches the project name column.