This popup form can be accessed via the  add menu in the top header area of the
  project or
  sub-project view pages, as shown in Figure 1. Alternatively you can access the
  add popup form at the bottom of the Test runs tab at these same view pages, as shown in Figure 2.
*The name field is mandatory, but all others are optional.
Once you are happy with your entries click the “Add test run” button at the bottom of the form. This will add a new test run with the details that you supplied.
The new test run can be viewed in the Test runs tab asset listing at the parent asset’s view page, as shown in Figure 4.

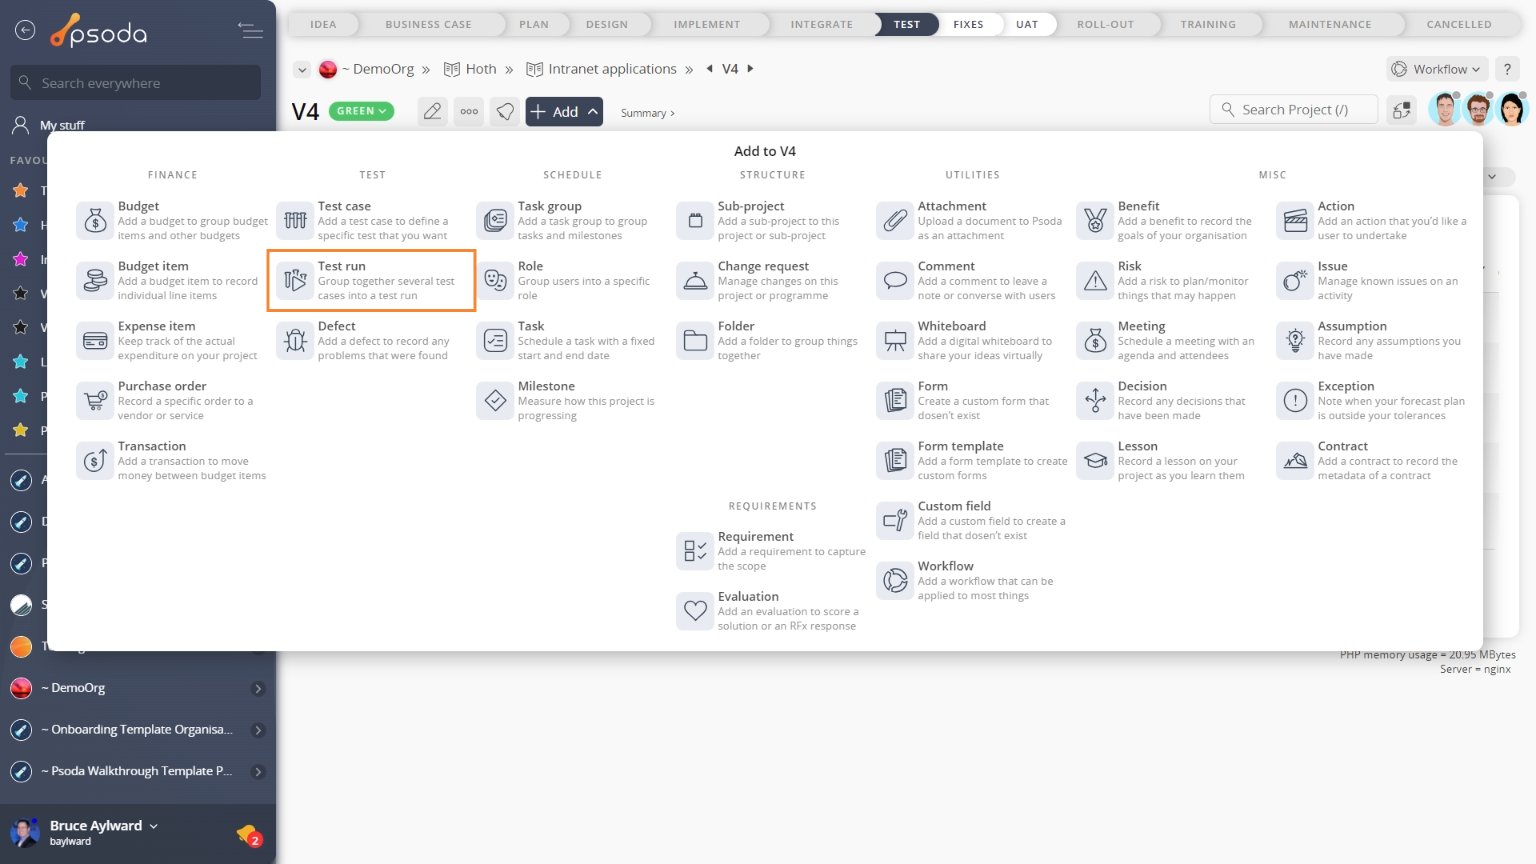
Figure 1 – Access via add menu
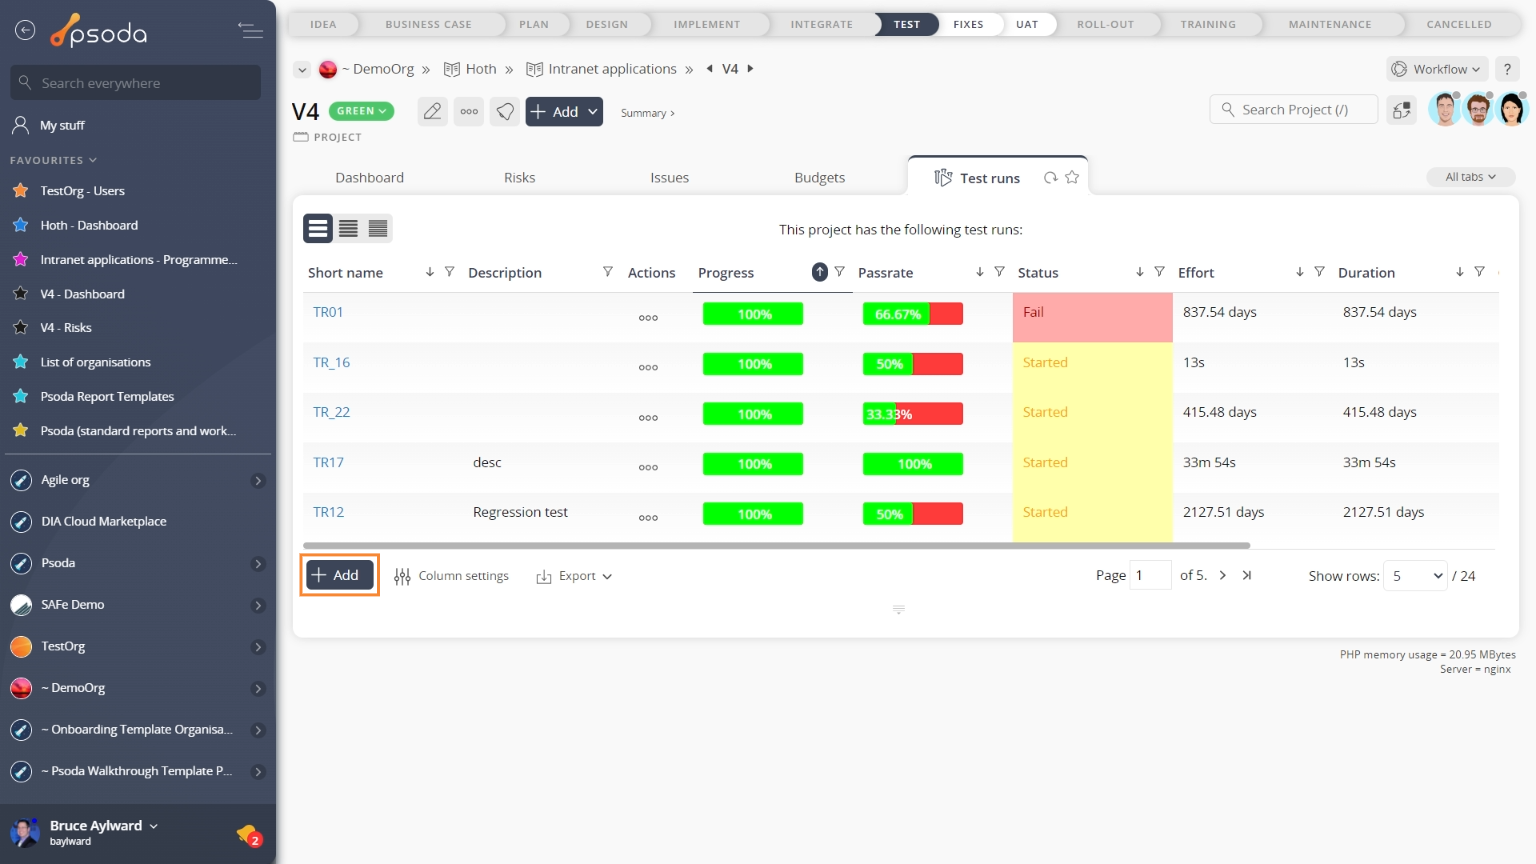
Figure 2 – Access via test runs tab
This popup is shown in Figure 3 and is used to add a new ![]() test run within the selected asset.
test run within the selected asset.
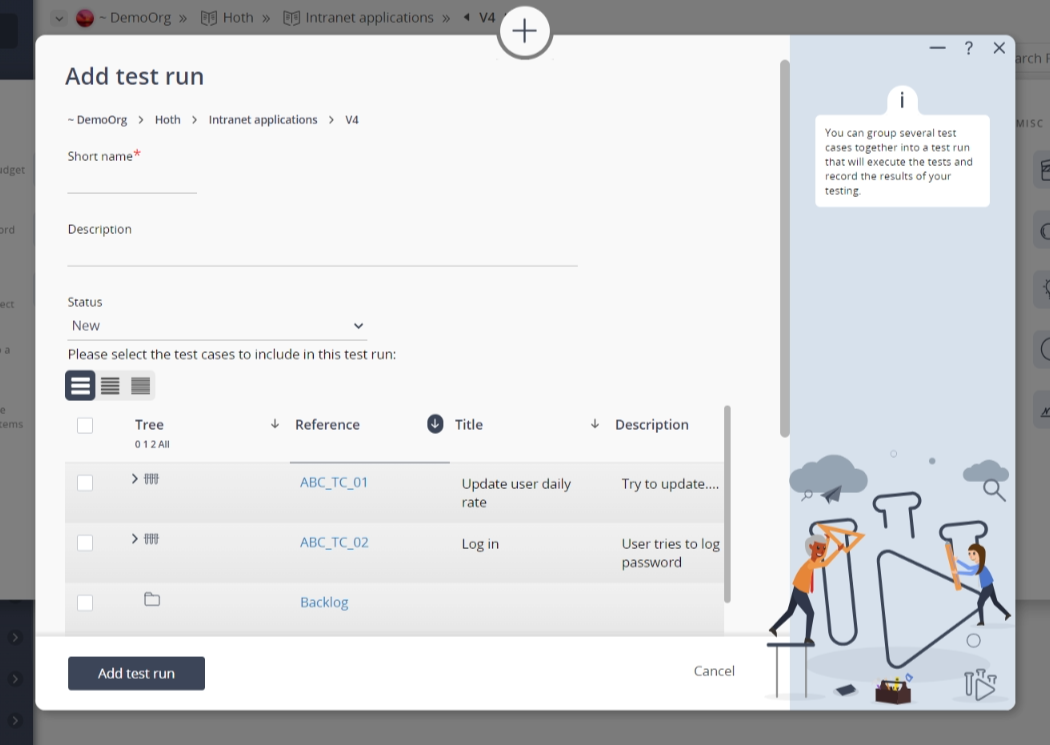
Figure 3 – Add test run form
This form has the following fields:| Parent assets: | These read-only fields show which |
|---|---|
| Short name*: | Enter a short name for this new test run, e.g. Regression test. This must be unique within the whole project or sub-project. |
| Description: | Enter a description of this new test run here. You could include any particulars of the test run for example which device the test will be run on. |
| Status: | Select the initial state of the test run from this drop-down list. Normally you would leave this as New. If you are going to start the test run directly then you could select Started as the initial state. |
| Test cases: | The rest of the form shows all the |
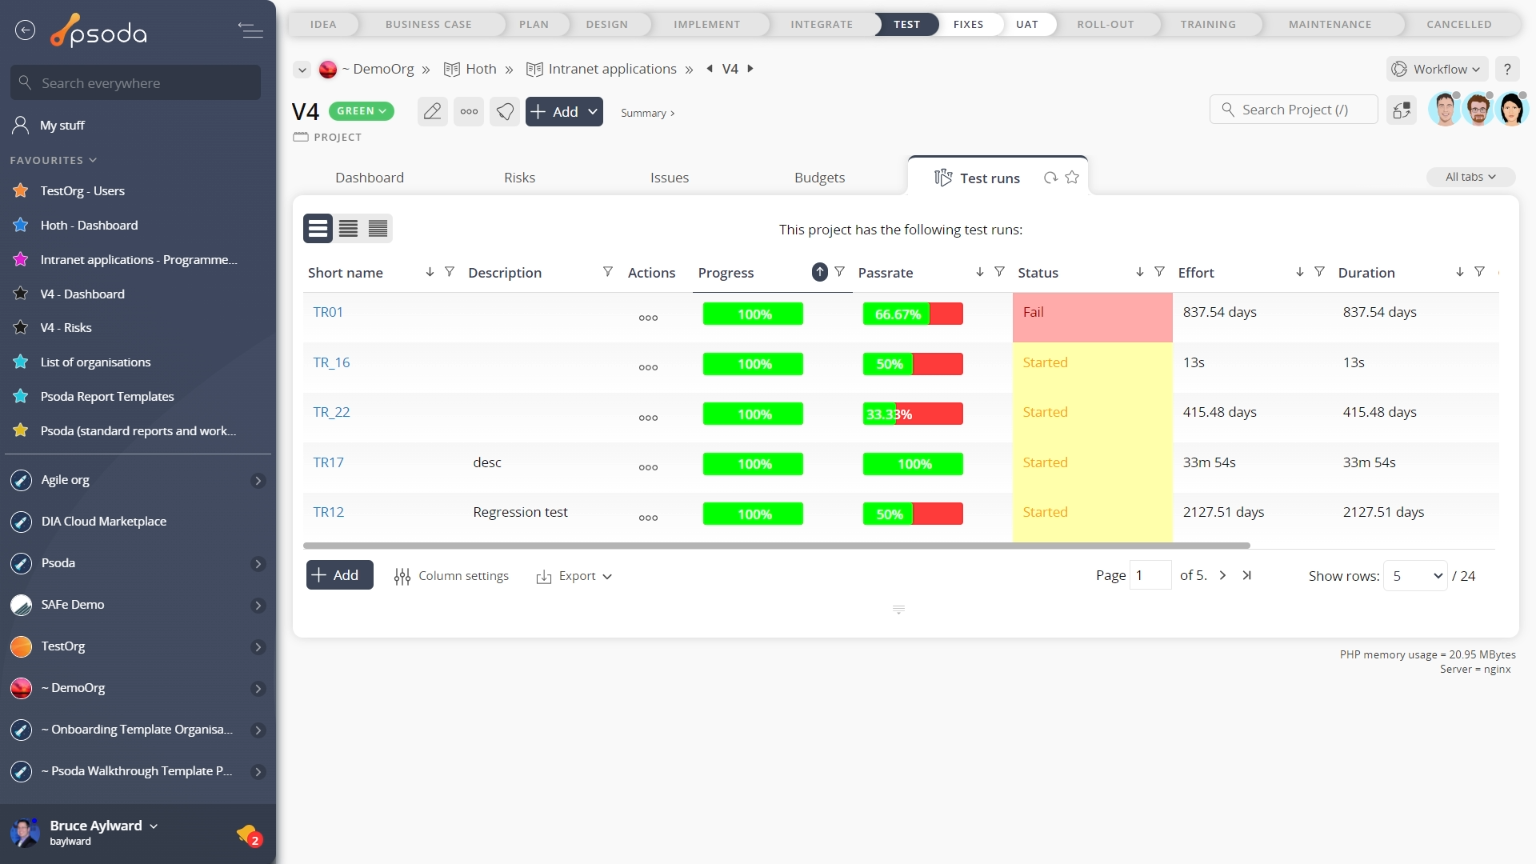
Figure 4 – View from Test runs tab
Click the “Cancel” button if you no longer want to add a new test run.