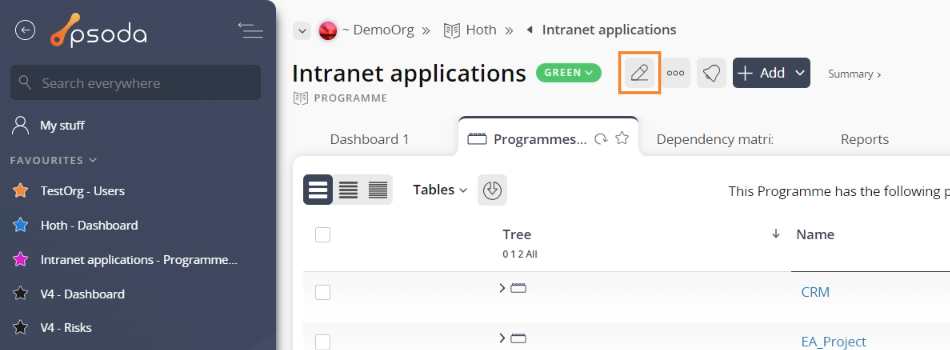
Figure 1 – Access via edit button
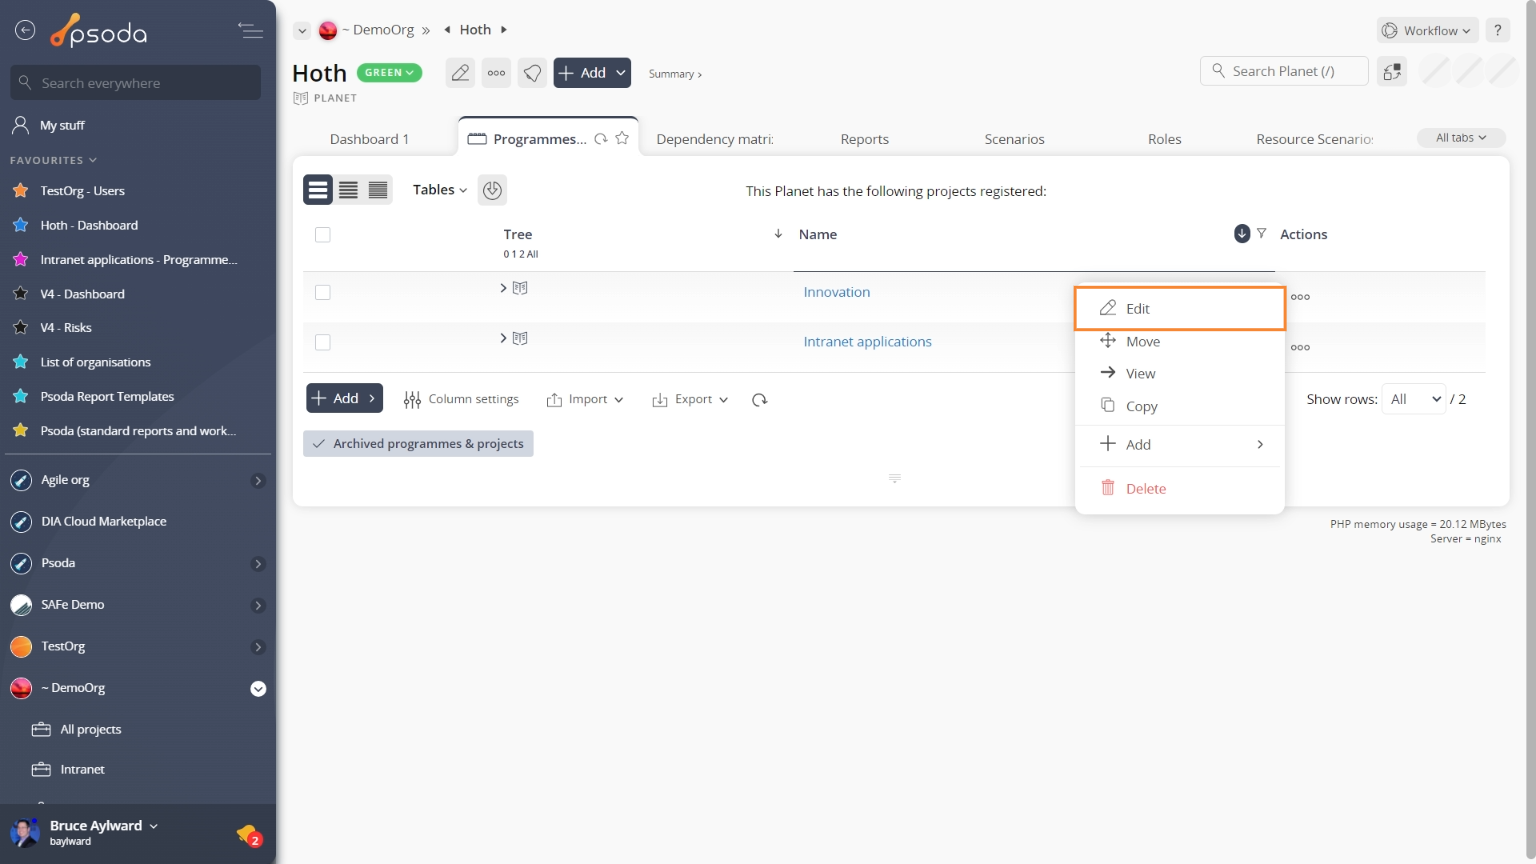
Figure 2 – Access via Programmes & Projects tab
This popup form is shown in Figure 3 and is used to edit an existing programme.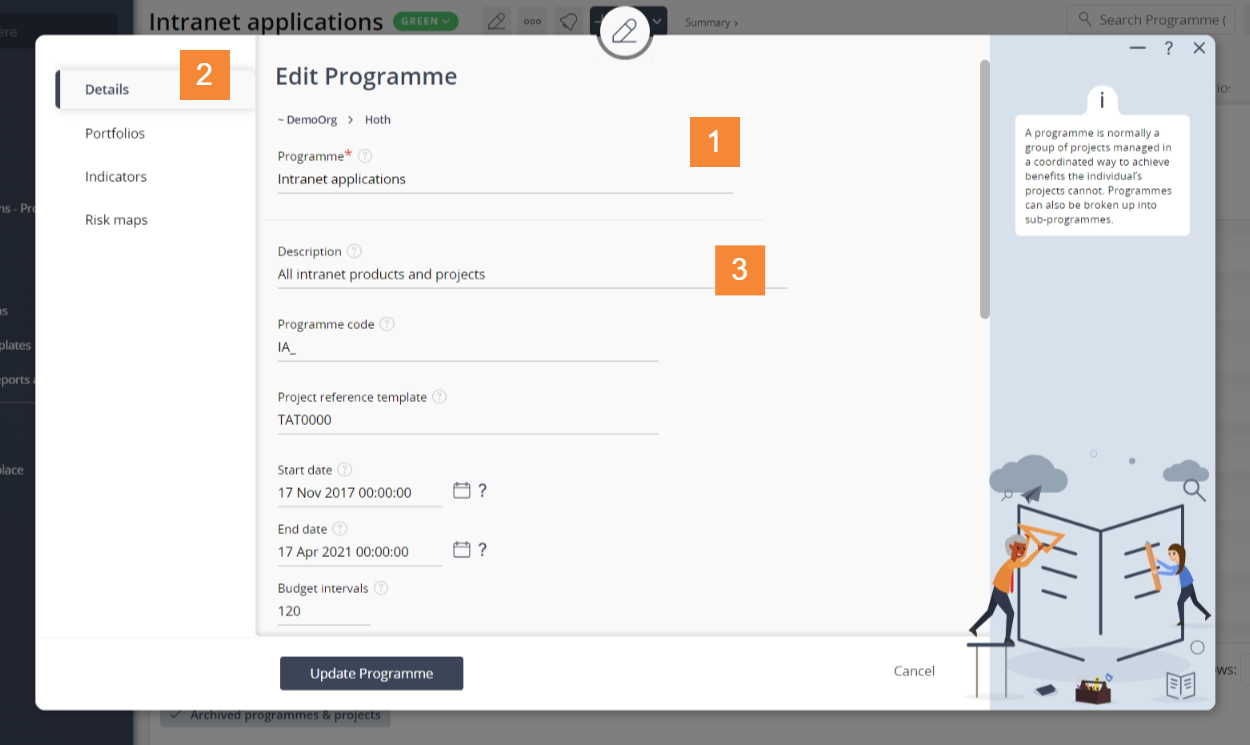
Figure 3 – Edit programme form
In Figure 3 above, the form has been broken down into three sections:
| Section 1 | This section contains a selection of important top fields: Organisation: This read-only field shows which organisation you are this programme belongs to. Programme*: This is a mandatory field where the unique name for this programmeis displayed. If you want to change this programme name, you still need to ensure that the new name will be unique. |
|---|---|
| Section 2 | These are the tabs that you can cycle through to edit each section of the programme.When you navigate to a new tabbed view in this popup, any information entered in Section 3 from the previous tabbed view will be saved. This means you do not need to click on any buttons to save each tab, but can instead click on the Update button at the bottom of the popup when you wish to update your programme with edited details. |
| Section 3 | This information will change as you cycle through the tabs shown in Section 2, and the available fields will change accordingly. A breakdown of the field information for each tab is provided below. |
Tab breakdown
The following information provides a breakdown of each of the tabbed views that may be available for you to set the organisation’s details under each section. Details
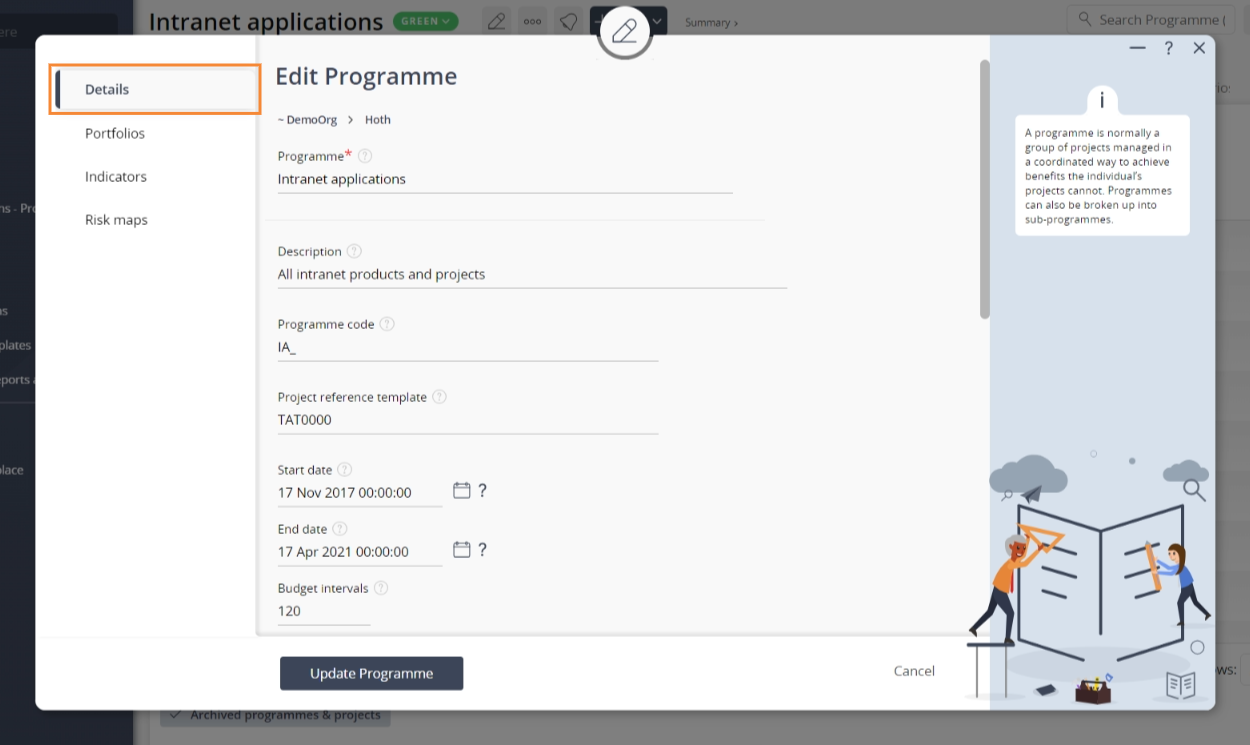 Figure 4 – Edit programme details tab
| Description: | Enter or edit the short description of your programme here. |
|---|---|
| Programme code: | Enter or edit the code for your programme here. The code is used as a prefix e.g. for the risk reference. For example, if we were to use the code DP_ for a new “demo portfolio” a risks added beneath it will have the reference DP_R_01. |
| Project reference template: | |
| Start date: | Use calendar control to enter or edit the date that you wish to set for the start date of the programme here. The start date sets the month from which the budgets apply. |
| End date: | Use calendar control to enter or edit the date that you wish to set for the expected end date of the programme here. |
| Budget interval: | Set or change the number of budget intervals (months) you want to track for this programme by using this text field. |
| RAG Status: | Select or change the Red/Amber/Green status for your programme by choosing an option from this drop-down list. |
| Manager: | Select or change a manager for the programme using the drop-down list of users in the organisation. |
| Owner: | Select or change the owner for the programme using the drop-down list of users in the organisation. |
| Sponsor: | Select or change the sponsor for the programme using the drop-down list of users in the organisation. From this list, you can add sponsors as normal users or even suspended users. |
| Job code prefix: | Enter or edit the job code prefix here. This is used to auto-generate job codes for tasks within this programme. For example if you set the job code prefix to “ABC_00” then the first task will get a job code of “ABC_01”, then “ABC_02” etc. Clear this field if you do not want the job code to be auto-generated. |
| Archived: | Use this checkbox to set this programme as archived. This field will only be visible if you do not have any workflow set for the programme. Archived programmes will not appear in certain reports. |
| Workflow: | Select or change the workflow applied to this programme from this drop-down list of available workflows. This field will only be visible if you have workflows for programmes configured. |
 Portfolios
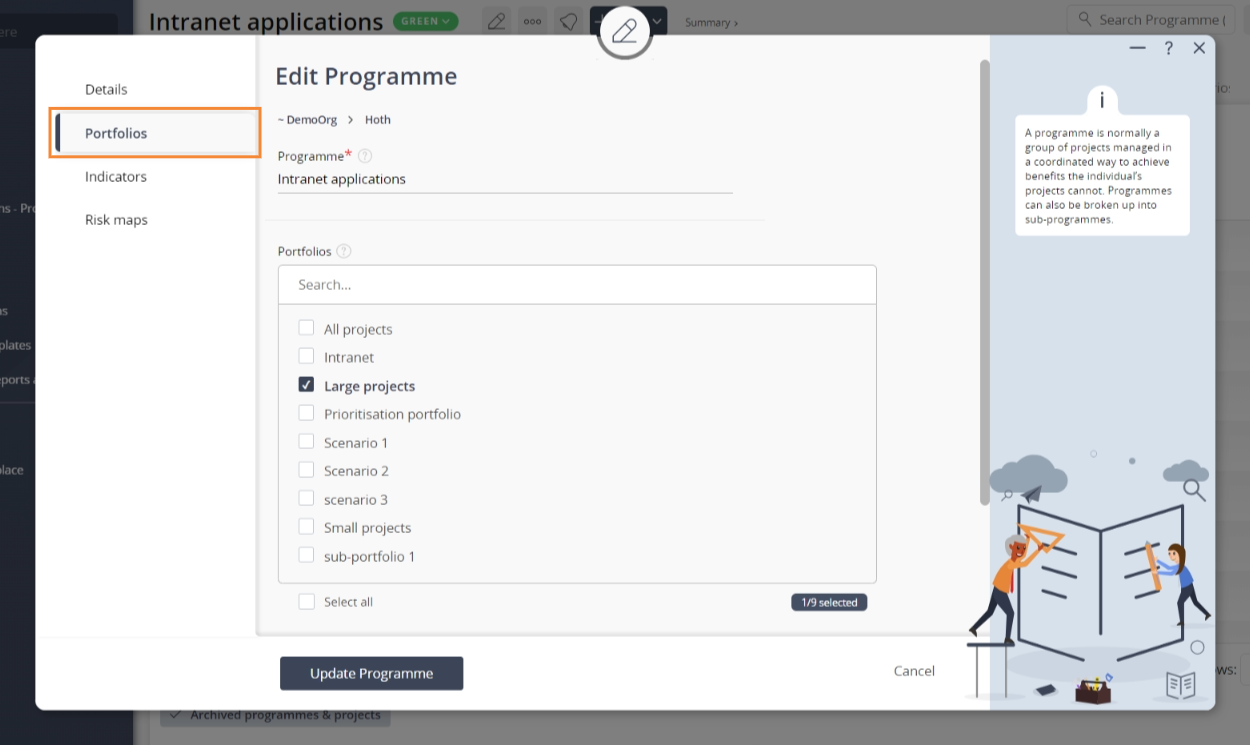 Figure 5 – Add programme portfolios tab
This tabbed view presents a list of portfolios that this programme is or may be grouped under. You may have one selected, and this can be changed by selecting a new portfolio in this list or you can add more by multi-selecting. To utilise this, hold the CTRL key or the SHIFT key and select the name of the portfolio.
 Indicators
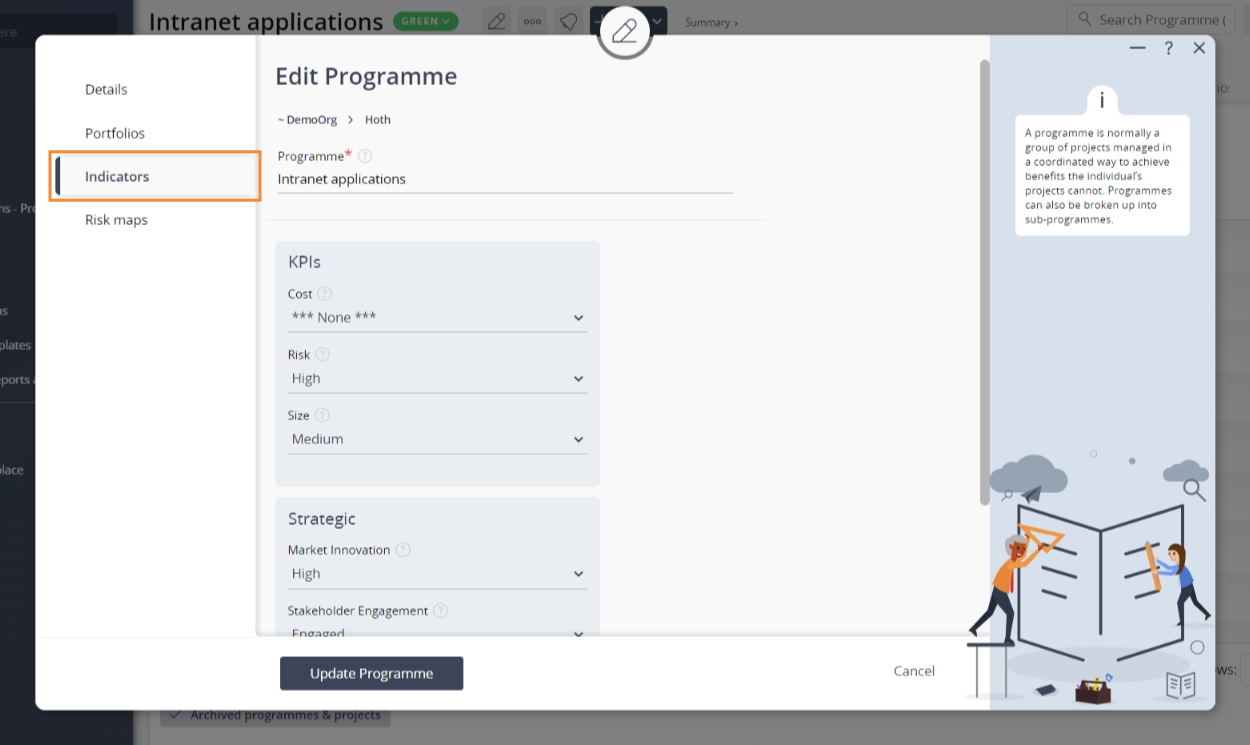 Figure 6 – Add programme indicators tab
This tabbed view presents a drop-down list of portfolios indicators that can be applied to this programme according to the portfolio it is grouped under. You can select or change the indicator applied to this programme using this drop-down list.
Once you are happy with your entries click the “Update programme” button at the bottom of the form. This will update the programme with the details that you supplied. Click the “Cancel” button if you want to discard your changes.