Integrating Psoda SCIM with Microsoft Entra ID (Azure AD)
You can integrate Psoda’s SCIM 2.0 API with Microsoft Entra ID (formerly Azure AD) to automate user and group provisioning from your organisation’s identity provider.
Official Microsoft instructions can be found here.
1. Create a Non-Gallery Enterprise Application
- Log in to the Microsoft Entra admin centre.
- Go to Enterprise applications > + New application.
- Select “Create your own application”, give it a name (e.g.
Psoda SCIM), and choose “Integrate any other application you don’t find in the gallery”.
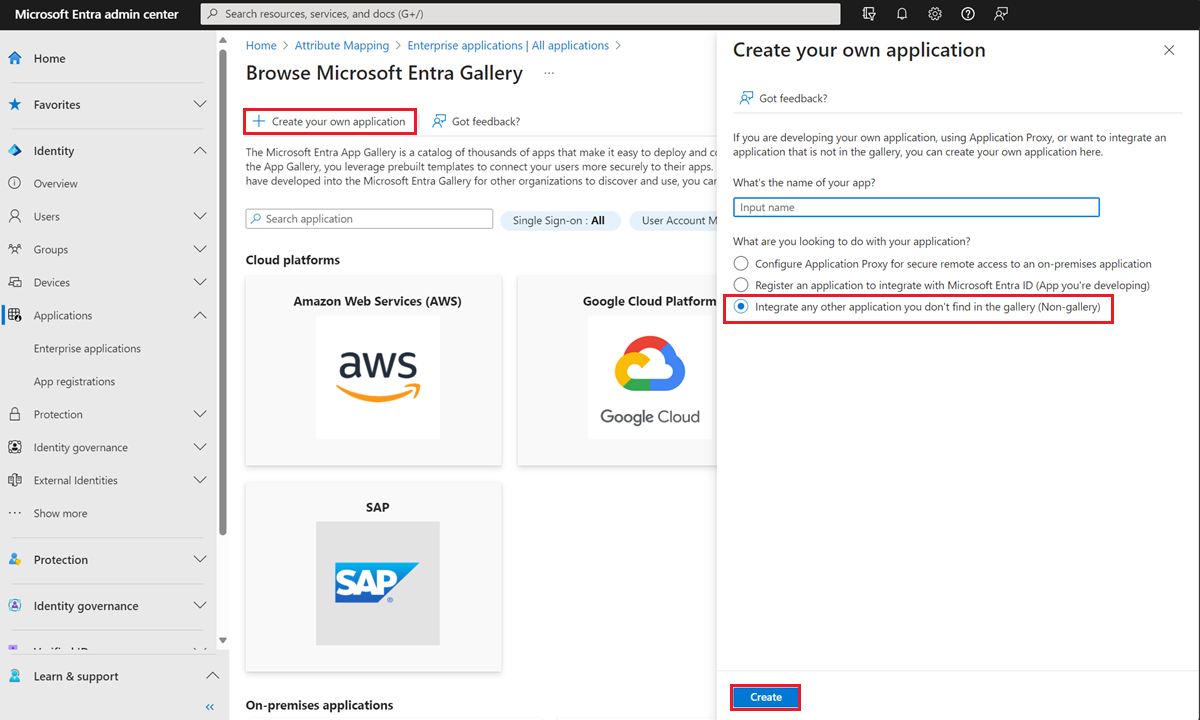
Figure 1 – Application Creation
2. Configure SCIM Provisioning
- After creating the app, go to the app’s Provisioning section.
- Click New configuration
- Enter the following settings:
- Tenant URL:
https://www.psoda.com/scim/v2 - Secret Token: Your Psoda API key. This can be found under “My Stuff” in your account settings.
- Tenant URL:
- Click Test connection to make sure you’re connected.
- Once the test is successful, click Save.
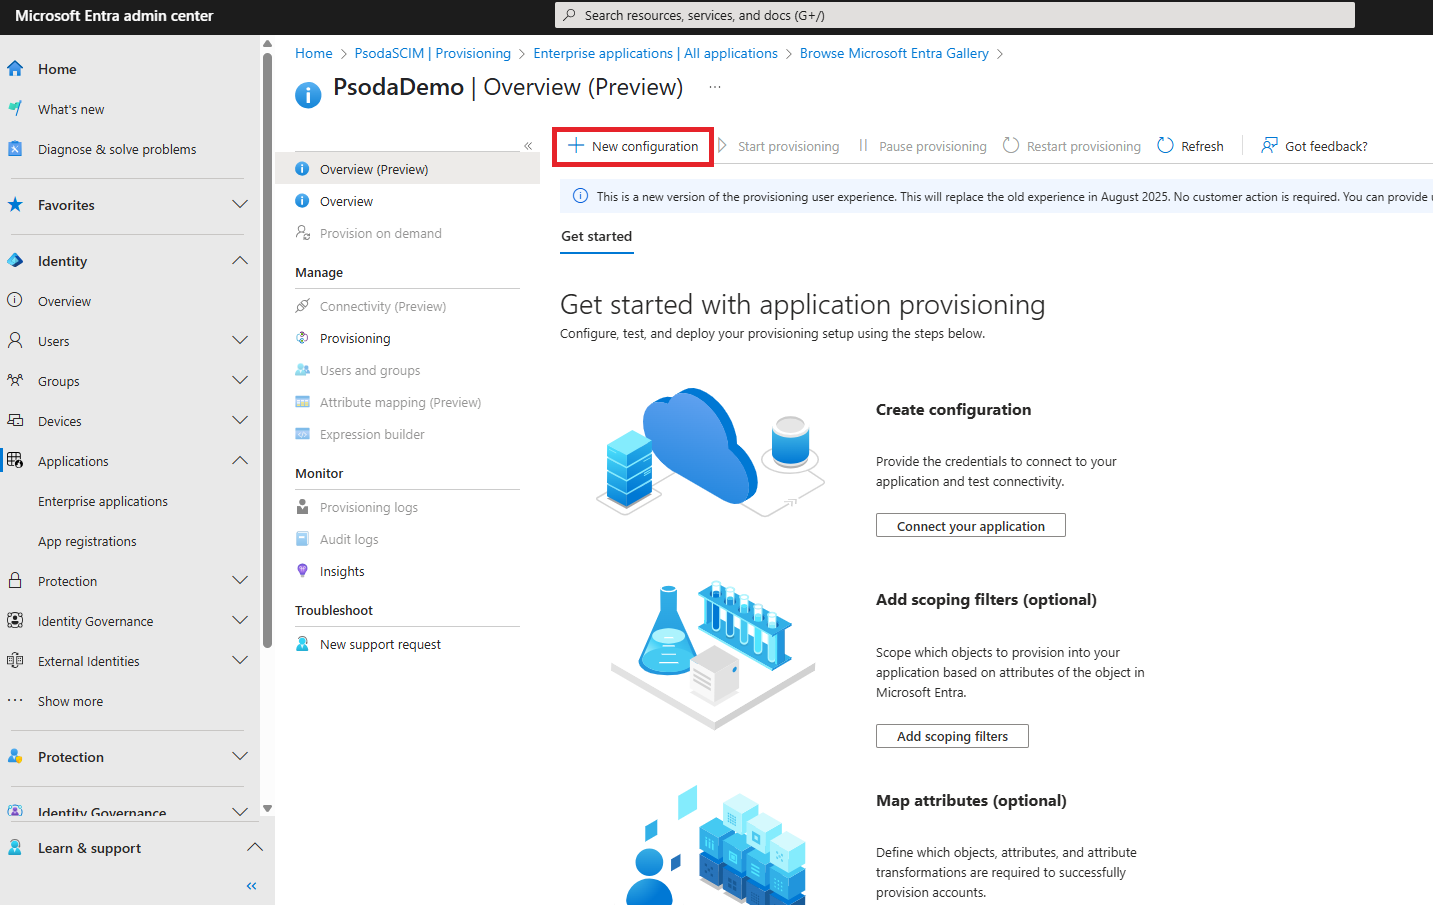
Figure 2 – New configuration
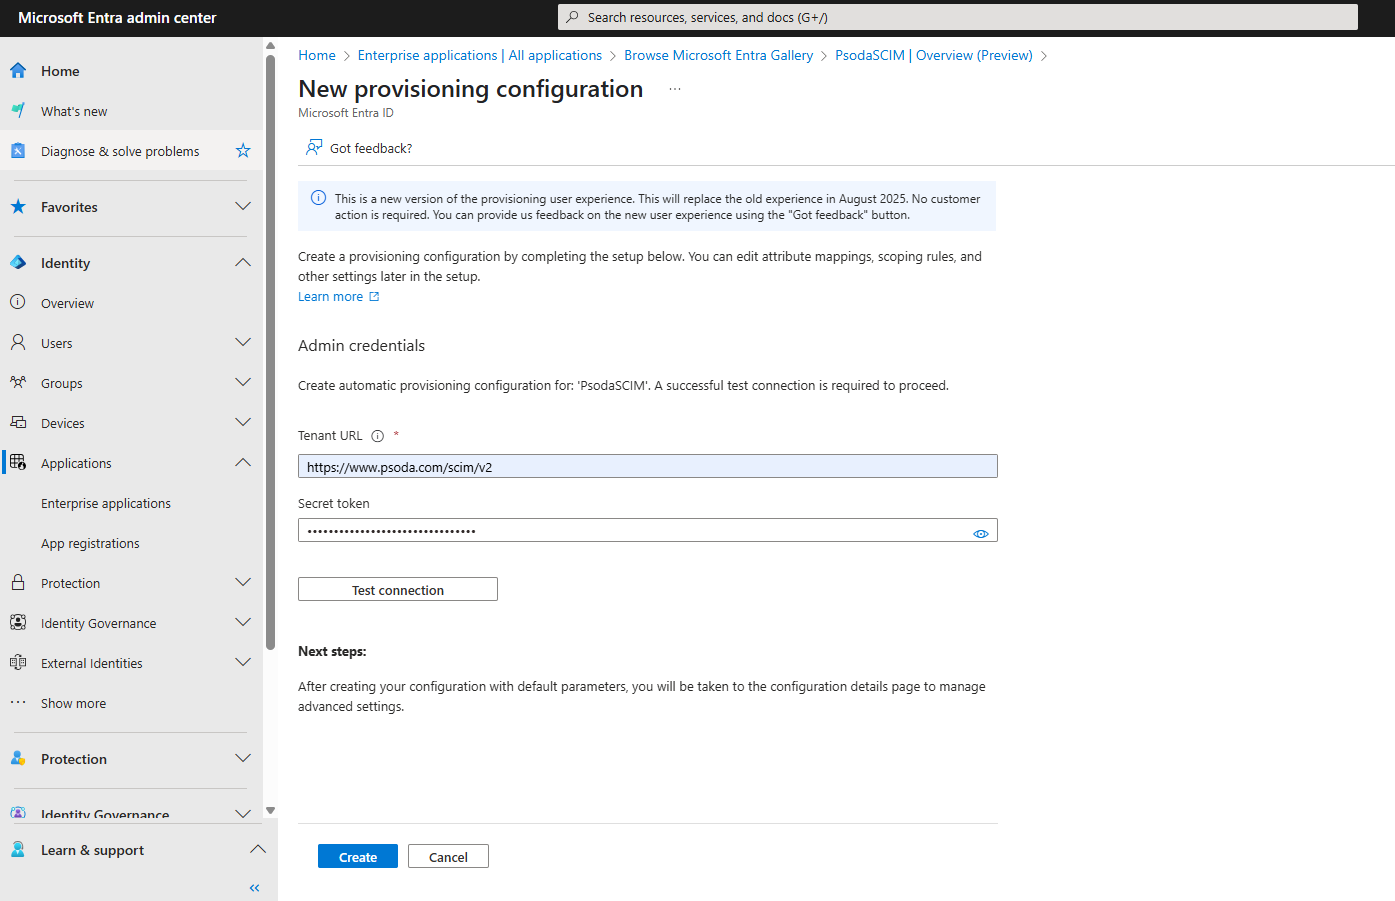
Figure 3 – Configuration page with fields
3. Save and Configure Attribute Mappings
In the Attribute Mapping section, adjust the user attributes to match the images below
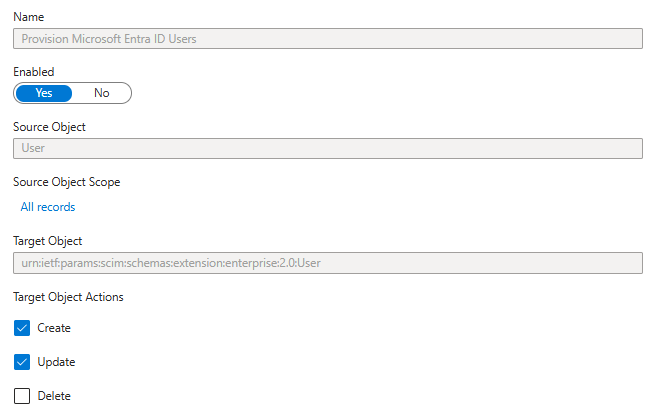
Figure 4 – Attribute mappings, available methods for users
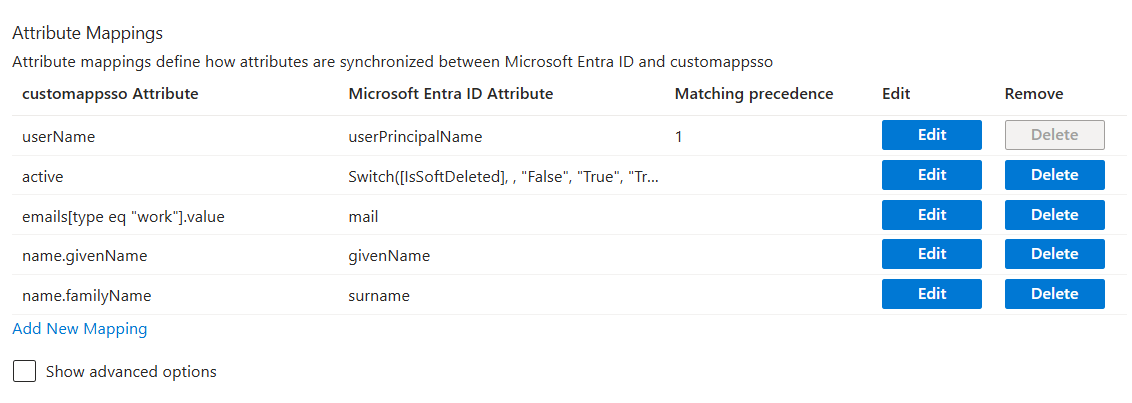
Figure 5 – Attribute mappings, available fields for users
Do the same for the group attributes
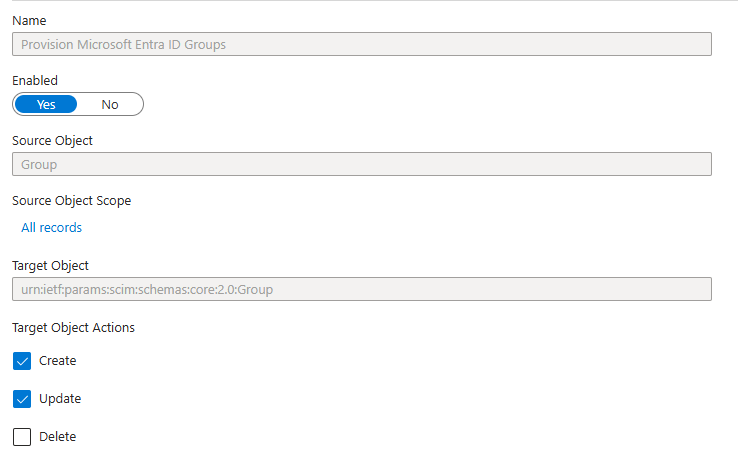
Figure 6 – Attribute mappings, available methods for groups
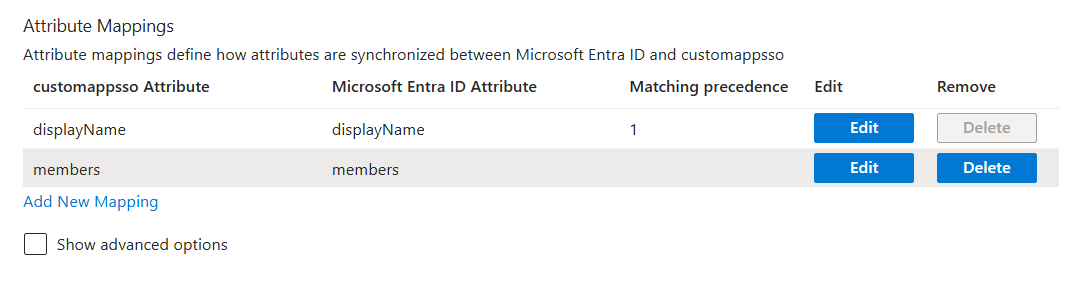
Figure 6 – Attribute mappings, available fields for groups
4. Assign Users and Groups
Go to Users and groups and assign the appropriate users or groups to the application.
5. Start Provisioning
- Return to the Provisioning page and click Start provisioning.
- Azure will begin syncing users and groups with Psoda.