Enabling SAML SSO with Microsoft Entra ID (Azure AD)
You can configure SAML-based Single Sign-On (SSO) in Microsoft Entra ID (formerly Azure AD) to allow your users to authenticate using their organisational credentials.
Official Microsoft instructions can be found here.
1. Create a Non-Gallery Enterprise Application
- Log in to the Microsoft Entra admin centre.
- Go to Enterprise applications > + New application.
- Select “Create your own application”, give it a name (e.g.,
My App SAML), and choose “Integrate any other application you don’t find in the gallery”.
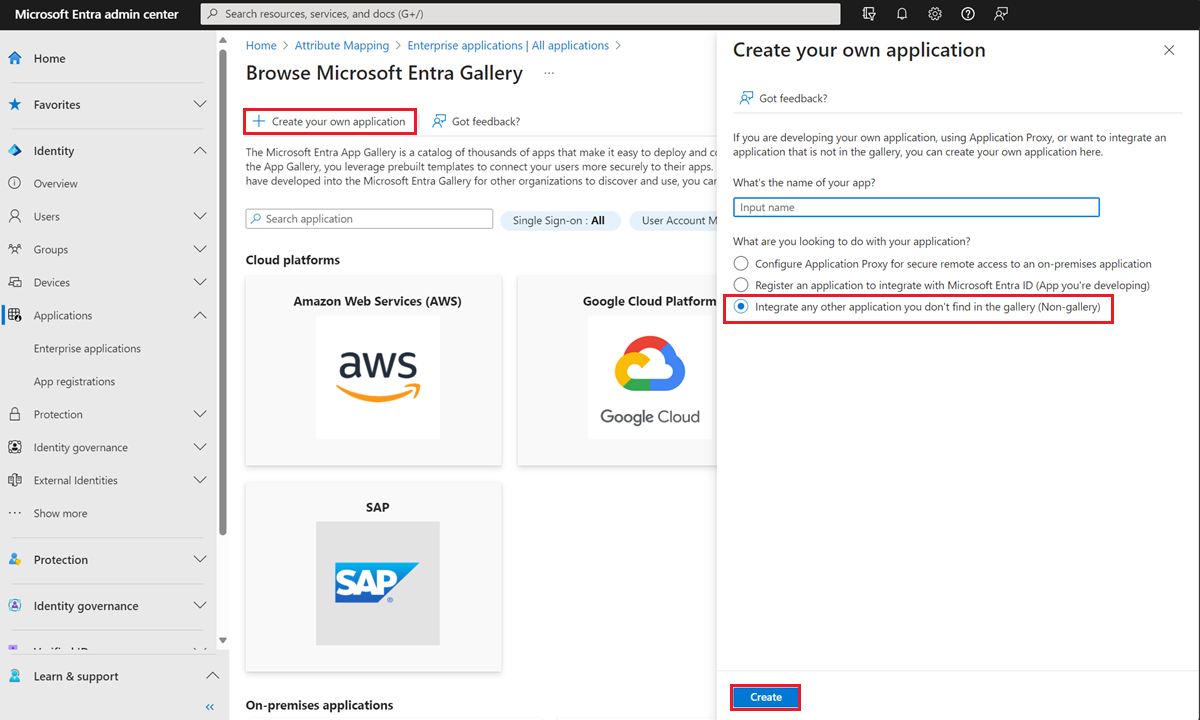
Figure 1 – Application Creation
2. Configure Single Sign-On
- After creating the app, go to the app’s Single sign-on section.
- Select SAML as the SSO method.
- Retrieve the Entity ID and related URLs from Psoda:
- Go to your organisation in Psoda.
- Click the Edit button on the organisation.
- Go to the SAML 2.0 tab.
- Click Enable SAML 2.0 Single Sign On?
- Navigate to the bottom of the tab and copy the provided URLs into their respective fields in Entra (Identifier/Entity ID, Reply URL, Sign-on URL).
- Click Save.
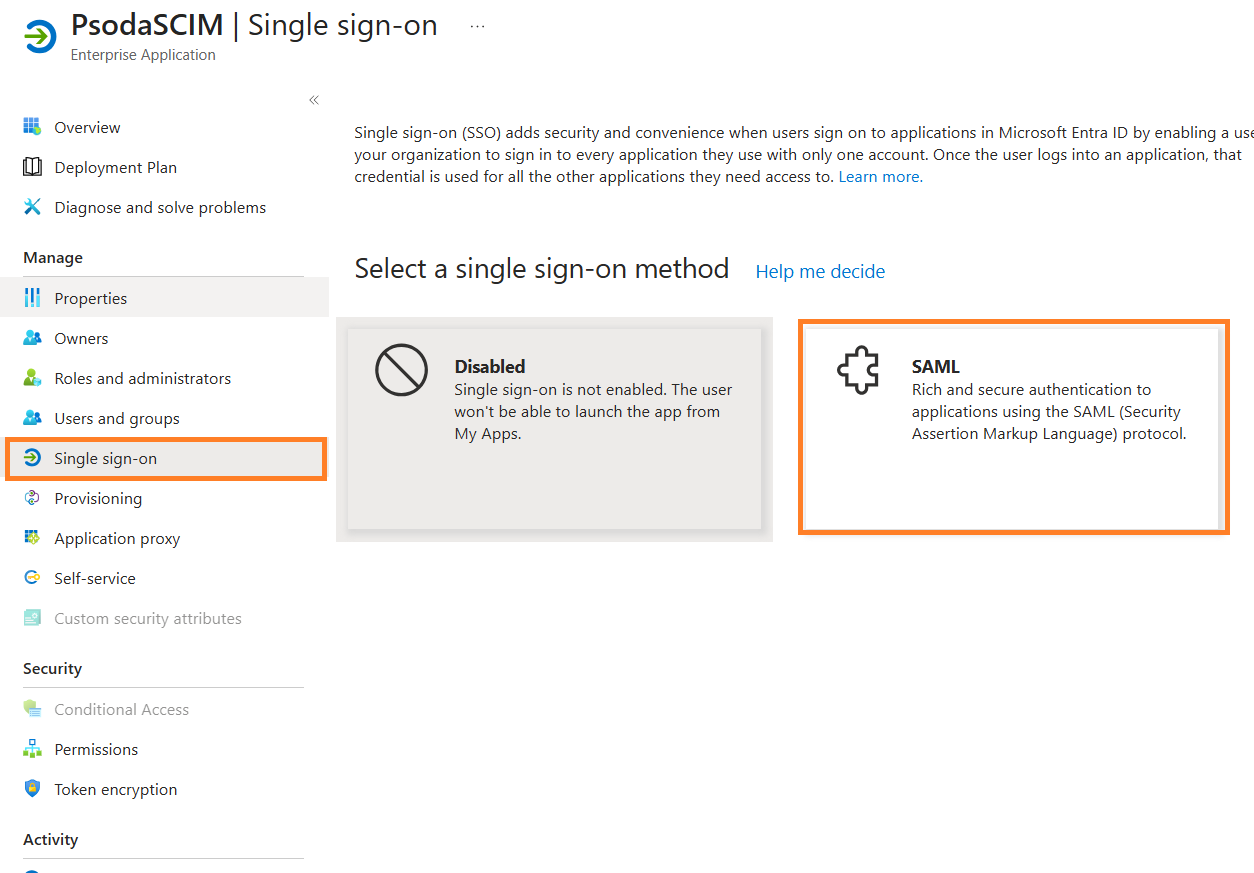
Figure 2 – Selecting SAML as the SSO method
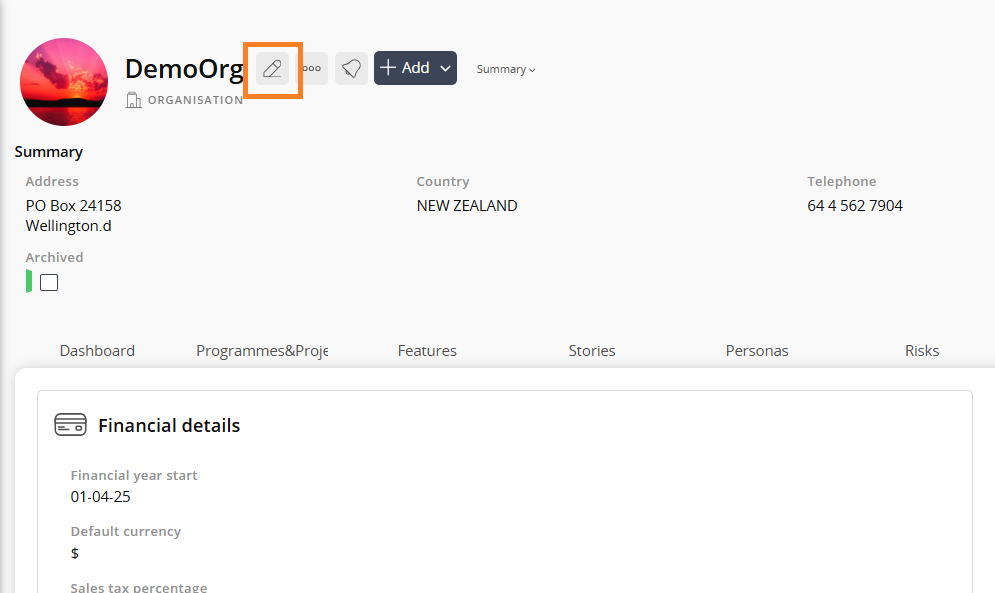
Figure 3 – Edit Organisation popup in Psoda
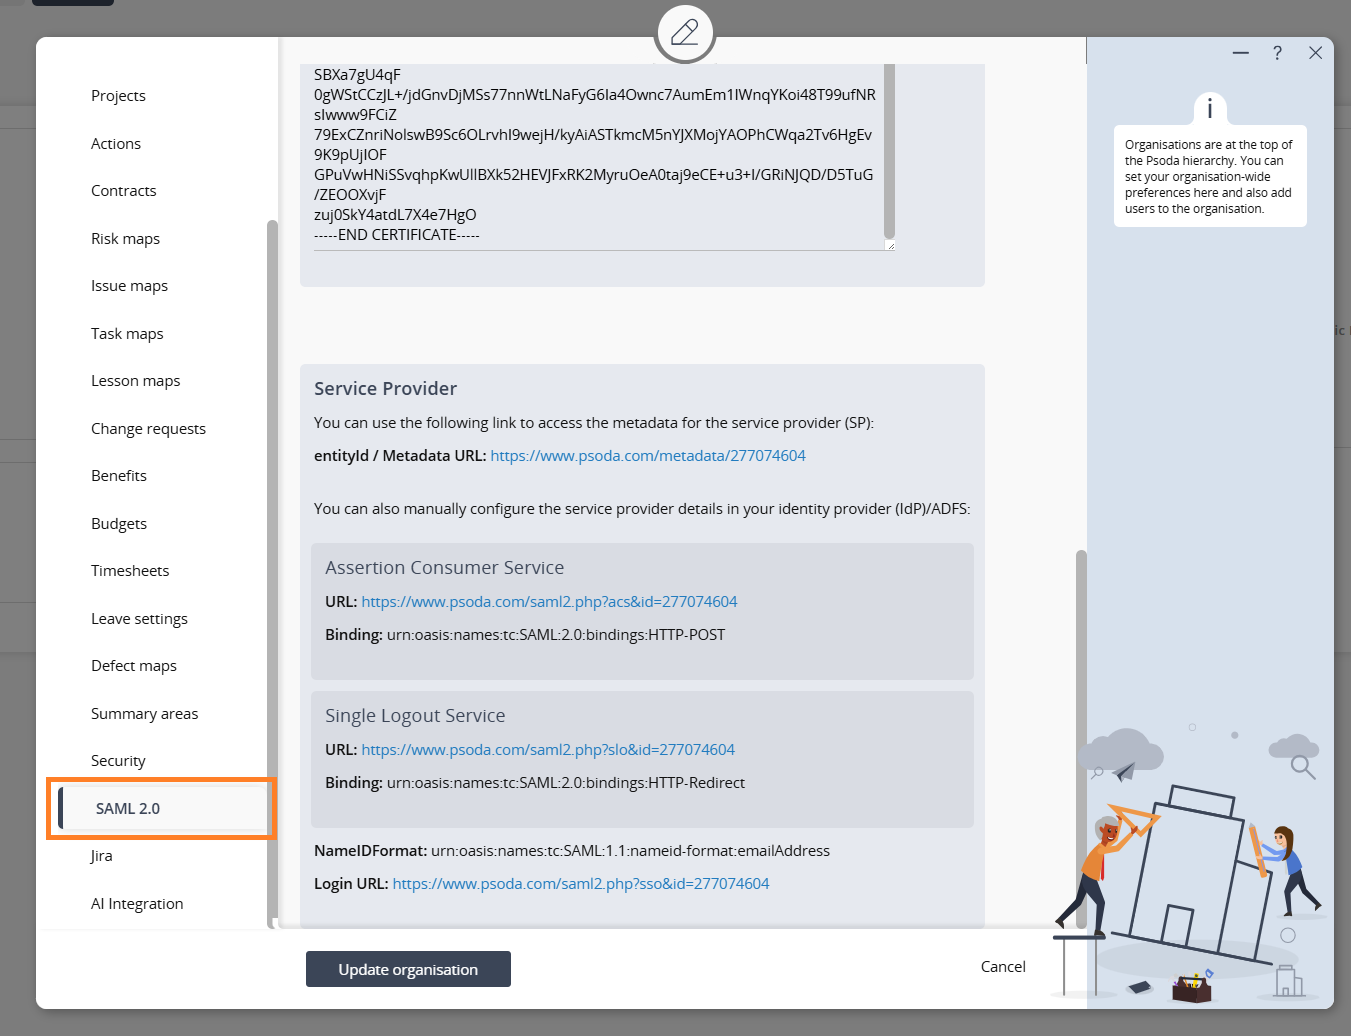
Figure 4 – SAML 2.0 tab showing URLs in Psoda
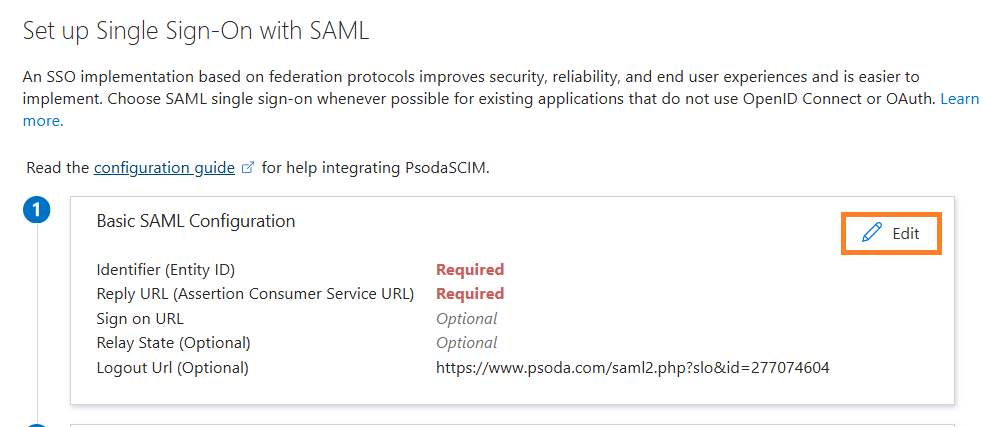
Figure 5 – Entering Psoda-provided URLs into Entra

Figure 6 – Populated Entity ID and Reply URL fields
3. Configure the Certificate
- In the SAML Certificates section of the Entra portal, click Download next to Certificate (Base64).
- Open the downloaded certificate file in Notepad or your preferred text editor.
- Copy the entire certificate text (including the
-----BEGIN CERTIFICATE-----and-----END CERTIFICATE-----lines). - Return to Psoda, open the Edit Organisation popup, and go to the SAML 2.0 tab.
- Paste the copied certificate into the X509 Certificate field.
- Click Save.
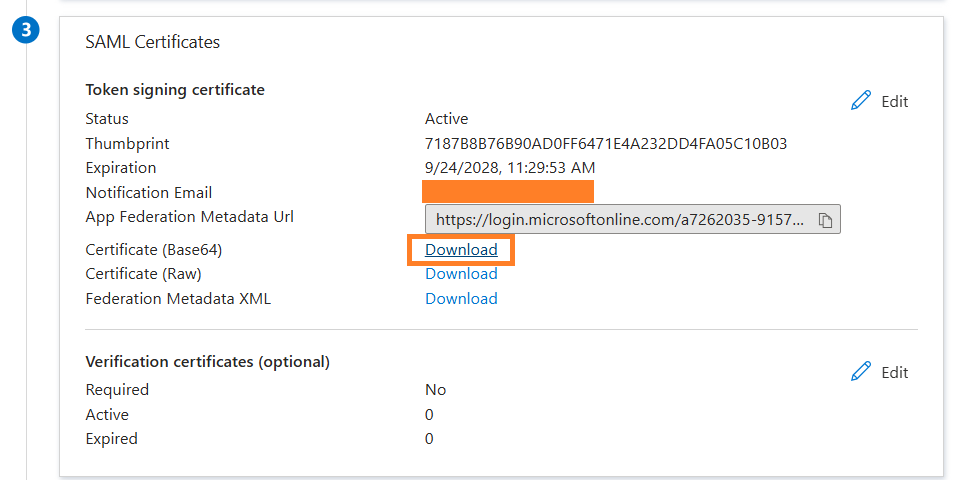
Figure 7 – Downloading the Base64 certificate
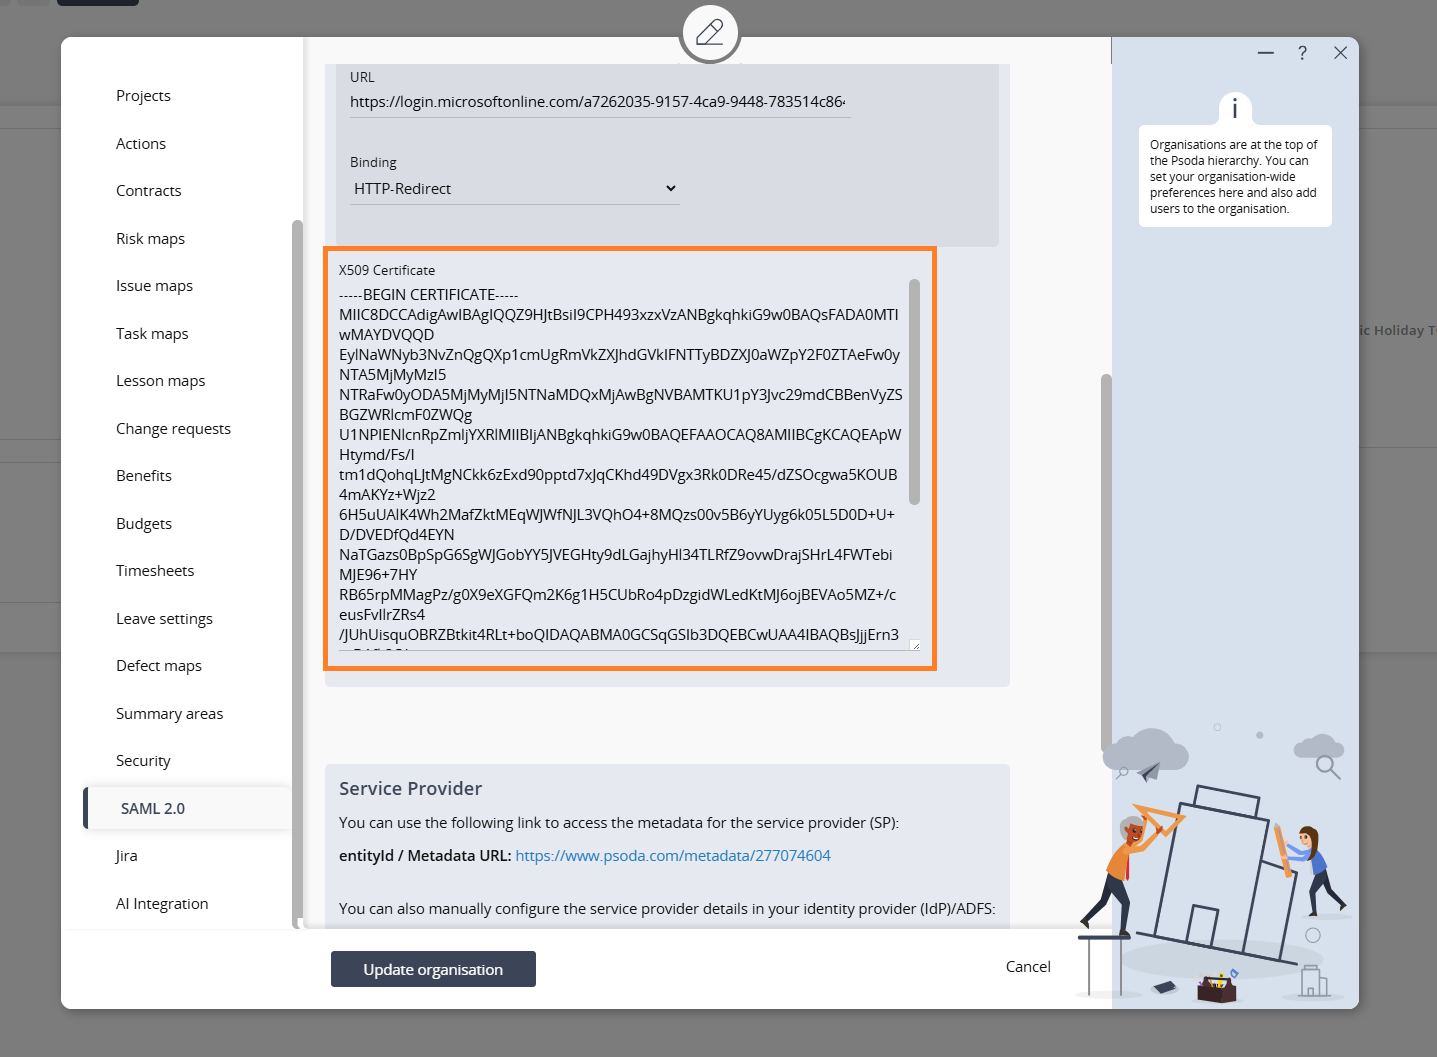
Figure 8 – Copying the certificate into Psoda
4. Configure Login and Logout URLs
- In the Entra portal, locate the Login URL and Logout URL fields on the Single sign-on page.
- Copy both URLs.
- Return to Psoda, open the Edit Organisation popup, and go to the SAML 2.0 tab.
- Paste the copied URLs into the respective Login URL and Logout URL fields.
- Ensure that HTTP-Redirect is selected as the binding method.
- Click Save.
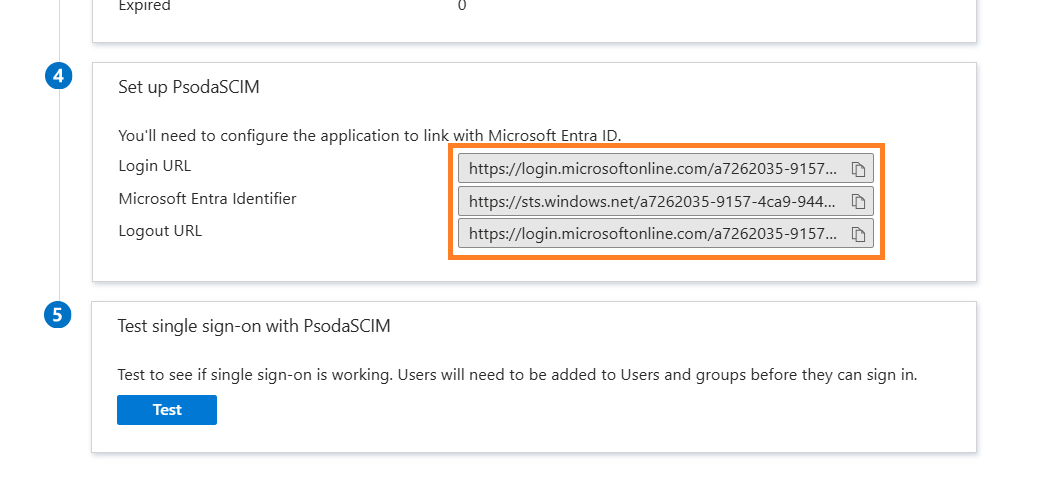
Figure 9 – Login and Logout URLs in Entra
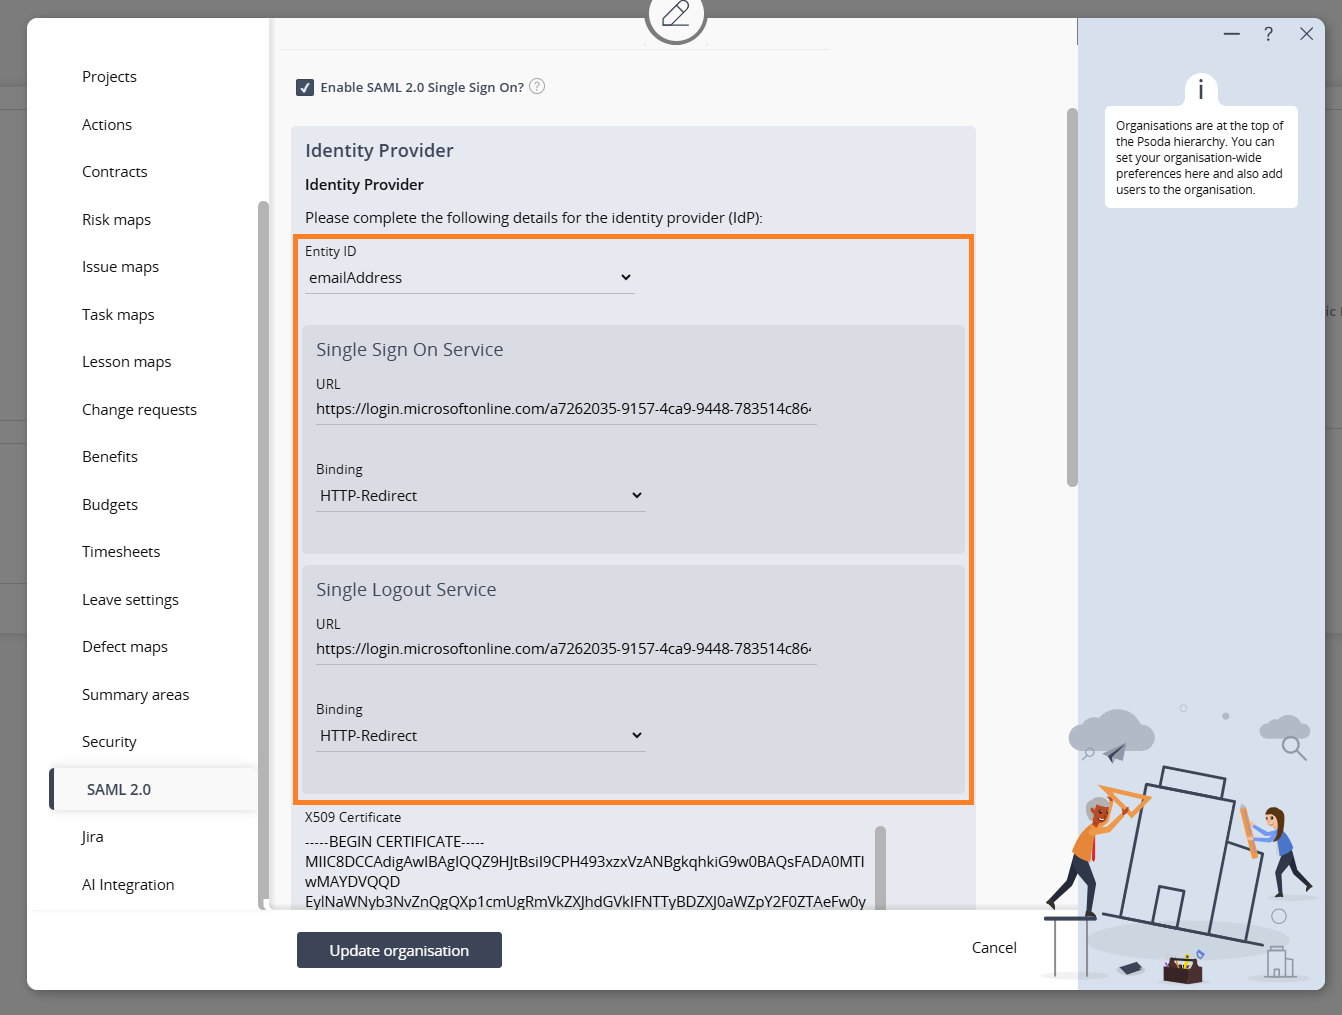
Figure 10 – Login and Logout URLs entered in Psoda
5. Assign Users and Groups
Go to Users and groups and assign the users or groups that should have access to the application via SAML SSO.
6. Test SAML SSO
- Click Test this application in the Entra portal.
- Verify that users can log in successfully using their Microsoft Entra credentials.