This popup form can be accessed via the  edit button in the top header area of the expense item view page, as shown in Figure 1. Alternatively you can access the
  edit popup form via the
  actions column menu of the Expenses tab at any of the parent asset view pages (e.g.
  organisation,
  programme or project), as shown in Figure 2.
*The reference, amount and tax percentage fields are mandatory, but all others are optional.
Once you are happy with your entries click the “Update expense item” button at the bottom of the form. This will update the expense item with the details that you supplied.
Click the “Cancel” button if you no longer want to update the expense item.
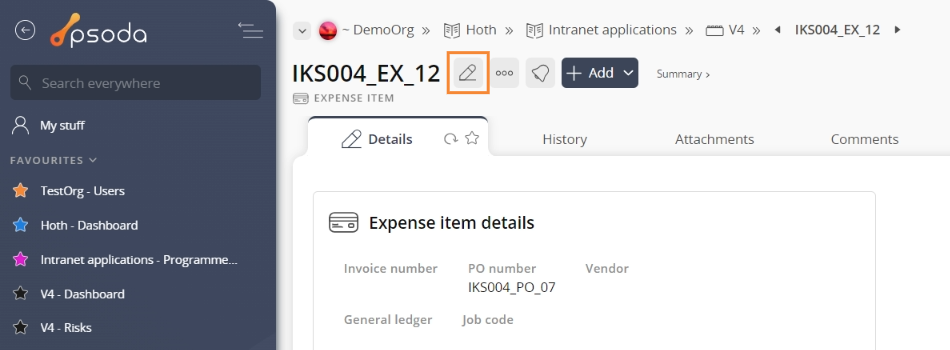
Fig 1 – Access via edit button
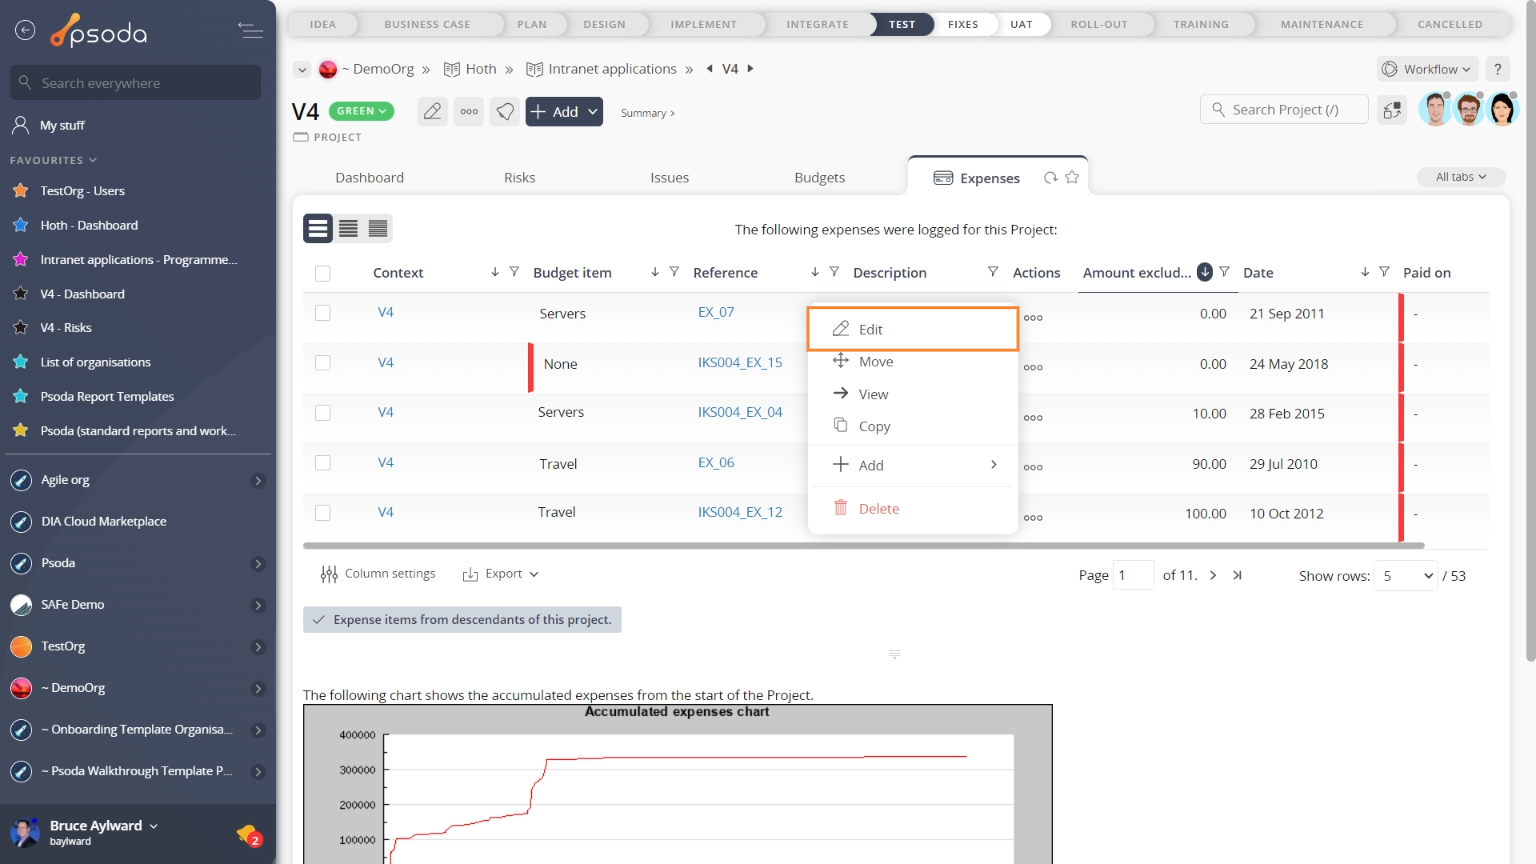
Fig 2 – Access via expenses tab
This popup is shown in Figure 3 and is used to edit an existing expense item.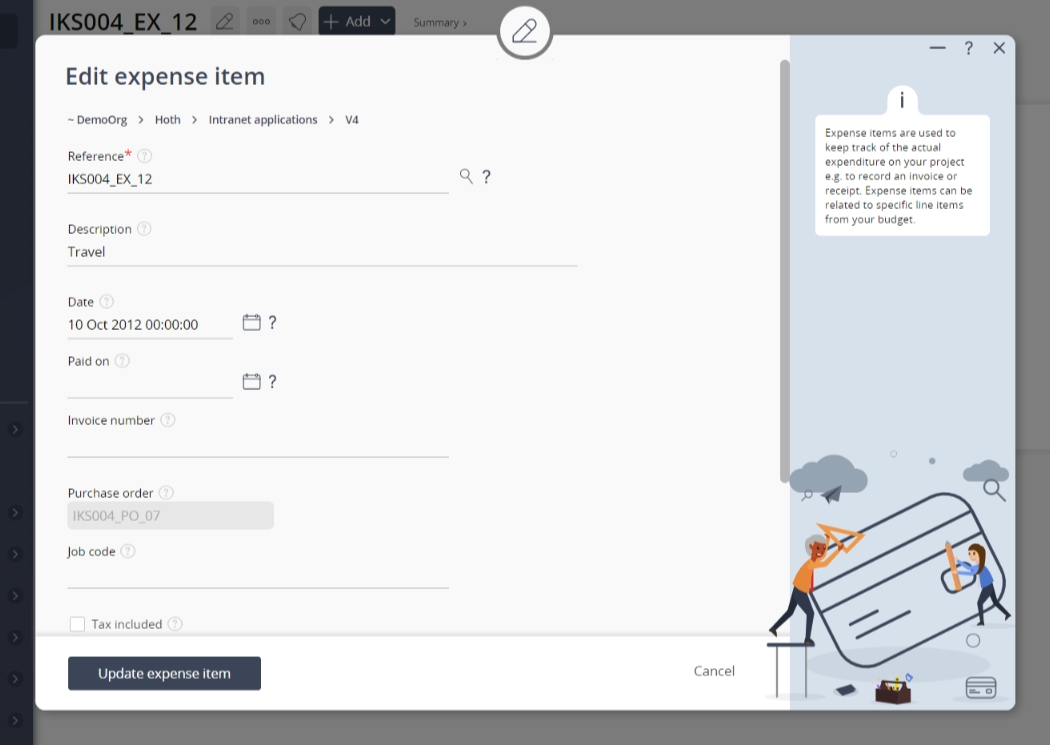
Figure 3 – Edit expense item form
This form has the following fields:| Parent asset: | This read-only field shows which organisation, programme, project or sub-project you are adding this expense item to. |
|---|---|
| Reference*: | Use this field to edit the unique reference for your expense item. If you enter a prefix and end it with one or more zeros, e.g. E_00, then you can click on the |
| Description: | Enter or edit the description for this expense item here. |
| Date: | Enter or edit the date for this expense using one of the supported date formats, or by selecting the date using the calendar control function. |
| Paid on: | Enter or edit the date that this expense was paid on using one of the supported date formats, or by selecting the date using the calendar control function. |
| Invoice number: | You may use this field to enter or edit the invoice number associated with this expense. |
| PO number: | You may use this field to enter or edit the purchase order number associated with this expense. |
| Vendor: | Use this drop-down list to select or change the vendor associated with this expense. |
| (New vendor name): | This field will only be available if you have the right permissions and have selected “Add vendor” in the Vendor field above. Use this to enter the name for a new vendor to be added and associated with this expense. Leave this field blank if you do not want to associate a vendor with this expense. |
| General ledger: | You may use this field to enter or edit the general ledger code to describe this expense. |
| Job code: | You may use this field to enter or edit the job code for this expense. |
| Tax included: | Select this check box if sales tax (GST/VAT) is included in the amount. |
| Amount (including/excluding) tax: | Enter or edit the expense amount in this field. |
| Tax percentage: | Enter or edit the percentage of the expense item’s tax. |
| Budget item: | This field will only be displayed if there are any budget items for the associated project or sub-project. You may use this drop-down list to select or change the budget item to be associated this expense item. If you select a budget item for this expense then the expense amount will be added to the budget item’s actual expenditure. |
| Approved: | Select this check box if you wish to set this expense item to have been approved. |
| Archived: | Select this check box if you would like to archive this expense item. |