To access this popup, click on the
Preferences link in the user menu at the bottom left-hand side of the page, as shown in Figure 1.
 Figure 1 – Edit preferences via user menu
This popup is shown in Figure 2 and allows you to customise how Psoda looks and feels for you, other users will not be affected. These options do not change the way that the data is stored in the database and will be remembered for the next time that you log in.

Figure 2 – Edit user preferences form
In Figure 2 above, the form has been broken down into two sections:
| Section 1 |
These are the tabs that you can cycle through to edit each of the user preferences for each associated section.When you navigate to a new tabbed view in this popup, any information entered in Section 2 from the previous tabbed view will be saved. This means you do not need to click on any buttons to save each tab, but can instead click on the Save button at the bottom of the popup when you wish to save your new user preferences. |
| Section 2 |
This information will change as you cycle through the tabs shown in Section 2, and the available fields will change accordingly. A breakdown of the field information for each tab is provided below. |
Tab breakdown
The following information provides a breakdown of each of the tabbed views that may be available for you to set the user’s details under each section.
Preferences
 Figure 3 – Edit general preferences tab
This is the first tab of preferences that you can set for yourself. The
general preferences for your account can be assigned by clicking on the tab indicated in Figure 3 above. Each of the options available to be customised in this tab are described in the following table:
| Keep me logged in
|
Select this check box if you would like to stop your session being automatically terminated after 15 minutes of inactivity. |
| Freeze table headers and footers |
Select this check box if you would like to freeze the headers and footers your tables.
Note: this option is particularly useful if you have large tables that require scrolling. |
| (Maximum table height)
|
If you have selected in the option above that you would like to freeze table headers and footers, you will be presented with this option that can allow you to assign the table’s maximum height (as a percentage of the window height).
If you have more information than can be presented within the maximum table height assigned, a scroll bar will be added to the table. |
| Navigator width
|
Use this option to change the width (in pixels) of the Navigator on the left hand side of the page. |
| Auto-hide navigator
|
Select this check box if you would like to the navigator to auto-hide until you mouse over the navigator, which will make it visible again. |
| Notification frequency
|
Use this drop-down list to select how often you would like to receive email notifications. This will limit the rate of notification emails.
For example if you select “Immediately” then you will receive an email for each individual notification or if you select “Every 5 minutes” then Psoda will group all notifications that happened within a 5 minute window into one email. |
| Notification language
|
Use this drop-down menu to select which language you would prefer to receive your emails in. |
| Email format
|
Use this drop-down menu to select whether you would like to receive your emails in HTML or Text format. |
| Use current page as default
|
Select this check box if you would like the page in the background of this preference popup to be assigned as your default for when you next log in. |
| Navigate to newly created assets
|
Select this check box if you would like Psoda to automatically navigate into any new assets as they are created. |
| Reset permissions cache
|
Select this check box if you would like to reset the permissions cache to default settings. This option will only be available if you have the necessary access rights. |
Date&Time
 Figure 4 – Edit date & time preferences
The second tab allows you to select your preferred
date and time formats.
| Timezone |
Use this drop-down menu to select the timezone that you would like all the date and timestamps displayed in. When you change your timezone you will have to log out and back in again for it to take effect. |
| Date format |
Use this drop-down menu to select the format that you would like dates displayed in. You can select from short formats, 01/12/10, through to long formats, 1 December 2010.
The date format is used in standard report templates to format the output reports to have the same chosen date formatting. |
| Date and time format |
Use this drop-down menu to select between a 12 hour and a 24 hour AM/PM format to display times in Psoda. |
Financial performance
 Figure 5 – Edit financial performance preferences
| Calculation month & forecast month |
There are two options in this group. The first option sets the calculation month and (if you have selected the use maximum of actual vs forecast check box below) the second sets which forecast month to include.
For example if you select the Current month for the calculate month and select the Same month for the forecast month then the estimate at completion and variance anticipated calculations will include actuals up to the current month and forecasts from the current month forward.
If you select the Last month for the calculate month and select the One month after for the forecast month then the estimate at completion and variance anticipated calculations will include actuals up to the end of last month and forecasts from the beginning of this month forward. |
| Use maximum of actual vs forecast |
Select this check box if you would like to include a second forecast month option to accompany the drop-down calculation month field. |
| Budget overruns display |
Select if you want positive or negative variance displayed. |
Risk Management
 Figure 6 – Edit risk preferences
This fourth tab lets you set up the risk management standard that you would prefer to use. Make your selection from the drop down list. You can select a view from Normal, Prince2, PMP or ISO 31000. This will change the field headings in all the risk-related displays.
Schedule
 Figure 7 – Edit tasks & milestones preferences
Use the options on this tab to configure how the predecessors are displayed in the Schedule table.
| Show predecessor/successor title in table |
Select this check box if you would like the full titles for predecessors and successors rather than just their references to be displayed. |
| Show only abbreviation |
Select this check box if you would like to show the abbreviated form for the predecessor relationship types rather than the full start-to-start, start-to-finish, etc. |
Test case results
 Figure 8 – Edit test case results preferences
Select this check box if you would like to
skip the confirmation box when you are passing/failing test case results.
Traceability Matrix
 Figure 9 – Edit traceability matrix preferences
Select this check box if you would like a
confirmation box to popup when adding dependencies through the traceability matrix.
Timesheets
 Figure 10 – Edit timesheets preferences
This tab allows you to change how your timesheets behave.
| Timesheet effort format |
Use this drop-down menu to select or change the format for timesheet effort. You can choose between the decimal (hh.hh) or the traditional (hh:mm:ss) formats. |
| Automatically add all tasks to new timesheets |
Select this check box if you want each week’s new timesheet to automatically add all tasks that are allocated to you. |
Tabbed View
 Figure 11 – Edit tabbed view preferences
This tab allows you to control the number of tabs Psoda displays and how they are displayed.
| Maximum tabs in a row |
Use this drop-down list to select or change the maximum number of tabs that you want displayed on one row. If there are more tabs then they will be included in additional rows of tabs. |
| Drag-n-drop tab reordering
|
Select this check box if you would like to be able to reorder your tabs by selecting and dragging into a new position when the selected tab is released. You can reset tab order at any point if you want to.
If you have this check box selected, then the tab that you are viewing will be moved to be the left-most tab. All other tabs will move over to the right one place and the last one may merge into the “Other views” drop-down tab. |
| Reorder tabs |
Select this check box if you would like to move the latest tab that you selected to the head of the list. You can permanently change the order of your tabs by selecting this box and clicking the tabs to change their order and then de-selecting this box again. |
| Reset tab order |
Select this check box if you would like to reset all of your tab ordering to Psoda’s default ordering. |
Shortcuts
Figure 12 – Edit shortcuts preferences
This tab allows you to control the shortcuts in Psoda. Learn more about
shortcuts here.
| Disable shortcuts |
Select this check box if you would like to turn off all shortcuts. |
| Remap shortcut matrix
|
You can remap any shortcut to your desired key. Click and type into the value field of the shortcut you want to change. You can only use 1 key and it has to be unique. |
Accessibility
Figure 13 – Edit accessibility preferences
This tab allows you to change settings relating to accessibility in Psoda. Learn more about
accessibility here.
| Disable enter key submitting popups |
Select this check box if you would like to disable popups to be submitted when you press the enter key WHILE you are inside a text or checkbox field. Please turn this on if you are using the keyboard for accessibility. |
| Disable animations
|
Select this check box if you would like to disable all animations and motion in Psoda. |

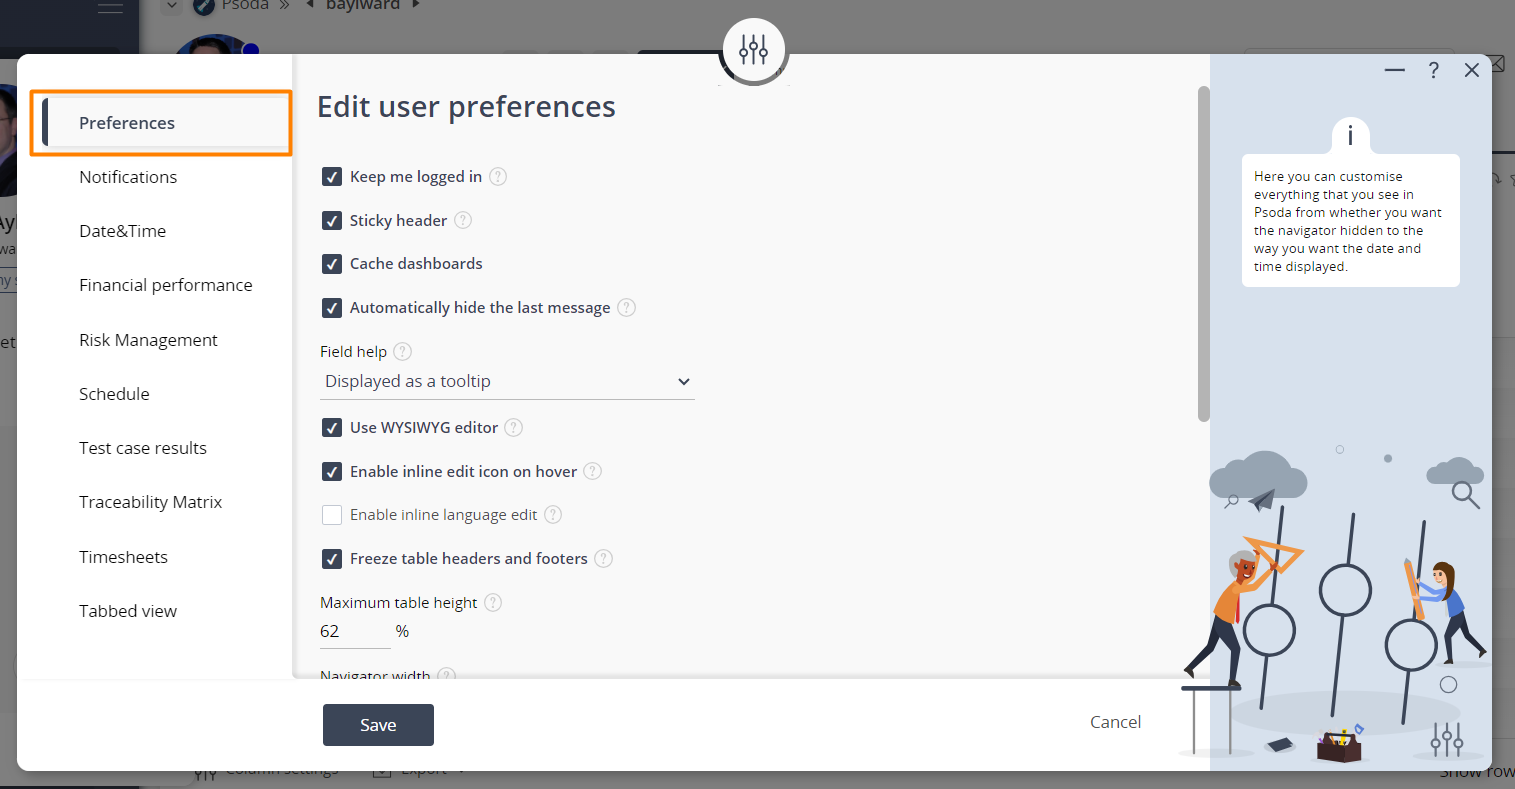 Figure 3 – Edit general preferences tab
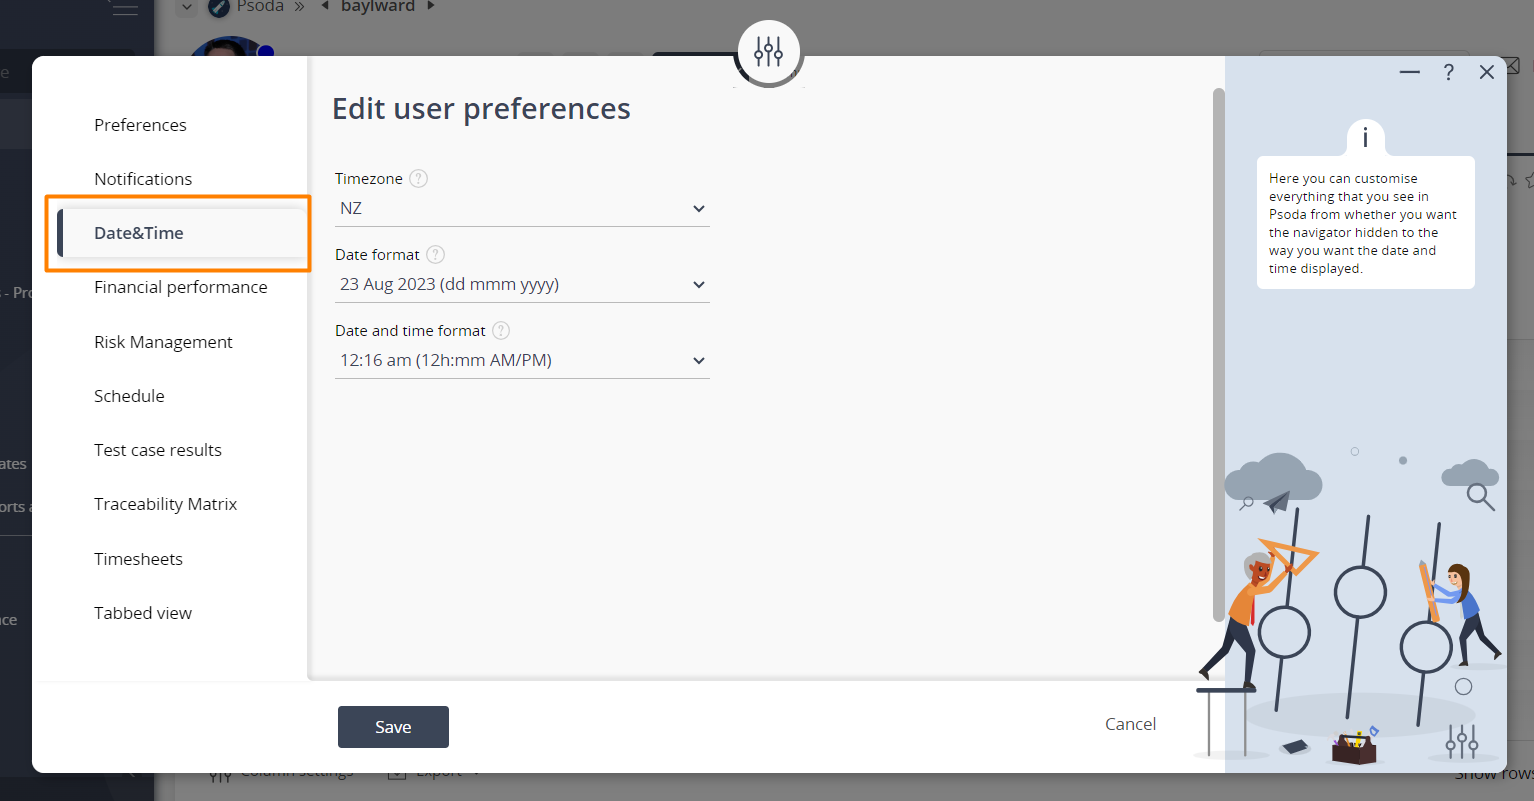 Figure 4 – Edit date & time preferences
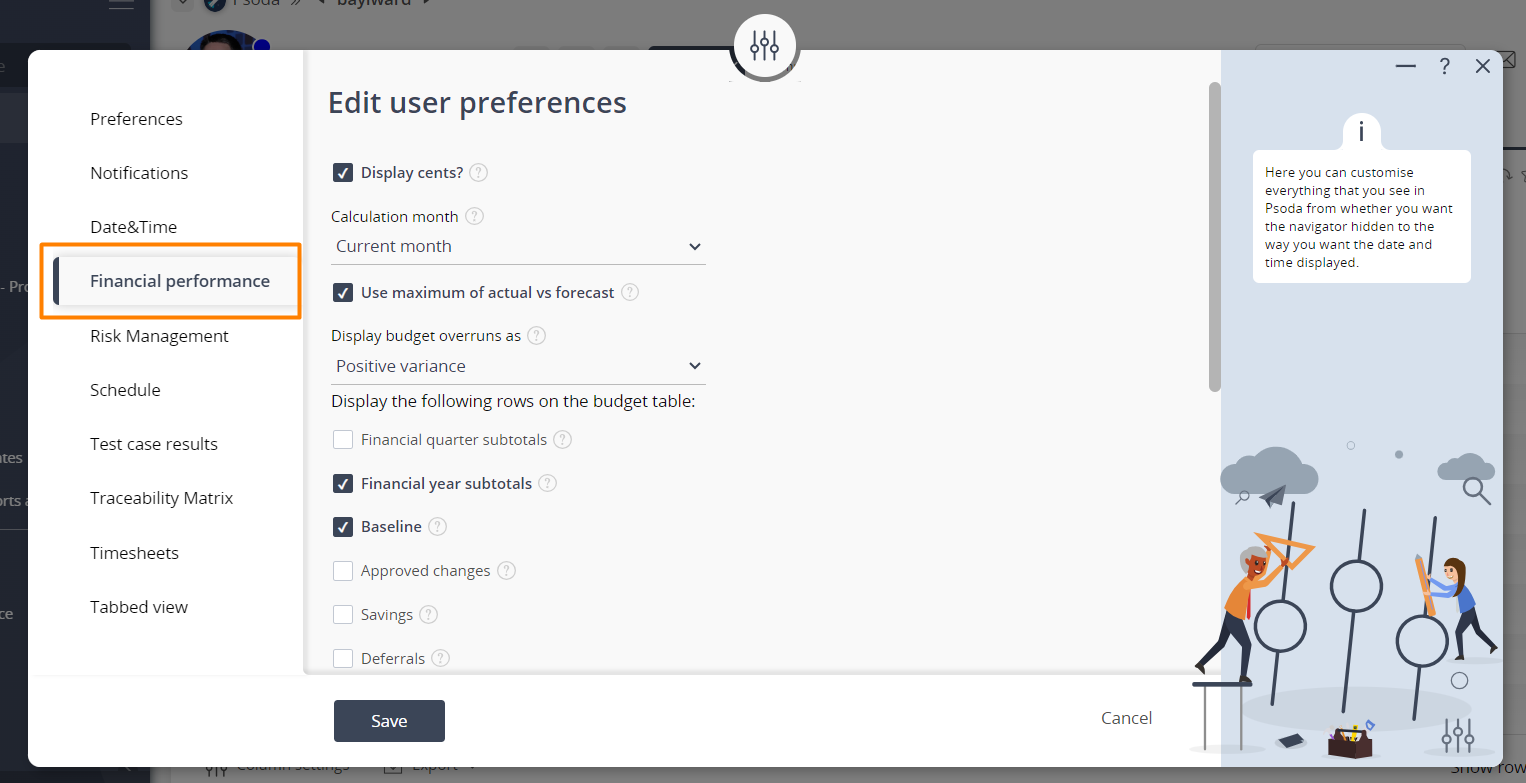 Figure 5 – Edit financial performance preferences
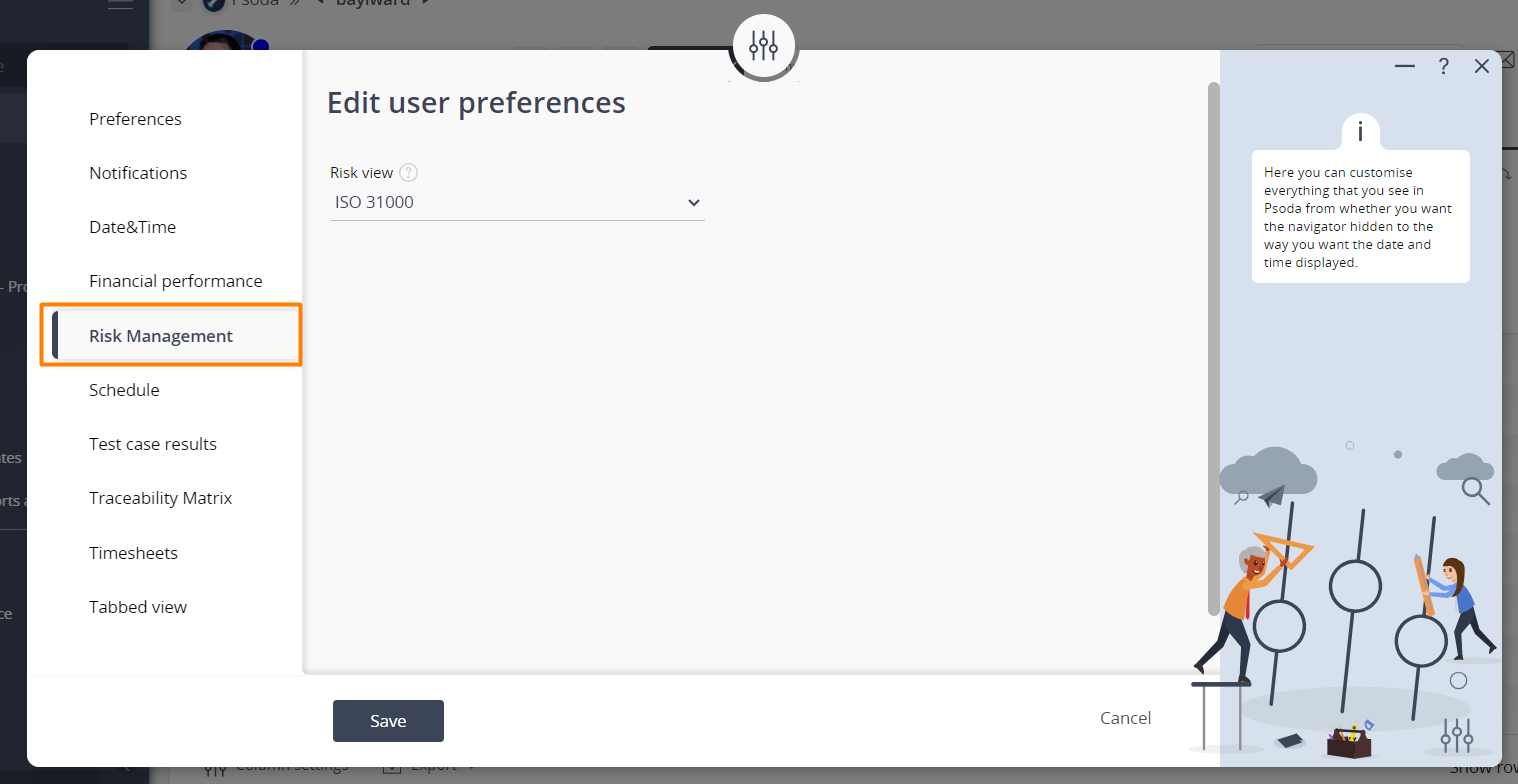 Figure 6 – Edit risk preferences
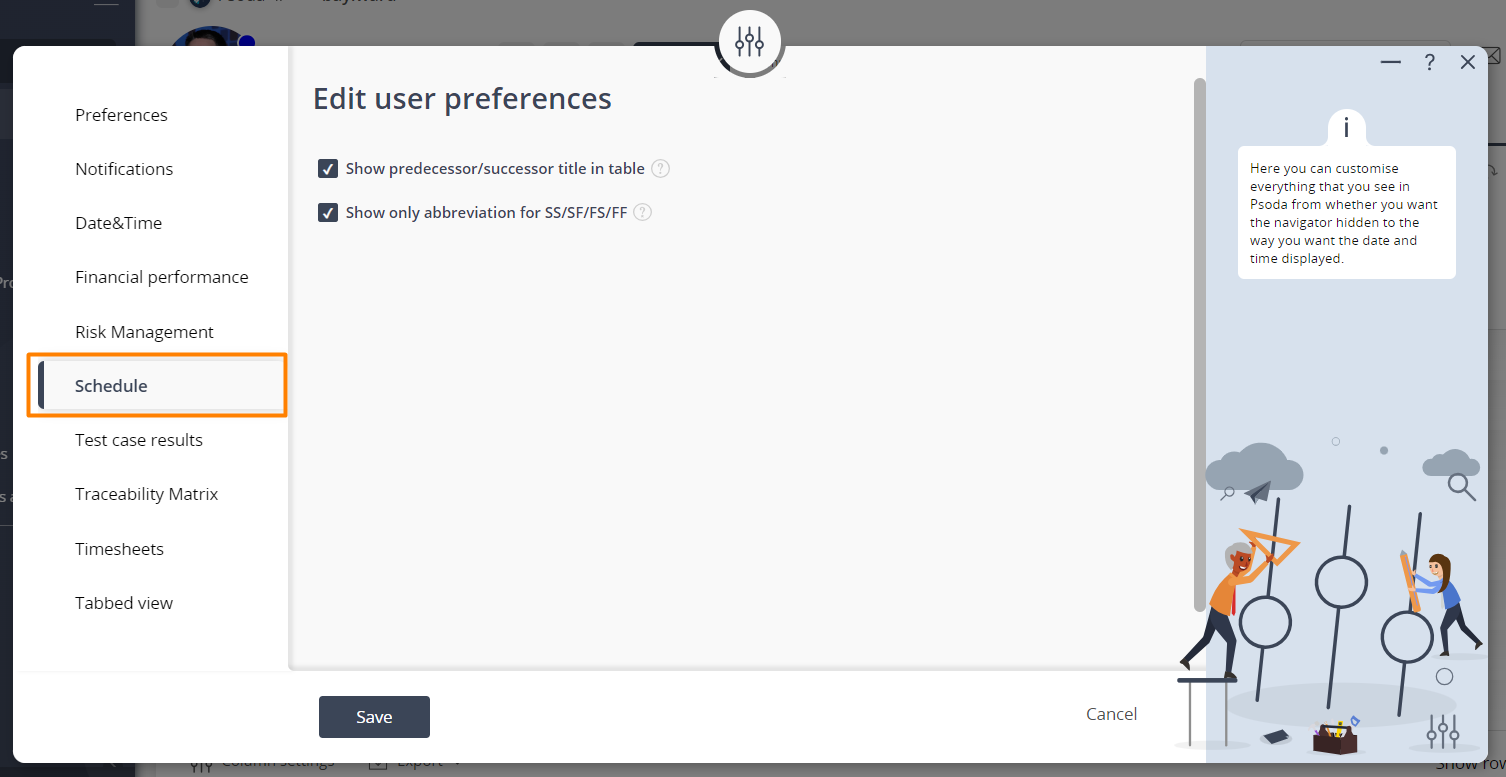 Figure 7 – Edit tasks & milestones preferences
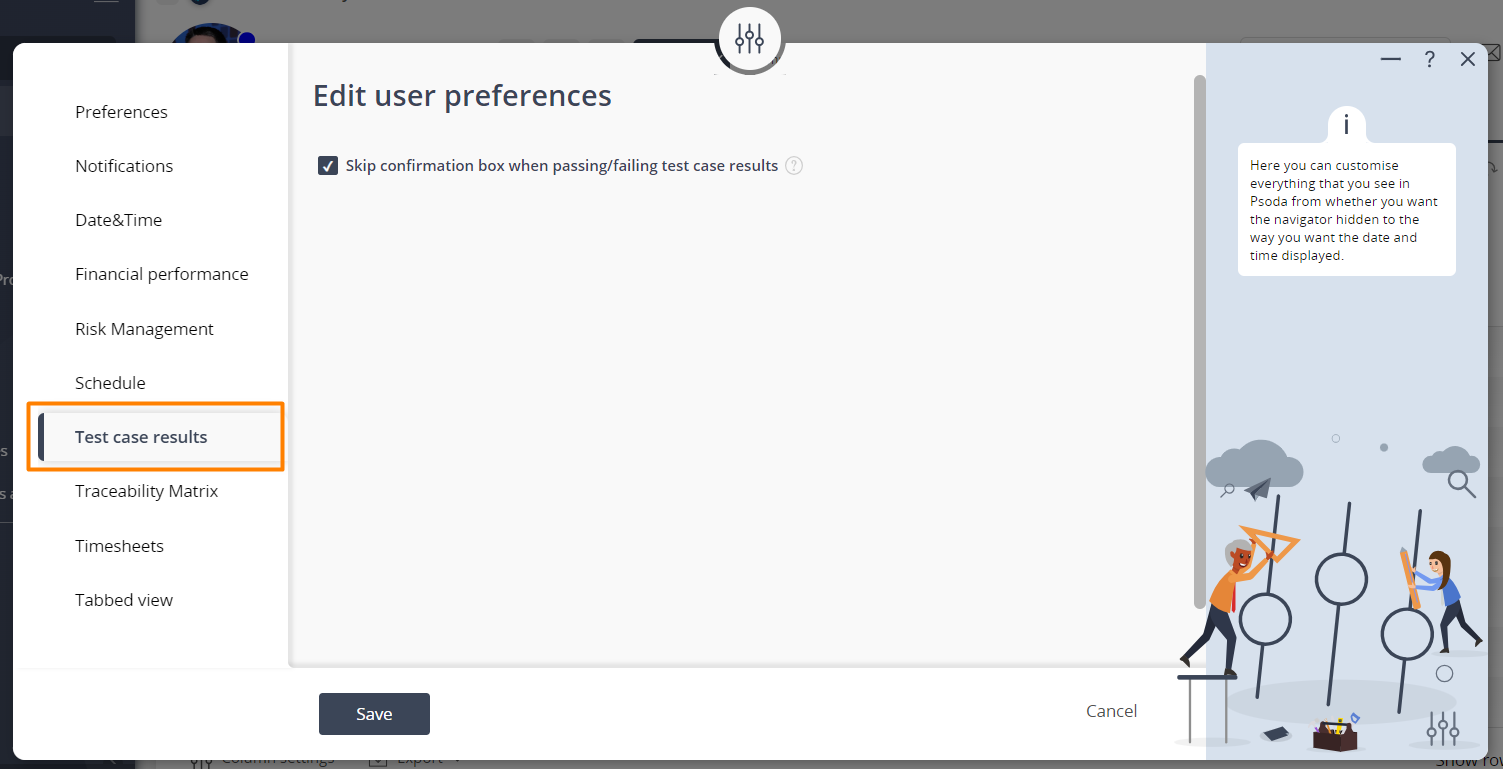 Figure 8 – Edit test case results preferences
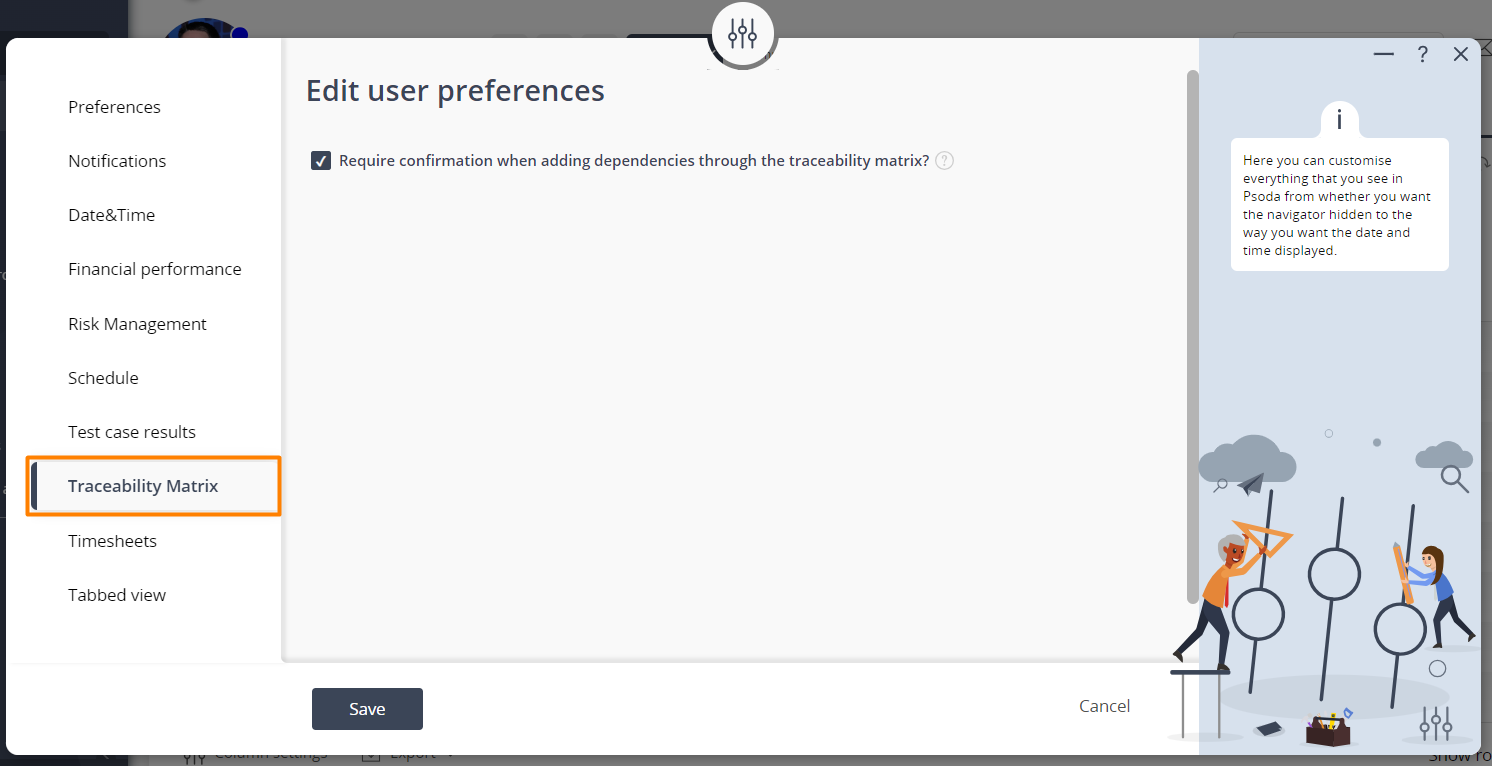 Figure 9 – Edit traceability matrix preferences
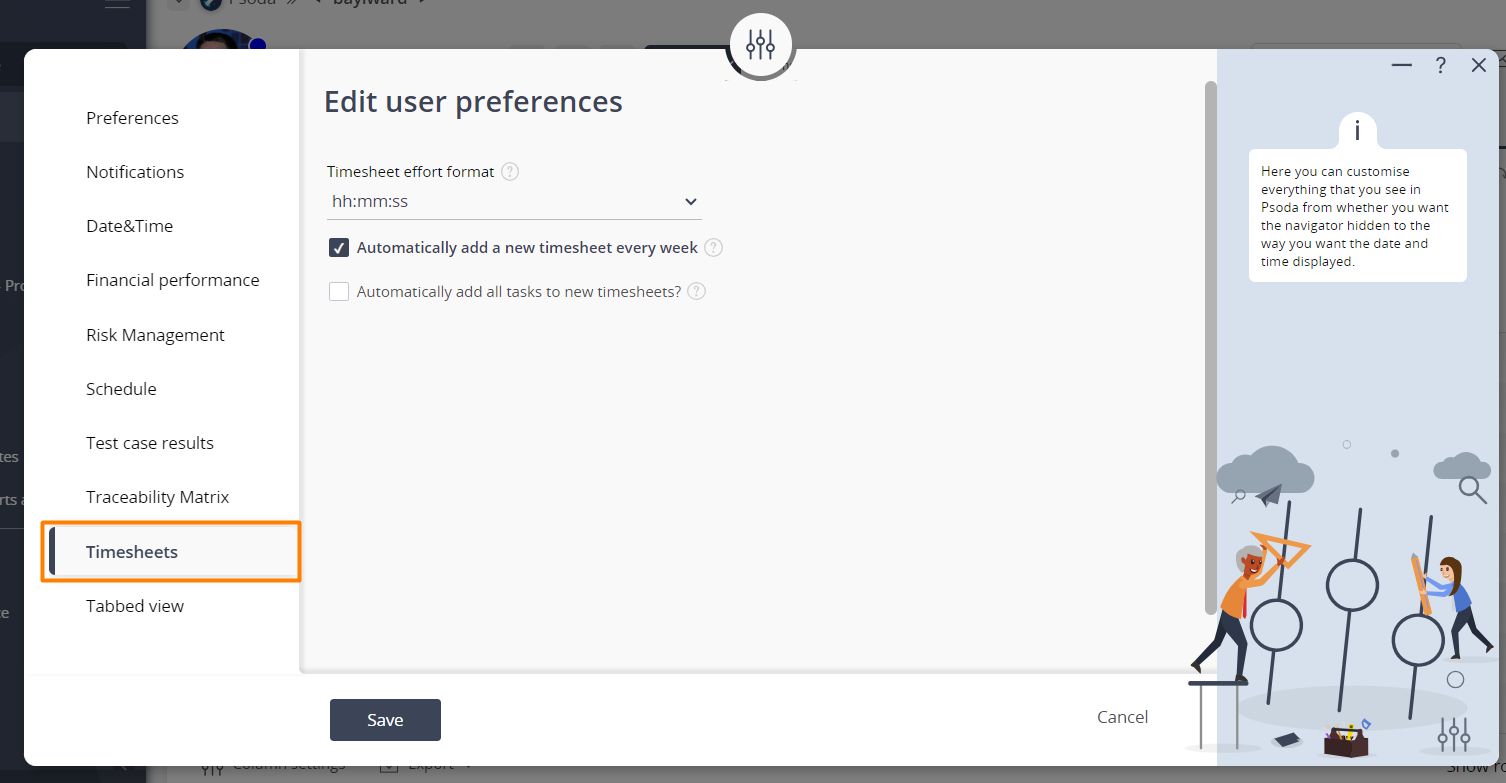 Figure 10 – Edit timesheets preferences
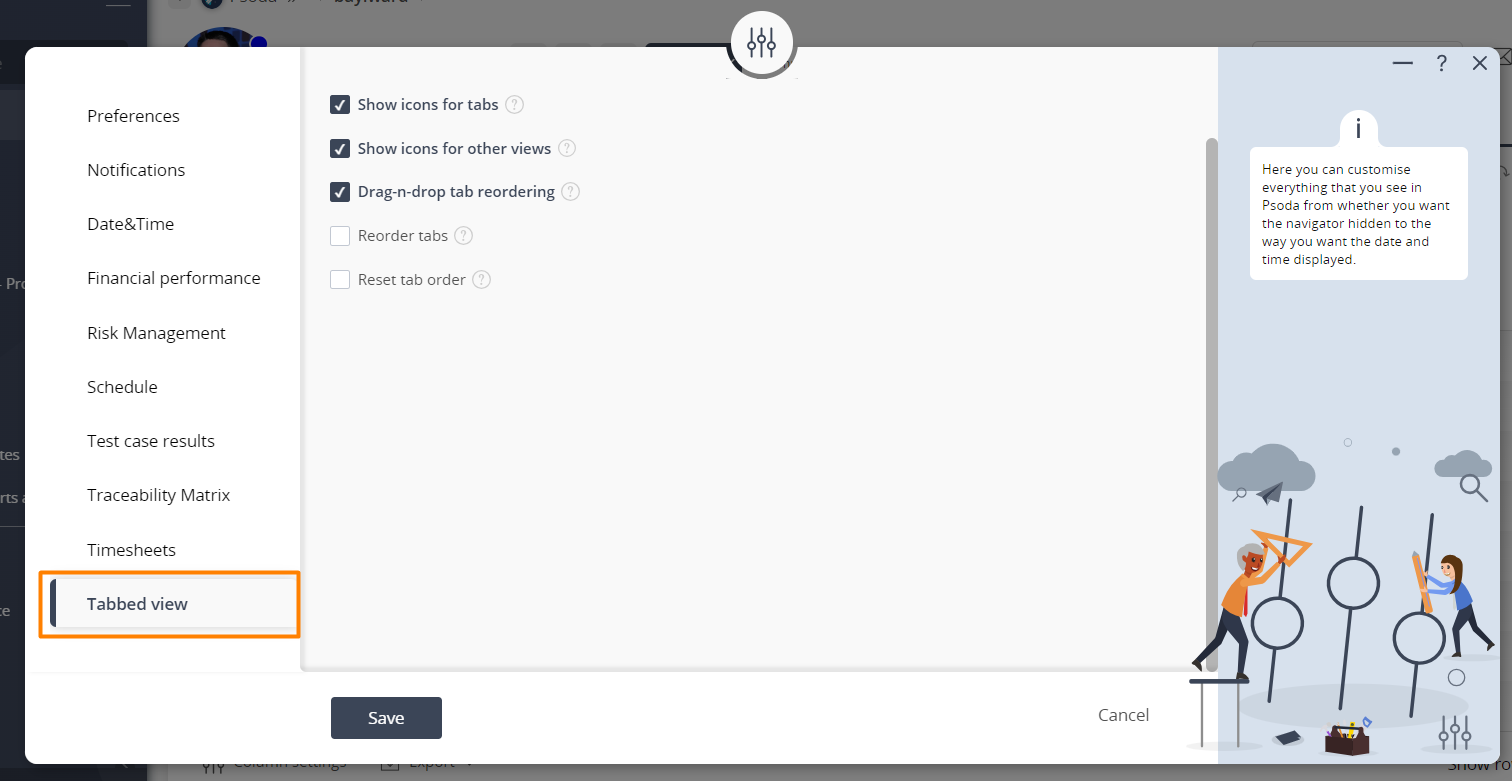 Figure 11 – Edit tabbed view preferences
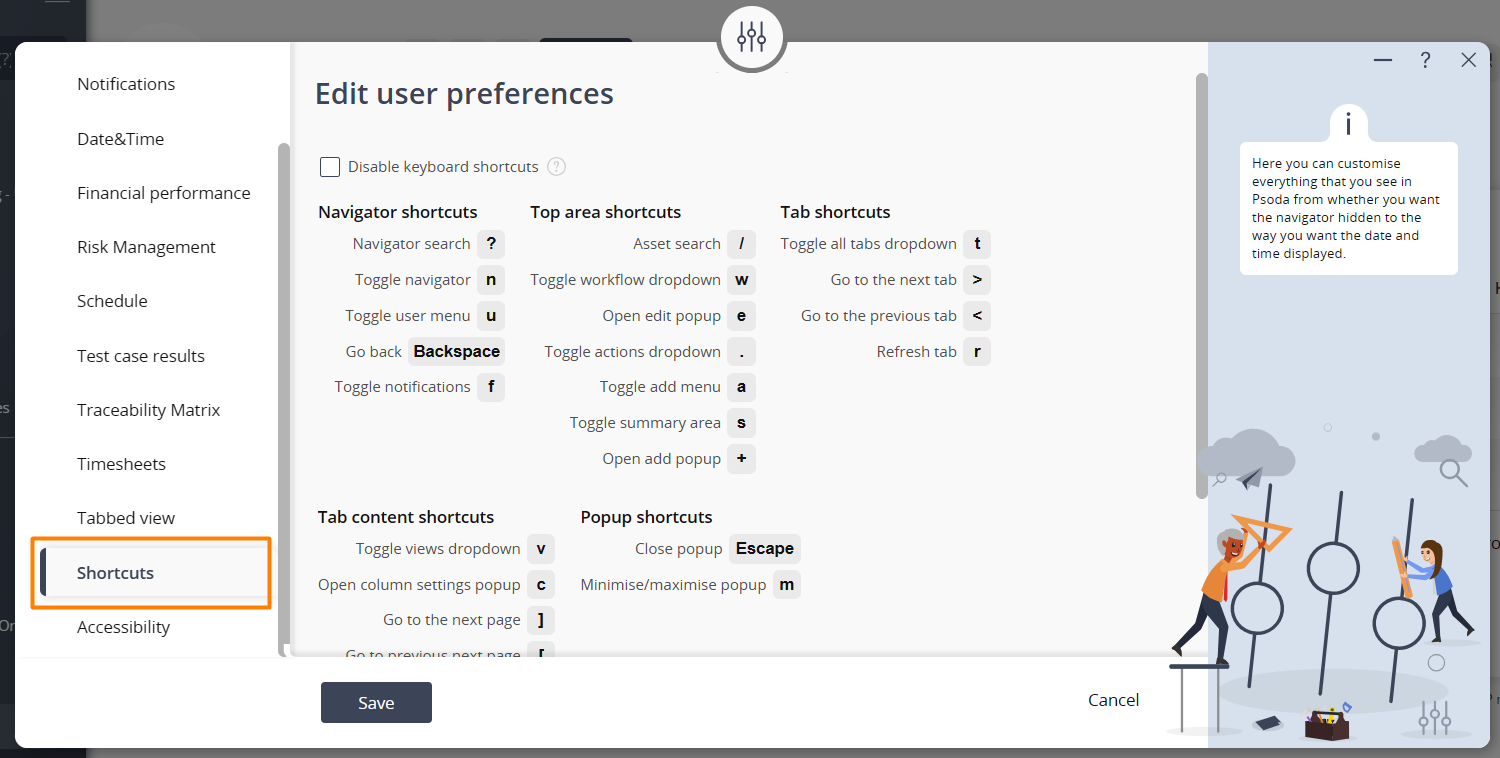 Figure 12 – Edit shortcuts preferences
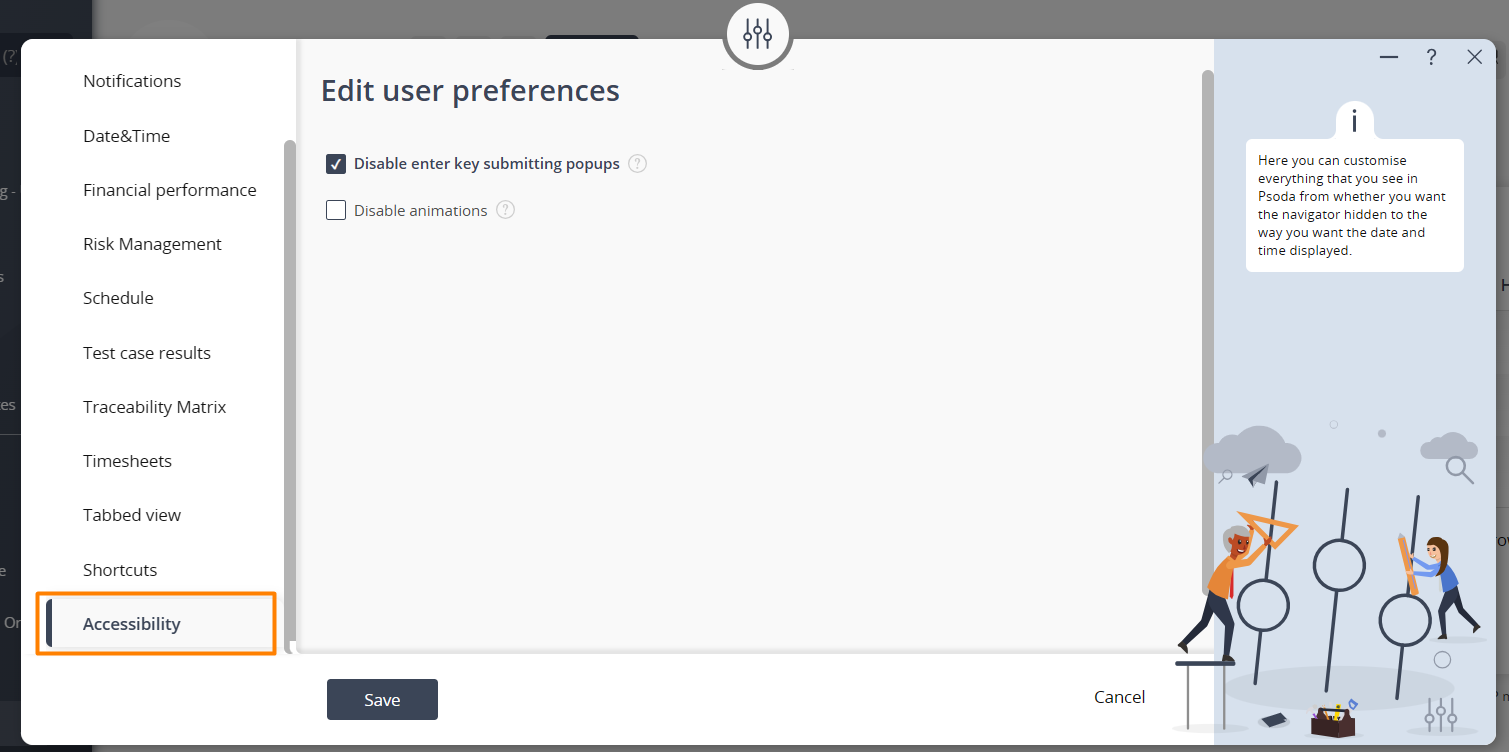 Figure 13 – Edit accessibility preferences