This popup form can be accessed via the  add menu in the top header area of the view page of the group that you wish to add this
  ACL to, as shown in Figure 1. Alternatively you can access the
  add popup form at the bottom of the ACLs tab at this same view page, as shown in Figure 2.
access control list to the selected security group.
add popup form at the bottom of the ACLs tab at this same view page, as shown in Figure 2.
access control list to the selected security group.
When you have selected the required asset, click on the “Next” button. If you have accidentally selected an asset that already has an ACL in this group then you will get a warning message.
 benefit then you may have tabs for
  attachments,
  comments,
  actions etc.
Each tab lists the access rights for that particular area that you can enable/disable for this ACL. For example on the Comments tab you have option to allow users to list comments, view the details of a comment, add new comments, etc.
Certain defaults may be set in each tab of this section, and any inheritance from parent groups may also already be checked or unchecked by default.
Once you are happy with your entries click the “Add ACL” button at the bottom of the form. This will add a new ACL with the settings that you entered. The members of the parent group of the ACL (and any sub-groups) will get the new access rights the next time that they log into Psoda.
The new ACL can be viewed in the ACLs tab at the parent or higher level asset’s view pages, as shown in Figure 5.
actions etc.
Each tab lists the access rights for that particular area that you can enable/disable for this ACL. For example on the Comments tab you have option to allow users to list comments, view the details of a comment, add new comments, etc.
Certain defaults may be set in each tab of this section, and any inheritance from parent groups may also already be checked or unchecked by default.
Once you are happy with your entries click the “Add ACL” button at the bottom of the form. This will add a new ACL with the settings that you entered. The members of the parent group of the ACL (and any sub-groups) will get the new access rights the next time that they log into Psoda.
The new ACL can be viewed in the ACLs tab at the parent or higher level asset’s view pages, as shown in Figure 5.

![]()
Figure 1 – Access via add menu
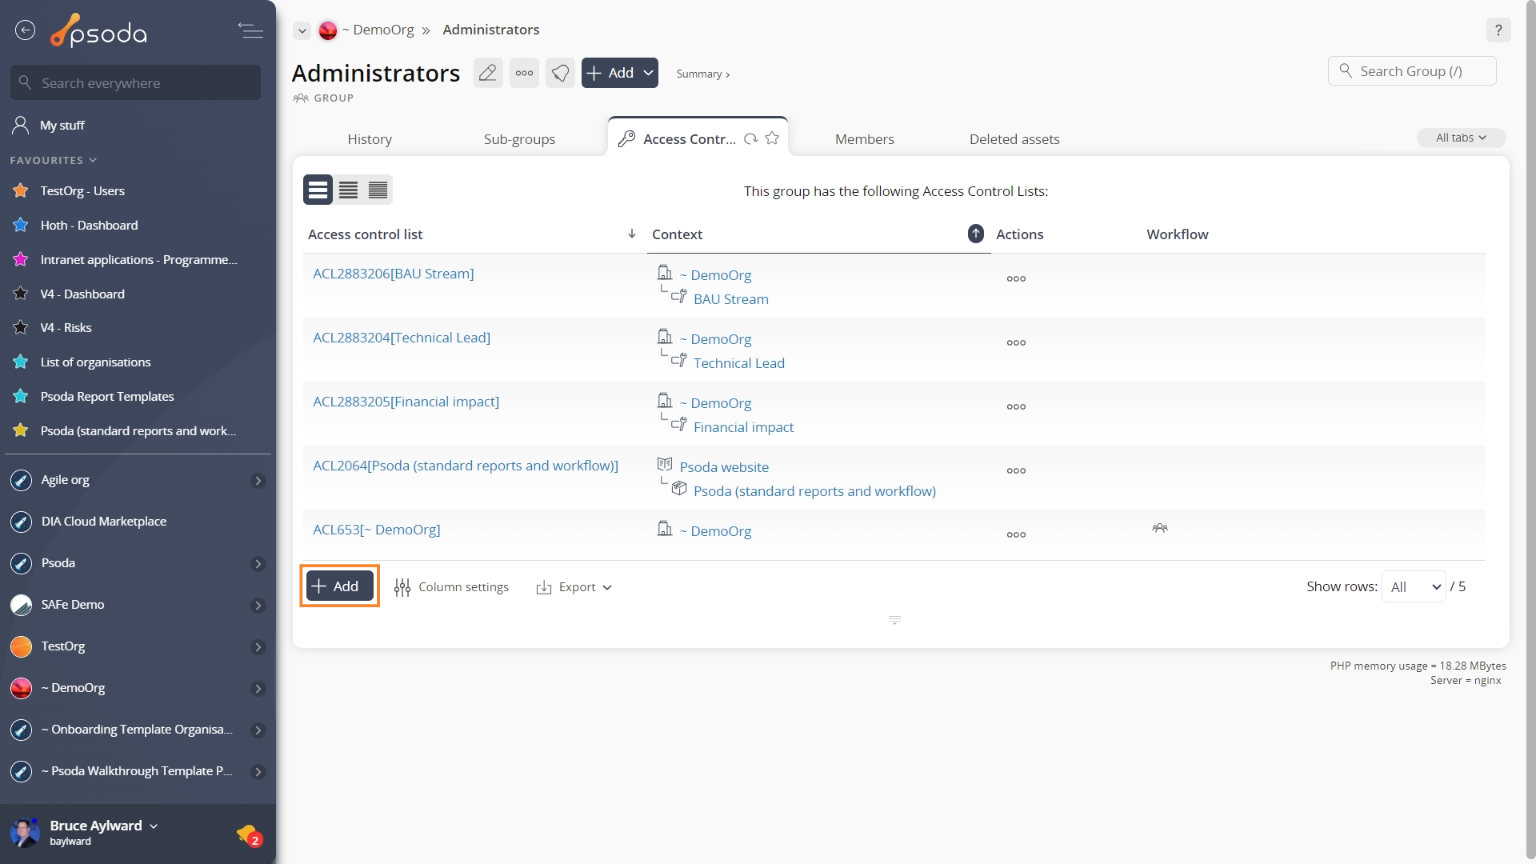
Figure 2 – Access via ACLs tab
This popup for has two phases, each shown in Figure 3 and 4, used to add a newPhase 1 – Select asset
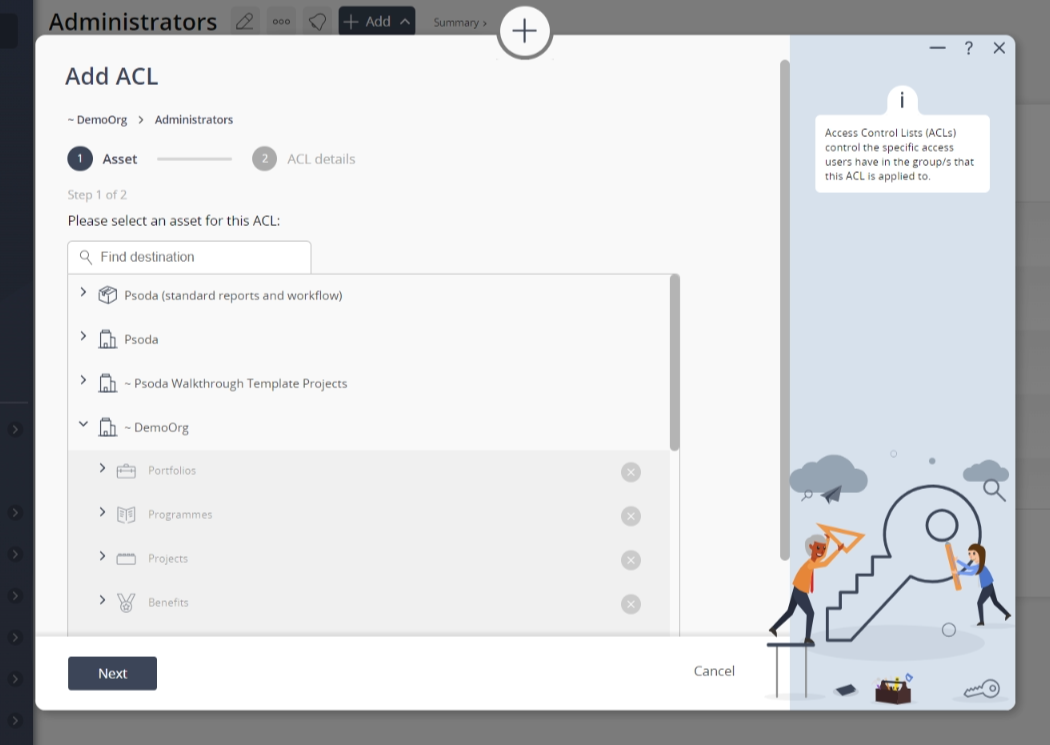
Figure 3 – Add ACL form (1)
This first phase is to select the asset that this ACL relates two. You will see a form with the following fields:| Parent Asset: | This read-only field shows which |
|---|---|
| Asset: | Use this tree selector to navigate to and select the asset that you want for this ACL. Click on the |
Phase 2 – Set access rights
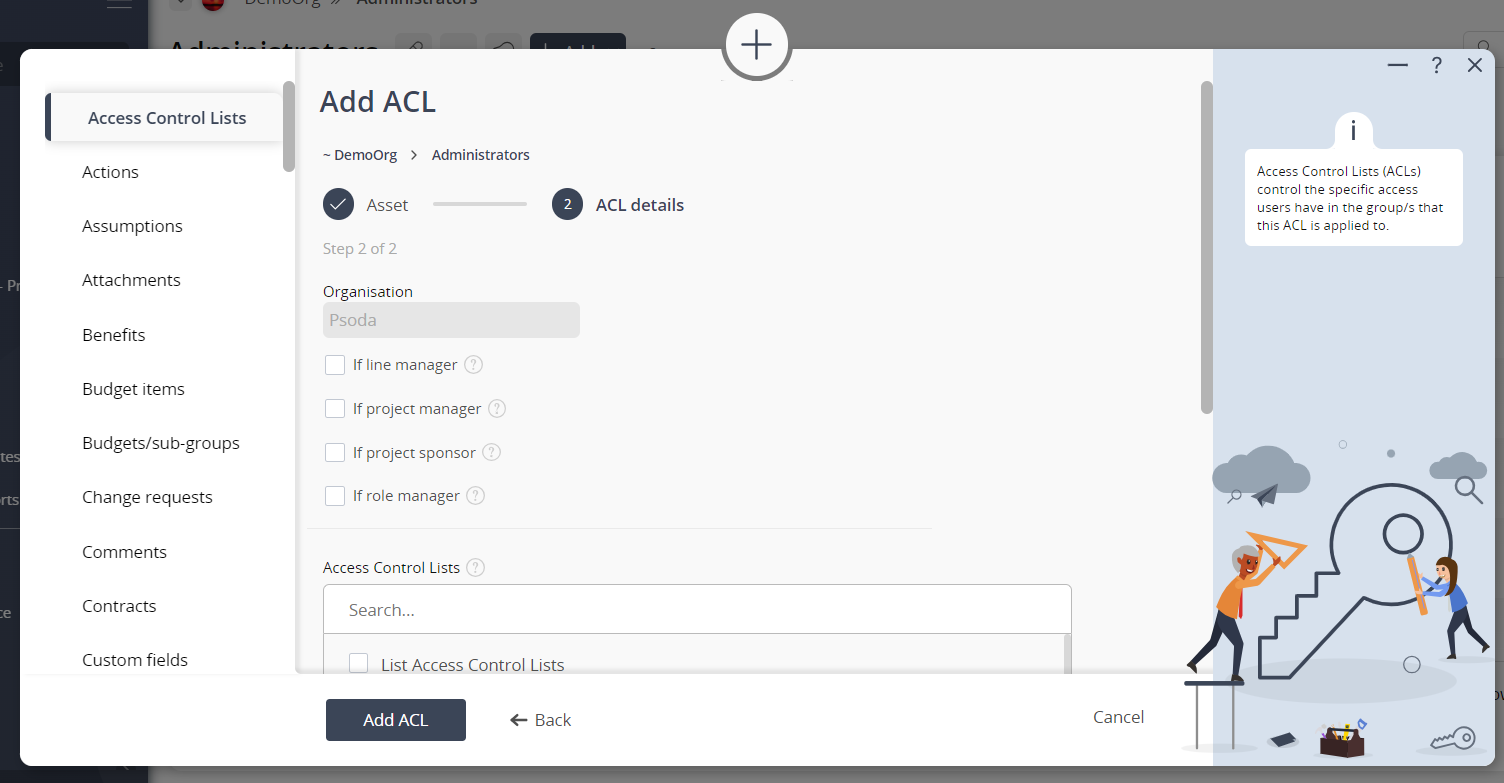 Figure 4 – Add ACL form (2)
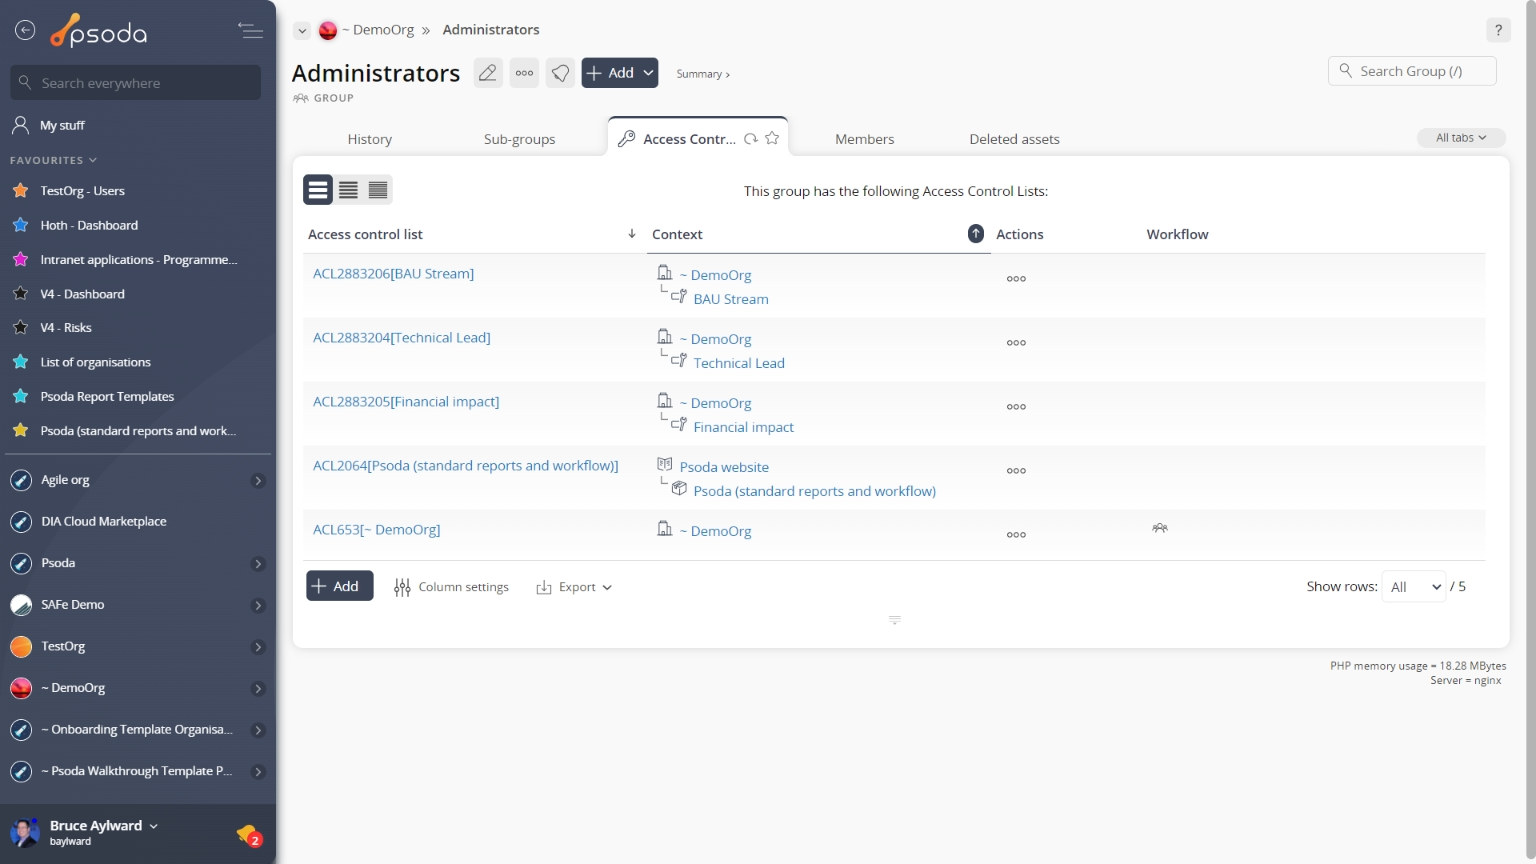
Figure 5 – View from ACLs tab
Click the “Cancel” button if you no longer want to add a new ACL.