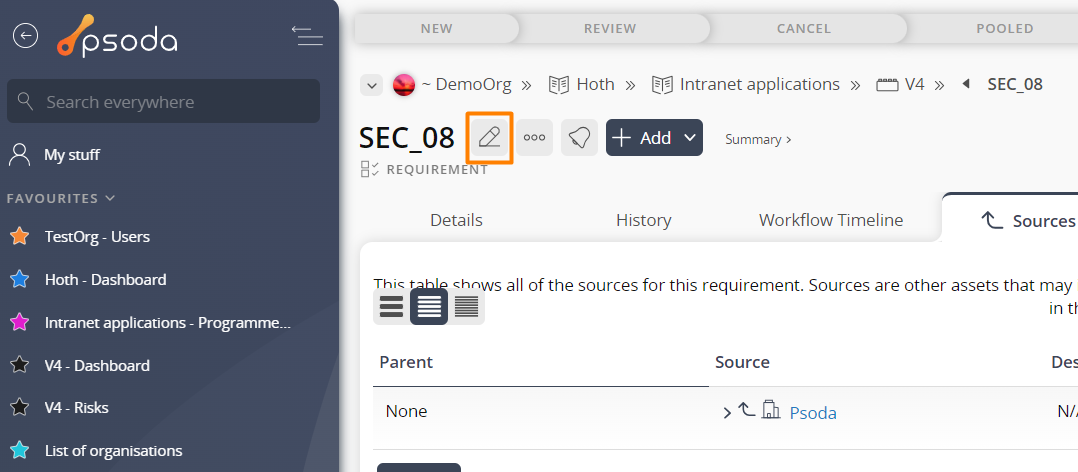
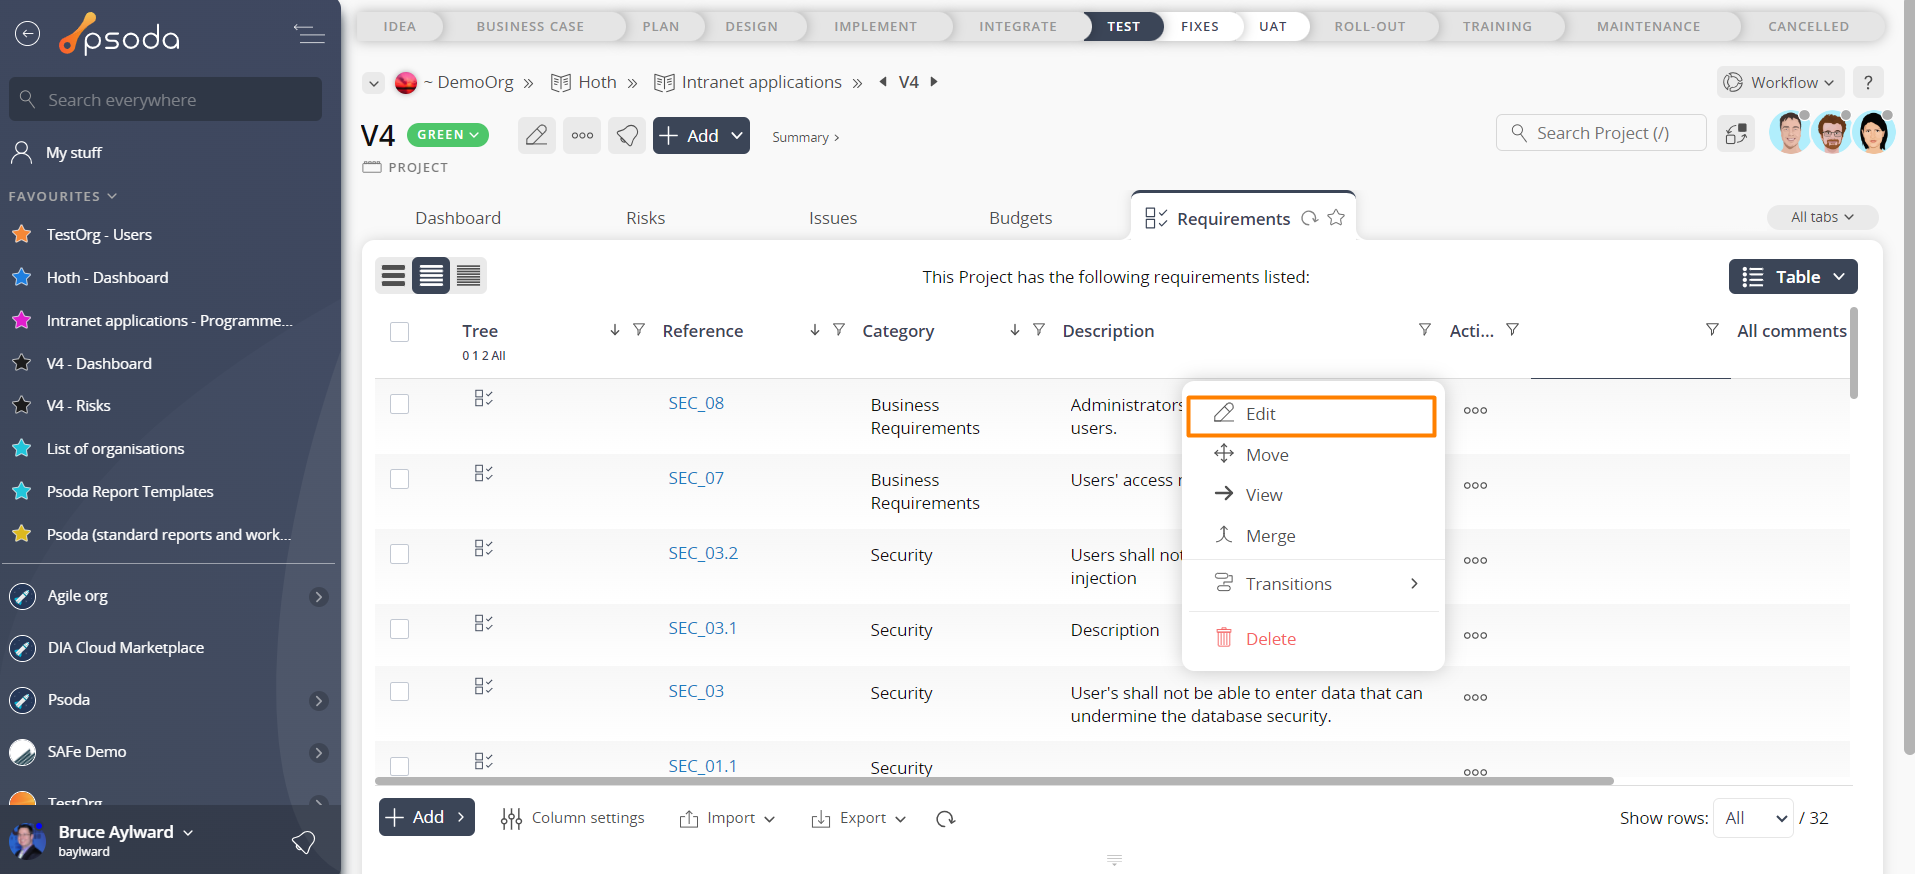
This popup form can be accessed via the  edit button in the top header area of the requirement view page, as shown in Figure 1. Alternatively you can access the
  edit popup form via the
  actions column menu of the Requirements tab at any of the parent view page (e.g.
  project,
  sub-project or
  change request), as shown in Figure 2.
Once you are happy with your changes click the “Update requirement” button at the bottom of the form. This will update the requirement with the details that you supplied.
Click the “Cancel” button if you no longer want to update the requirement.
Figure 1 – Access via edit button
Figure 2 – Access via requirements tab
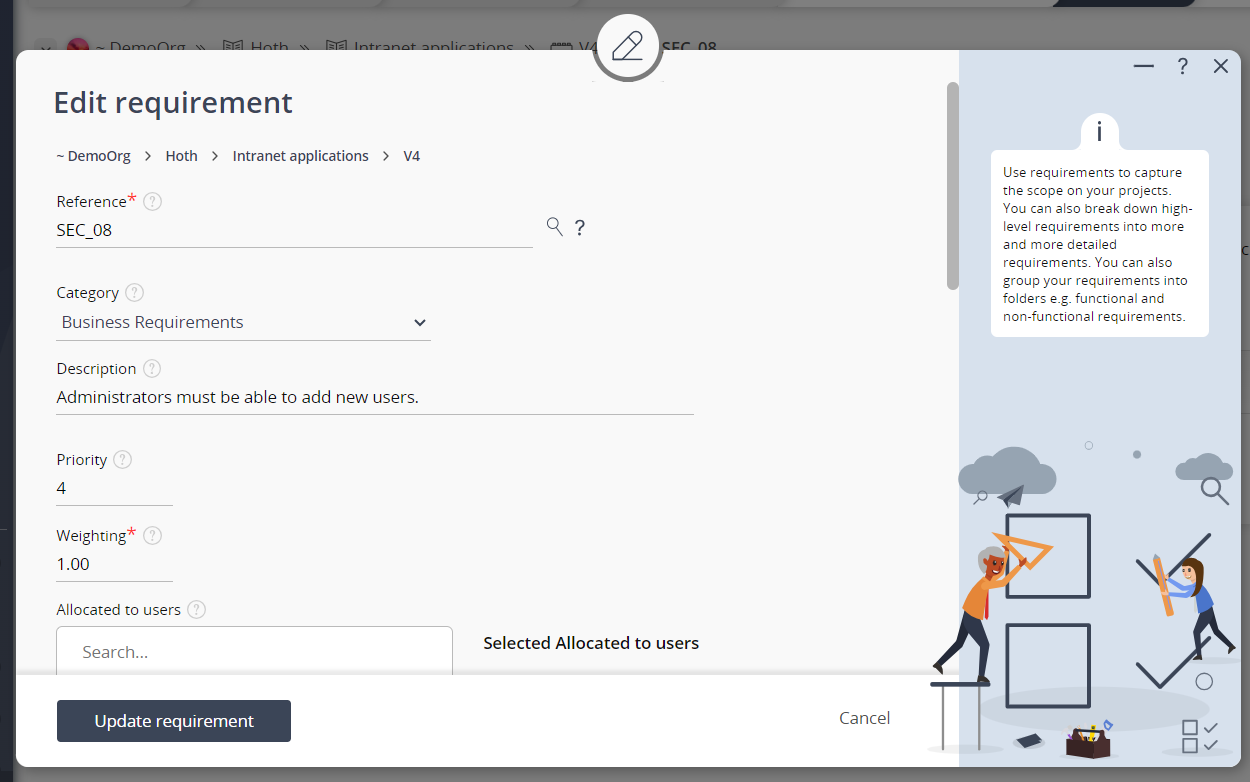
This popup is shown in Figure 3 and is used to edit an existing requirement.Figure 3 – Edit requirement form
This form has the following fields:| Parent asset: | This read-only field shows which asset this requirement belongs to. |
|---|---|
| Reference*: | This field shows the unique reference assigned to this requirement. NOTE: If you are going to edit this field, you must make sure this reference stays unique across the whole parent asset. |
| Category: | This drop-down list can be used to select or change the category for this requirement. |
| (New category): | This field can be used to add a new category to assign this requirement to. This field will only be available if you have selected the “Add a new category” option of the drop-list provided in the Category field above. |
| Description: | You can add or edit the short description for this requirement here. |
| Priority: | Enter or edit the priority for this requirement here. This priority can be used when sorting requirements in lists. |
| Weighting*: | Assign or adjust the weighting for this requirement here. |
| Allocated to users: | You may select or change which users to have this requirement allocated to them by holding the CTRL or SHIFT keys and clicking on the name of the additional user(s). To de-select, click on the highlighted name while still holding the CTRL or SHIFT keys so as not to lose all other selected users. |
| Allocated to roles: | You may select or change which roles to have this new requirement allocated to them by holding the CTRL or SHIFT keys and clicking on the name of the additional role(s). To de-select, click on the highlighted name while still holding the CTRL or SHIFT keys so as not to lose all other selected roles. |


