This popup form can be accessed via the project view page  edit button in the top header area, as shown in Figure 1. Alternatively you can access the
  edit popup form via the
  actions column menu of the Programmes & Projects tab of the parent asset view page (e.g. organisation or programme), as shown in Figure 2.


Figure 1 – Access via edit button
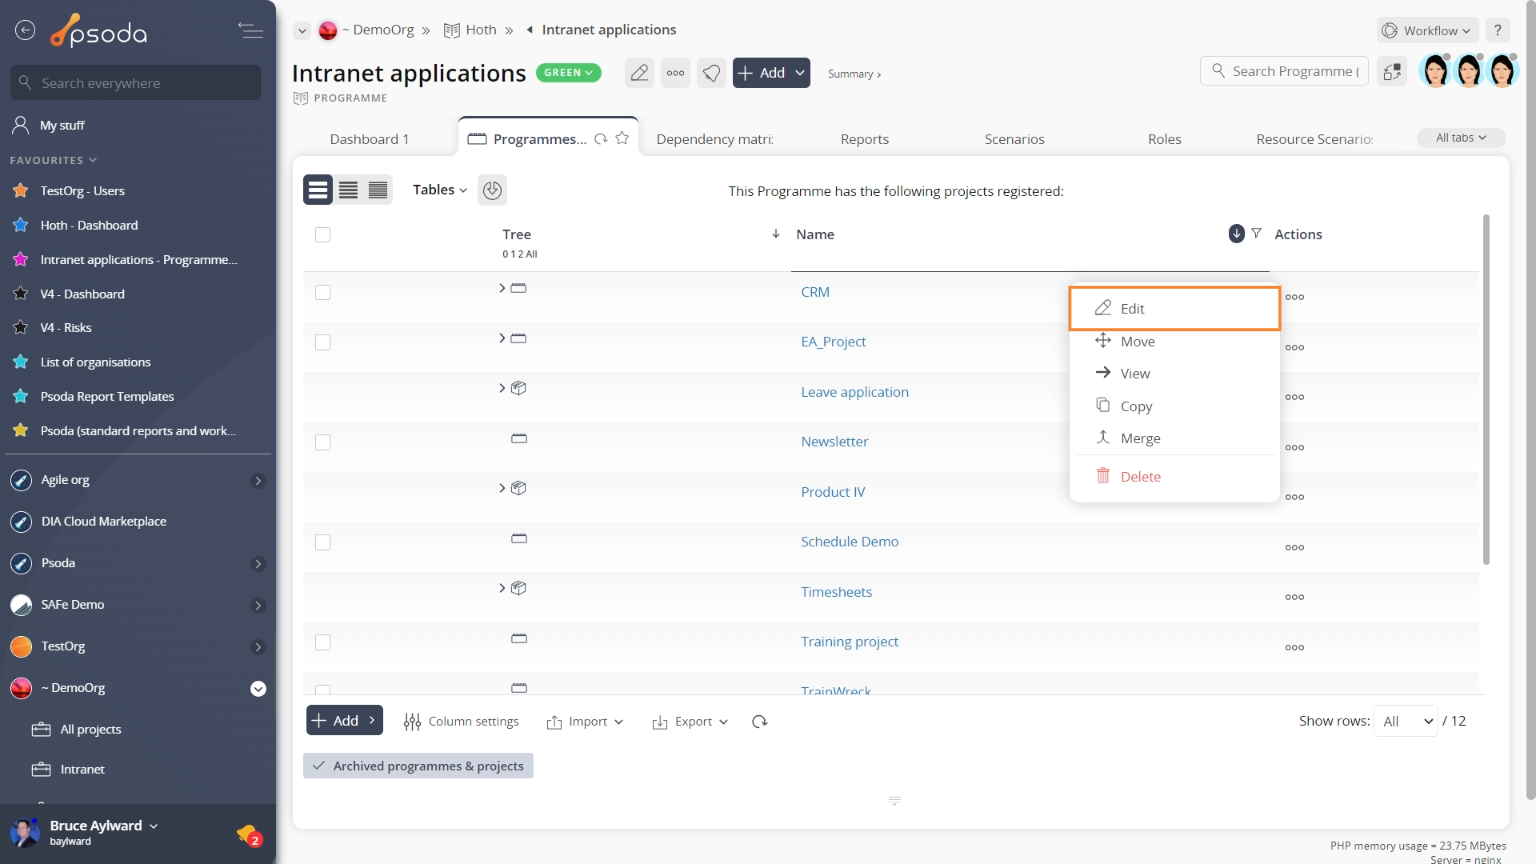
Figure 2 – Access via programmes & projects tab
This popup is shown in Figure 3 and is used to edit an existing project.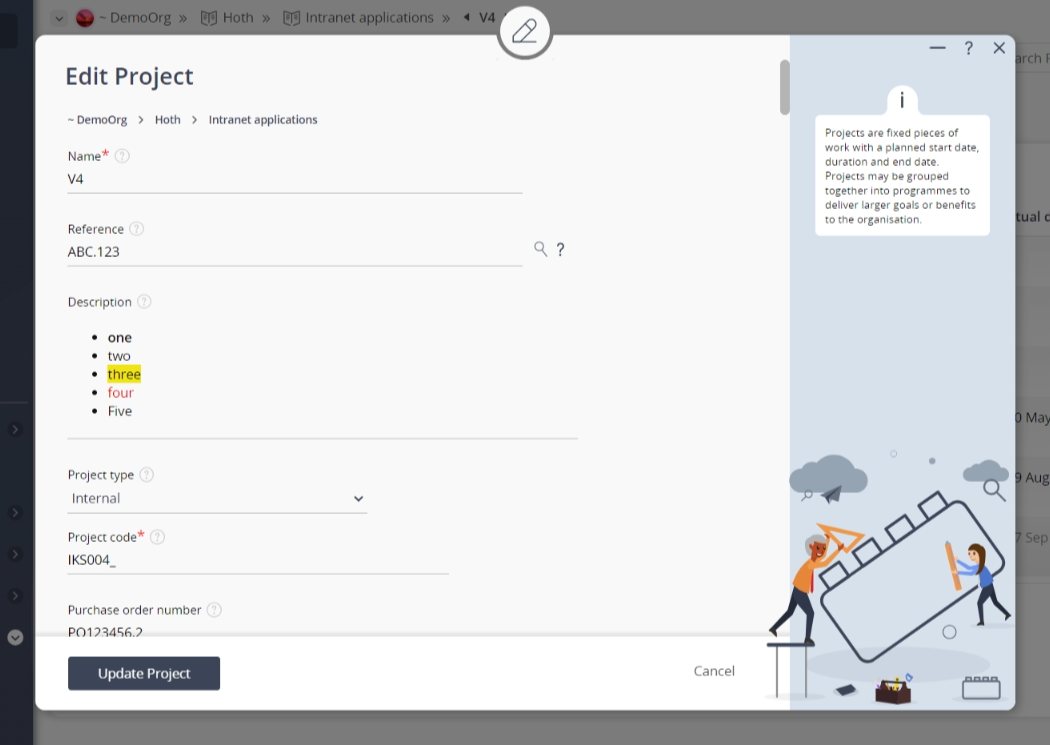
Figure 3 – Edit project form
*The name field is mandatory, if you accidentally try to edit this project’s name to have the same name as an existing project for your programme then you will get a warning message.Section breakdown
The following information provides a breakdown of each of the section views that may be available for you to set the project’s details under each section.Details
Figure 4 – Project details section view
The details for a project can be edited by scrolling to the section indicated in Figure 4 above. Each of the fields available to be customised in this section view are described in the following table:| Reference: | You can edit the reference number for your project here. If you enter a prefix and end it with one or more zeros, e.g. P_00, then you can click on the |
|---|---|
| Description: | You can add or edit the short description of your project here. |
| Project type: | Select or change the project type from this drop-down list. |
| (New project type): | If you have selected the “Add a new defect type” option in the Project type field above, then this field will be visible. Use this field to enter a new project type for this project. |
| Project code: | You can add or edit the code for your project here. The project code will be prefixed to the reference fields for certain asset types, for example risks. |
| Purchase order number: | You can add or edit the purchase order number for your project here if it applies. |
| Default GL number: | This general ledger number will be used as the default when adding new tasks to the project. |
| Start date: | You manually enter or change the date or use |
| Go live date: | You manually enter or change the date or use |
| End date: | You manually enter or change the date or use |
| Budget intervals: | Use this field to set or change the number of budget months you want to include for this project. |
| RAG Status: | Use this drop-down list to set or change the Red/Amber/Green status for this project. |
| Manager: | Use this drop-down list to select or change the manager for this project. |
| Owner: | Use this drop-down list to select or change the owner for this project. |
| Sponsor: | Use this drop-down list to select or change the sponsor for this project. |
| Approved: | Select this check box to indicate that this project has been approved. |
| Archived: | Select this check box to indicate that you want this project to be archived. |
| Workflow: | Select or change the applicable |
 Portfolios
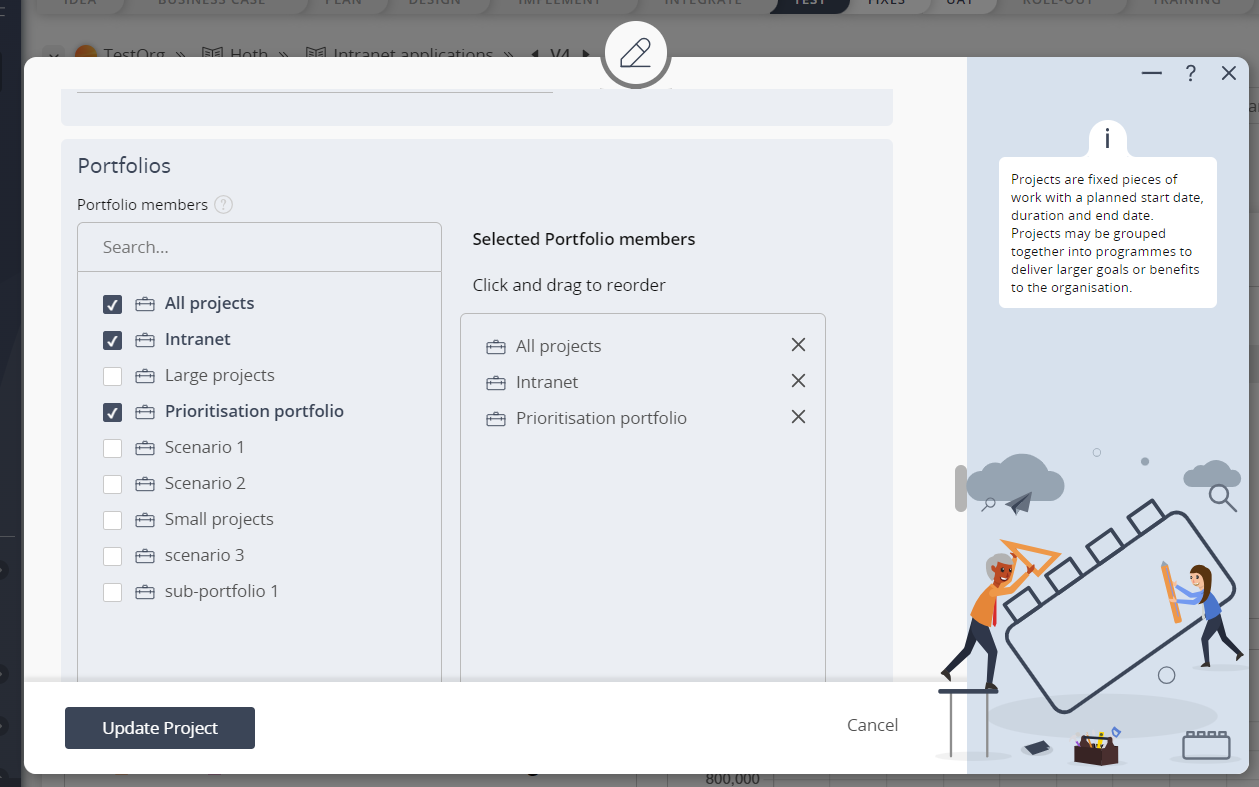 Figure 5 – Portfolios section view
 Indicators
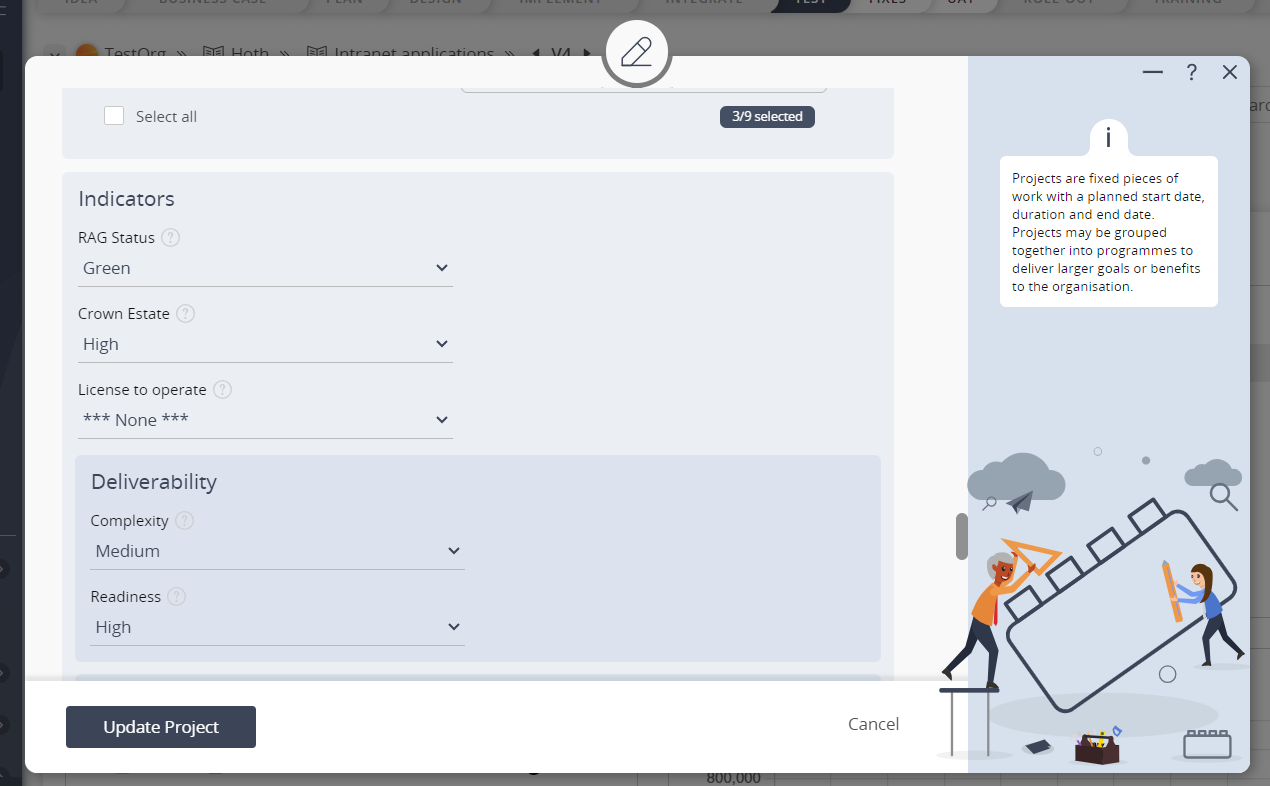 Figure 6 – Indicator section view
 Defect maps

Figure 7 – Defect maps section view
This section will only be available if you have the necessary permissions.
From here, you can add a comma separated list of defect types, modules, versions and builds that will be available to any defects added to this project.
Once you are happy with your entries click the “Update project” button at the bottom of the form. This will update the project with the details that you supplied. Click the “Cancel” button if you want to discard your changes.