On certain input fields you can bold, italic, underline, colour, highlight, add a URL link, add a number list, add a bullet point list, and add an emoji. This is called the WYSIWYG editor.
The WYSIWYG menu will automatically appear at the top of the input field as shown in figure 1.
The editor behaves like the Microsoft Word editor that most people are familiar with.
Click on the B icon to start bolding some text.
Click on the I icon to italic text.
Click on the U icon to start underlining text.
Click the coloured pencil icon to highlight text a certain colour. This opens a menu of colours to choose from.
Click the coloured A icon to change the text to a certain colour. This also opens a menu of colours to choose from.
Click on the link icon to add a URL with a label. This opens a menu where you can enter a label for your URL (text that will appear), and the URL you want it to go to when clicked. Note: the URL must be a valid URL that has a prefix like ‘https://’.
Click on the numbered list icon to create an automatic numbered list you can add to.
Click on the dotted list icon to create an automatic dotted list you can add to.
Click on the emoji icon to insert an emoji into your text. This opens a menu full of emojis to pick from. You can also filter the emojis by using the search box at the top of this menu.
The WYSIWYG menu will automatically appear at the top of the input field as shown in figure 1.
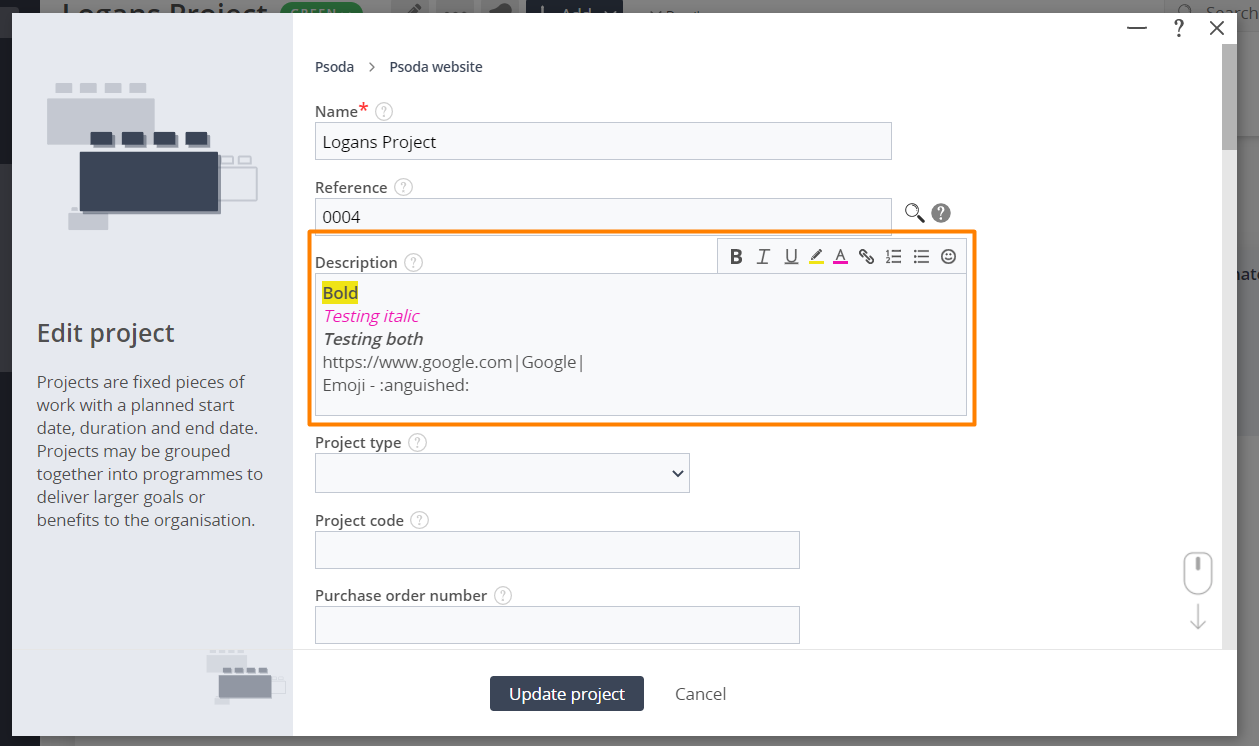
Figure 1 – WYSIWYG editor
The editor behaves like the Microsoft Word editor that most people are familiar with.
Click on the B icon to start bolding some text.
Click on the I icon to italic text.
Click on the U icon to start underlining text.
Click the coloured pencil icon to highlight text a certain colour. This opens a menu of colours to choose from.
Click the coloured A icon to change the text to a certain colour. This also opens a menu of colours to choose from.
Click on the link icon to add a URL with a label. This opens a menu where you can enter a label for your URL (text that will appear), and the URL you want it to go to when clicked. Note: the URL must be a valid URL that has a prefix like ‘https://’.
Click on the numbered list icon to create an automatic numbered list you can add to.
Click on the dotted list icon to create an automatic dotted list you can add to.
Click on the emoji icon to insert an emoji into your text. This opens a menu full of emojis to pick from. You can also filter the emojis by using the search box at the top of this menu.