Creating a new form template
- 1.1 – Creating a new template
- 1.2 – Editing a template
- 1.3 – Editing the form templates title or description
- 1.4 – Changing the form templates workflow state
- 2.1 – Adding a workflow to the form
- 2.2 – Adding an instruction to the form
- 2.3 – Adding a logo to the form
- 2.4 – Editing the form theme
- 2.5 – Making this a public form
- 3.1 – Adding a new section
- 3.2 – Editing a section title
- 3.3 – Deleting a section
- 3.4 – Adding a new field
- 3.5 – Editing a field
- 3.6 – Adding a field tooltip
- 3.7 – Adding and editing a drop-down field
- 4.1 – Previewing your form
1.1 – Creating a new template
Whilst on the dashboard page, navigate to the third section and click on the add template card as shown in Figure 1. Then fill in any desired quick information and click create. You will then see your newly created form template appear first in the list.
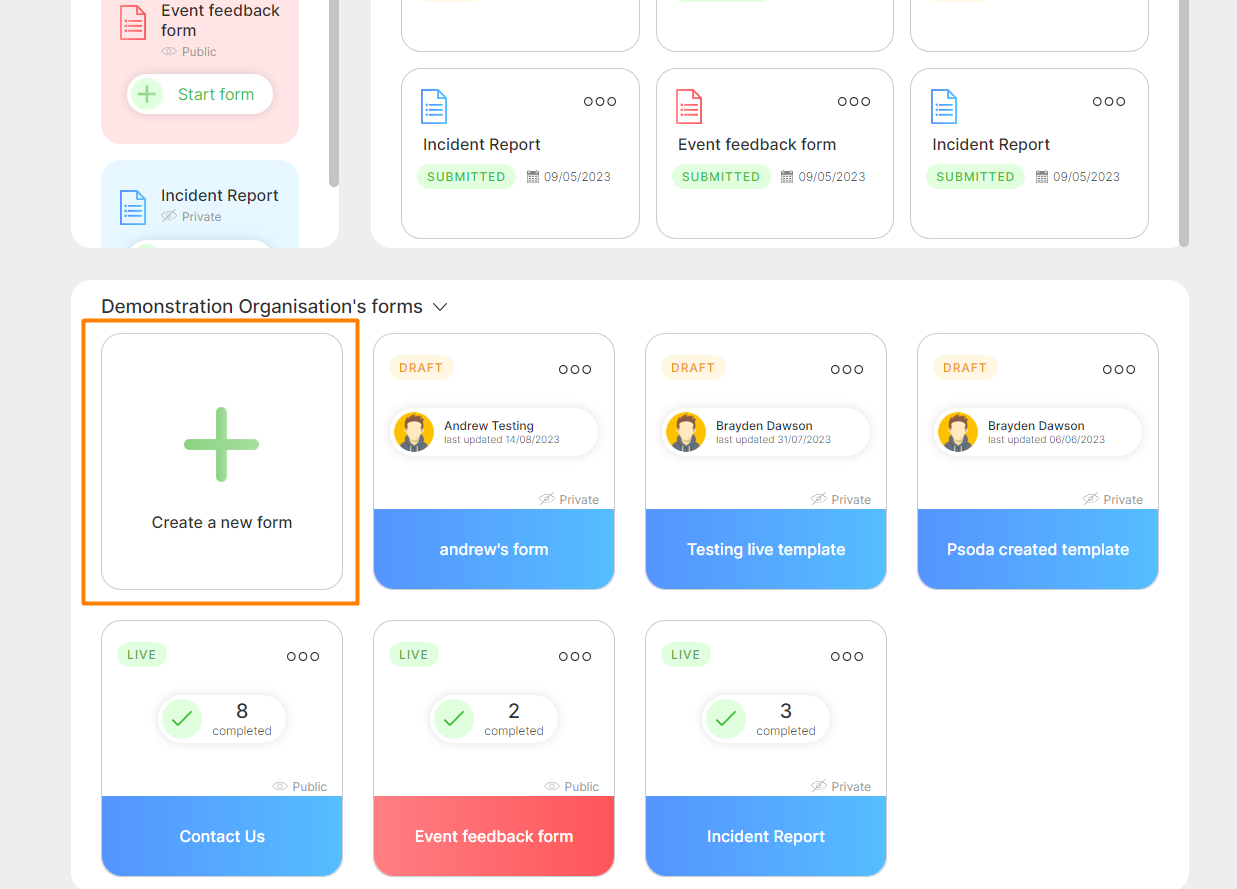
Figure 1 – Psoda Forms create form card
1.2 – Editing A form template
To begin editing your new form template, click on the templates card, you will then be navigated to the form builder page as seen below in Figure 2.
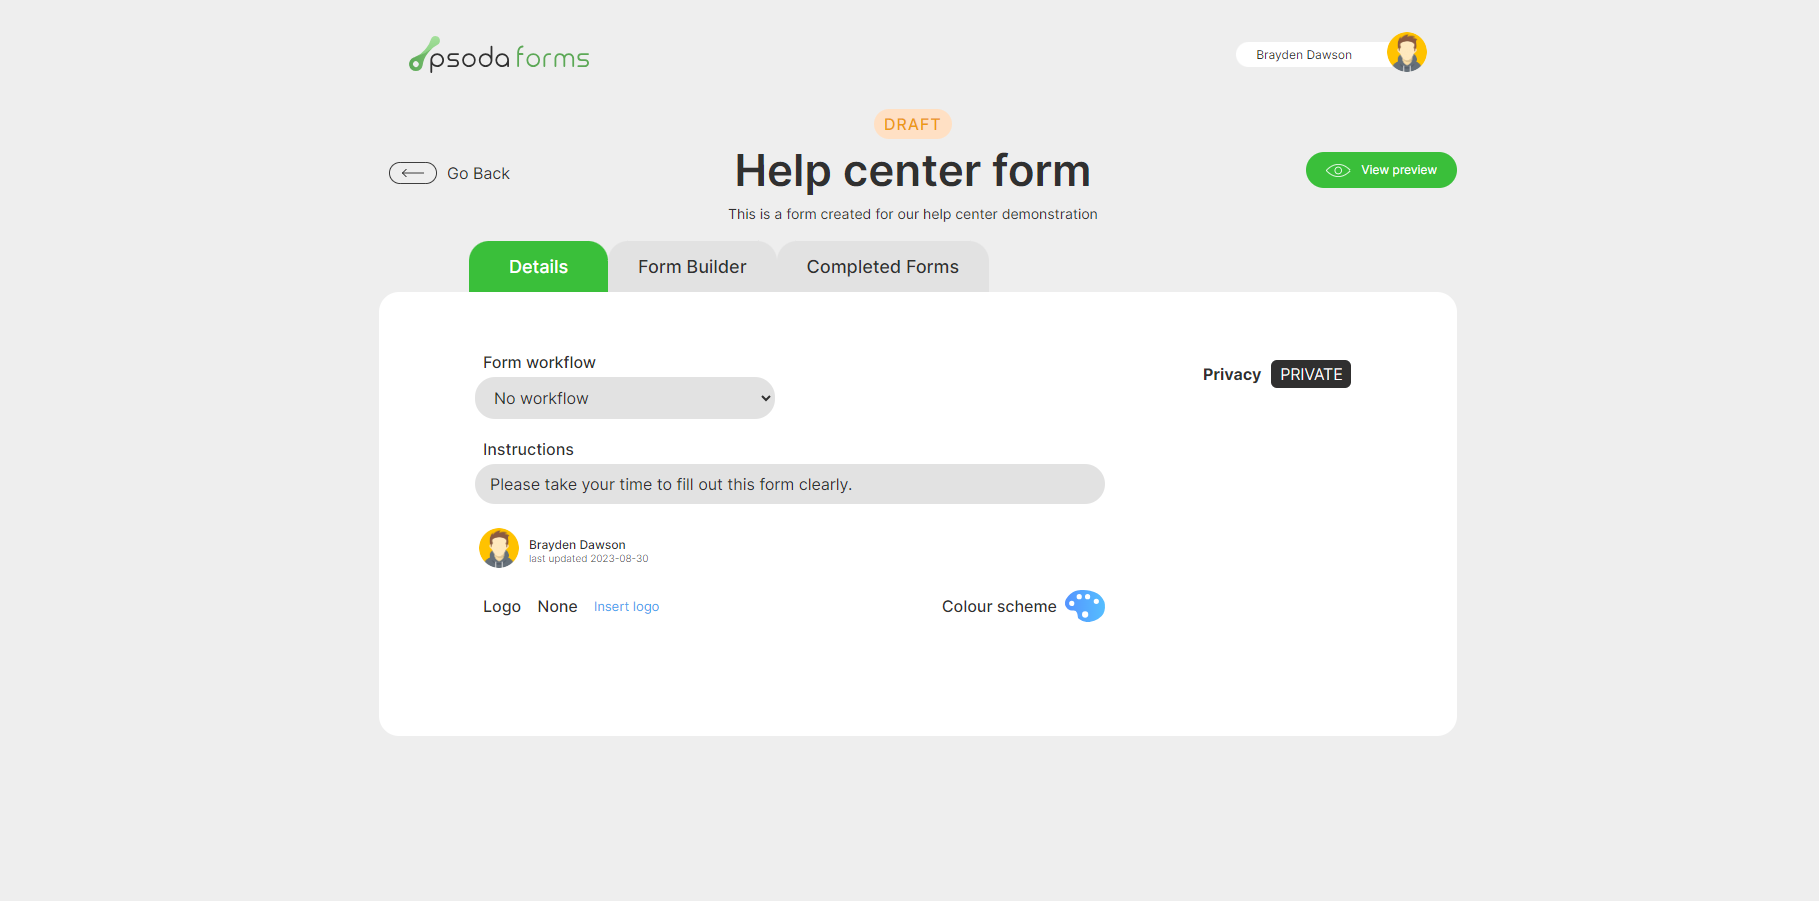
Figure 2 – Psoda Forms builder page details tab
If you wish to navigate back to the Dashboard page at any time you can do so by clicking the Go back button, as seen in Figure 3.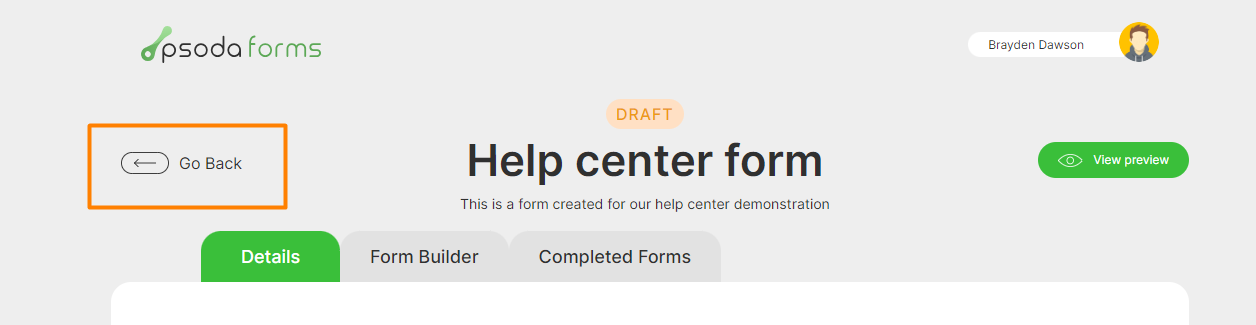
Figure 3 – Psoda Forms back navigation
Below in Figure 4 indicates all the tabs available on the form builder page. The Detail tab holds all information and settings relating to this form template. The Builder tab is where you will add your fields and sections to your form. The Completed forms tab will list all created forms made off of this form template.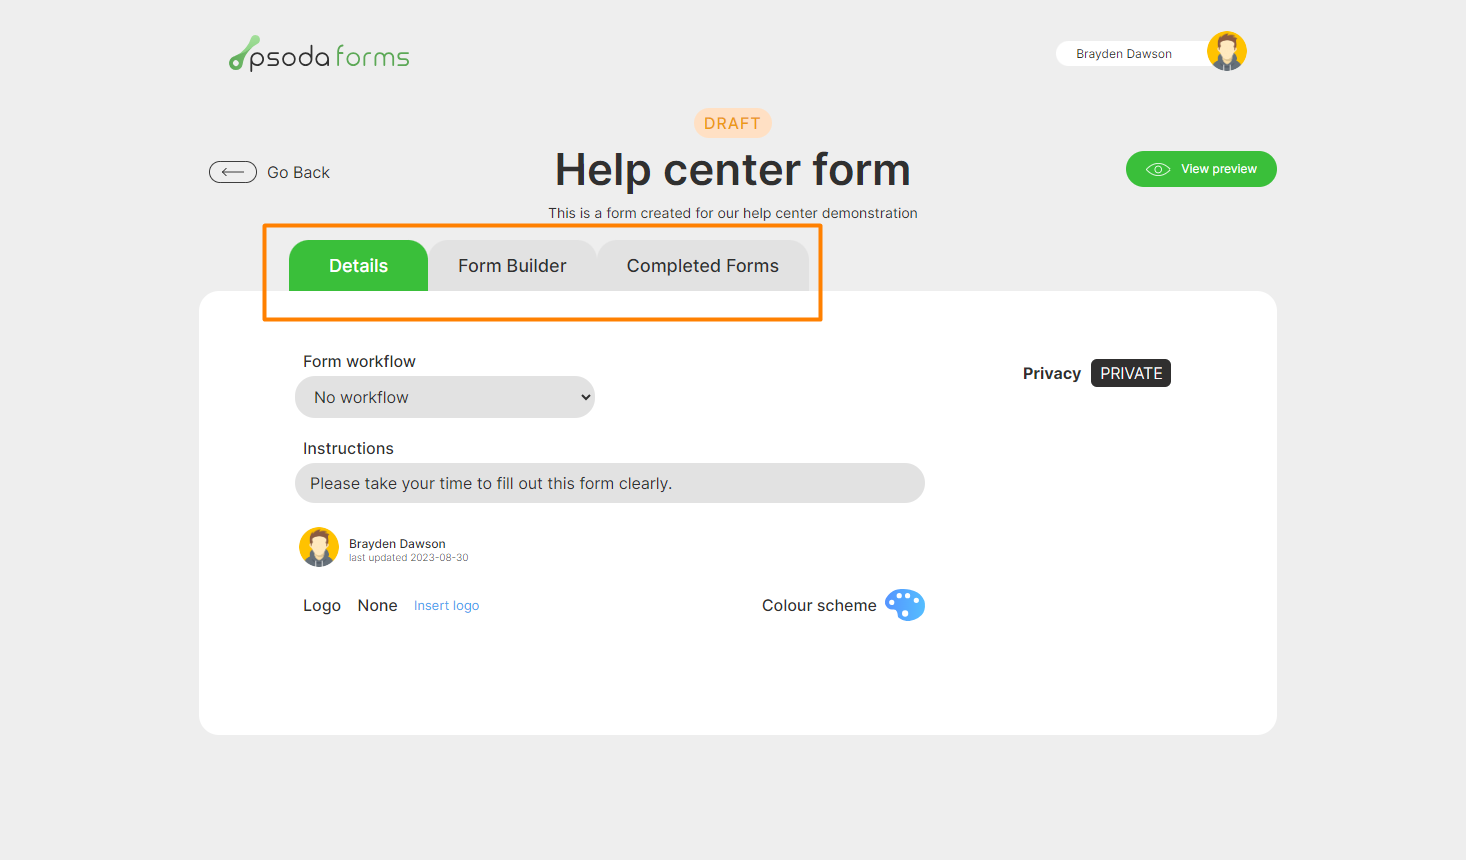
Figure 4 – Psoda Forms builder page tabs
1.3 – Title and description edit
Editing the title or description can be done by clicking on the text using inline editing, as seen below in Figure 5.
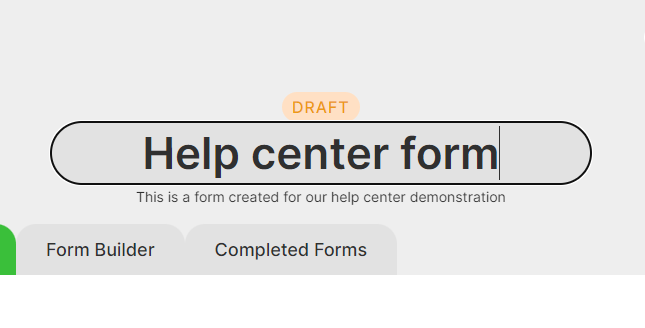
Figure 5 – Psoda Forms inline editing
1.4 – Change template workflow state
Here you can change the current state of your form templates workflow by clicking on the small workflow drop-down as indicated in Figure 6 below.
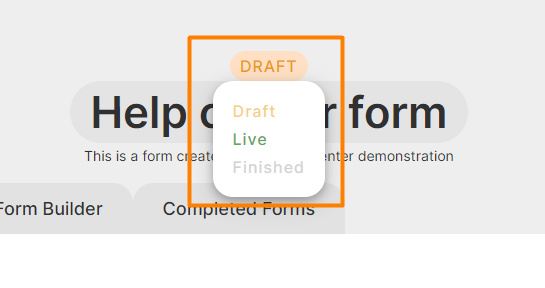
Figure 6 – Psoda Forms template workflow transition
On the Details tab you can edit information relating to the current form template, such as adding and editing instructions, adding or changing form workflows, adding or changing the forms logo, changing the forms theme, and setting the form to be a public or private form.2.1 – Adding a workflow to the form
You can add or change the forms workflow created form this template from the drop-down field labeled Form workflow as indicated below in Figure 7.
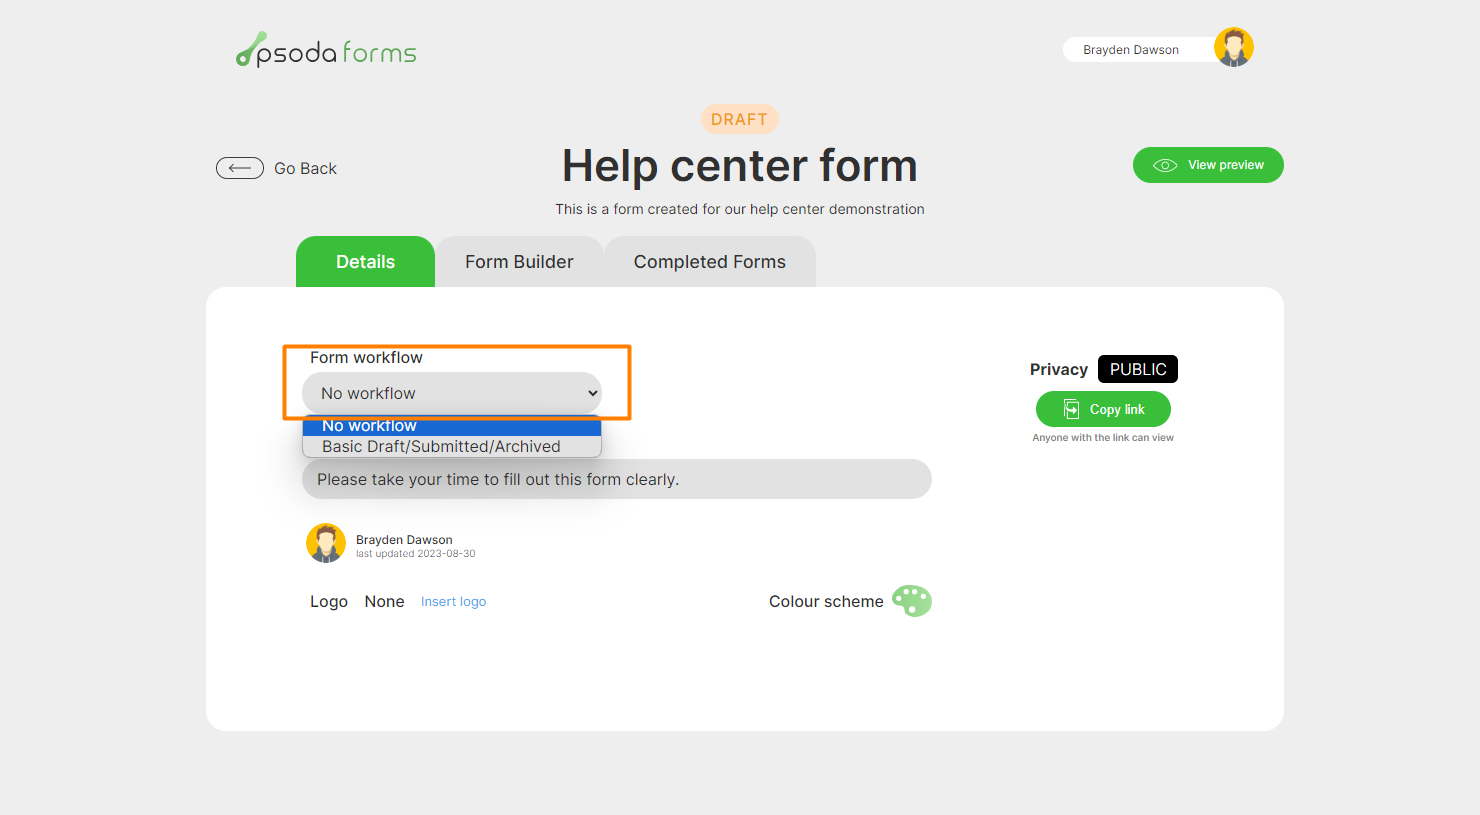
Figure 7 – Psoda Forms add form workflow
This will list all form workflows available to your organisation. This can be changed at any time and the forms workflow will be set once the form has been created.2.2 – Adding an instruction to the form
To add an instruction message for each form created from this template, click into the inline editing input under the label Instructions as seen below in Figure 8.
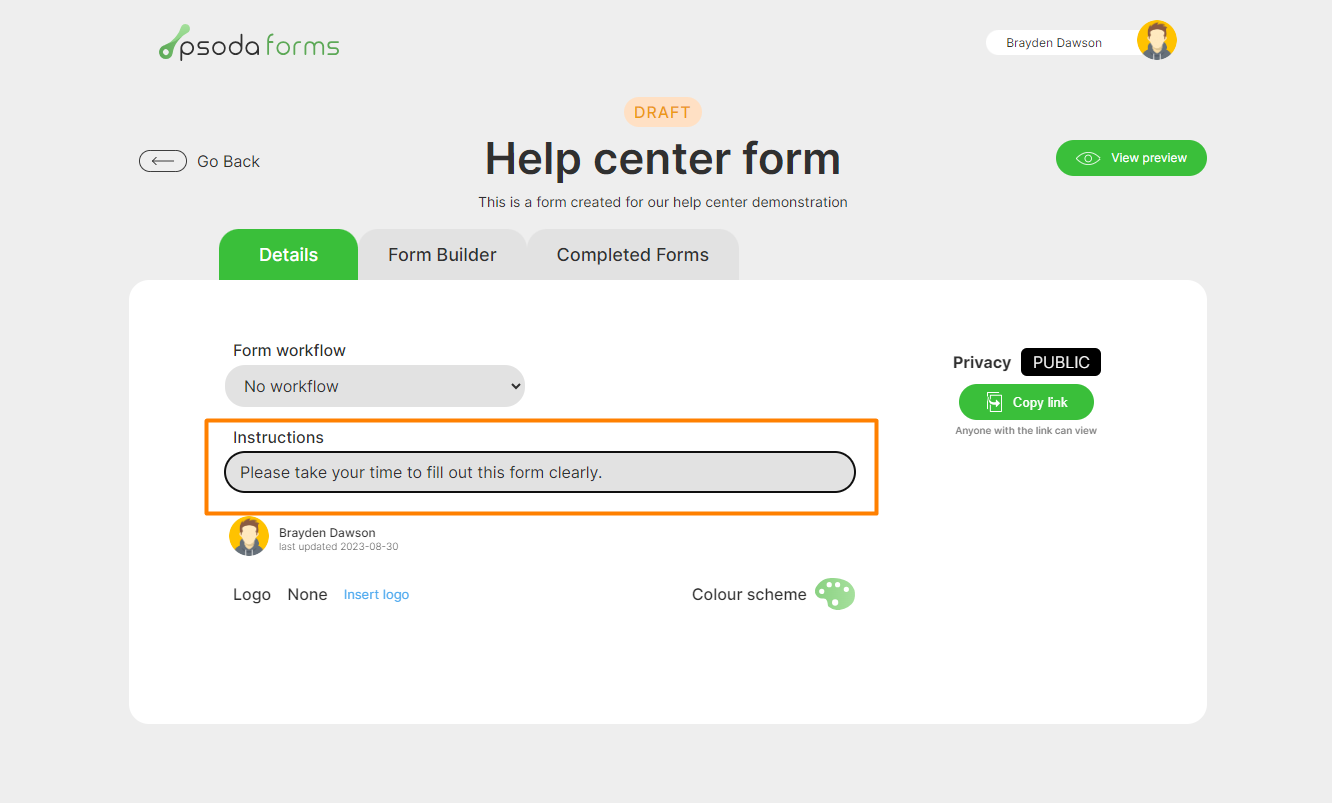
Figure 8 – Psoda Forms add instruction
When filling out a form using PsodaForms, this message will display in the forms first page. If no instruction has been set the instruction page will not display and the first page shown will contain all fields within your first section.2.3 – Adding a logo to the form template
To insert a logo to this form, click on the Insert logo text, this will display a drop-down where you can upload a new logo from your device or pick from an existing logo as seen below in Figure 9.
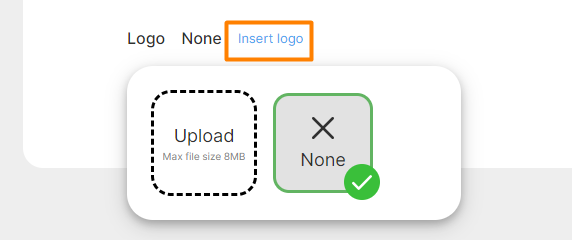
Figure 9 – Psoda Forms adding a logo
2.4 – Editing the form template theme
To change the theme of your form, click the paint pallete icon, this will display a drop-down with all currently available colour themes. You can select any of these by clicking on them. See Figure 10 below. The default theme will be Blue.
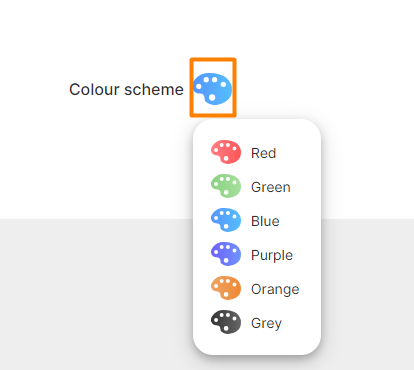
Figure 10 – Psoda Forms selecting a theme
Make this a public formWith the addition of Psoda Forms we now have Public forms available. A public form can be completed by any individual that has been given the required url and does not need a Psoda account to do so. By default all new forms are set to Private. To change your form to a public form, click on the Public/Private toggle as seen below in Figure 11. Please note, the form can only be viewed publicly if it is in an approved state and is not archived.
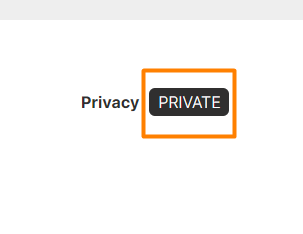
Figure 11 – Psoda Forms public/private toggle
The toggle will change to Public, indicating that this template forms are now public. To retrieve the url needed to fill out this form publicly, click on the Copy link button as indicated below in Figure 12. The link will be copied directly to your clipboard where you can either share via email or embed to your website. Please note, if you wish to change this public url link at any time this will need to be done in Psoda.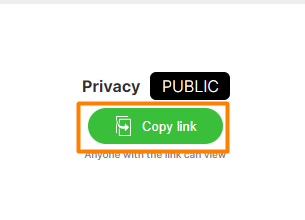
Figure 12 – Psoda Forms copy public link
3.1 – Adding a new sectionNow we are ready to start adding fields to this form. To do so, click on the Form Builder tab as indicated in Figure 4. To begin adding fields, first we need a section, click on the Add section button located on this page as indicated in Figure 13 below.
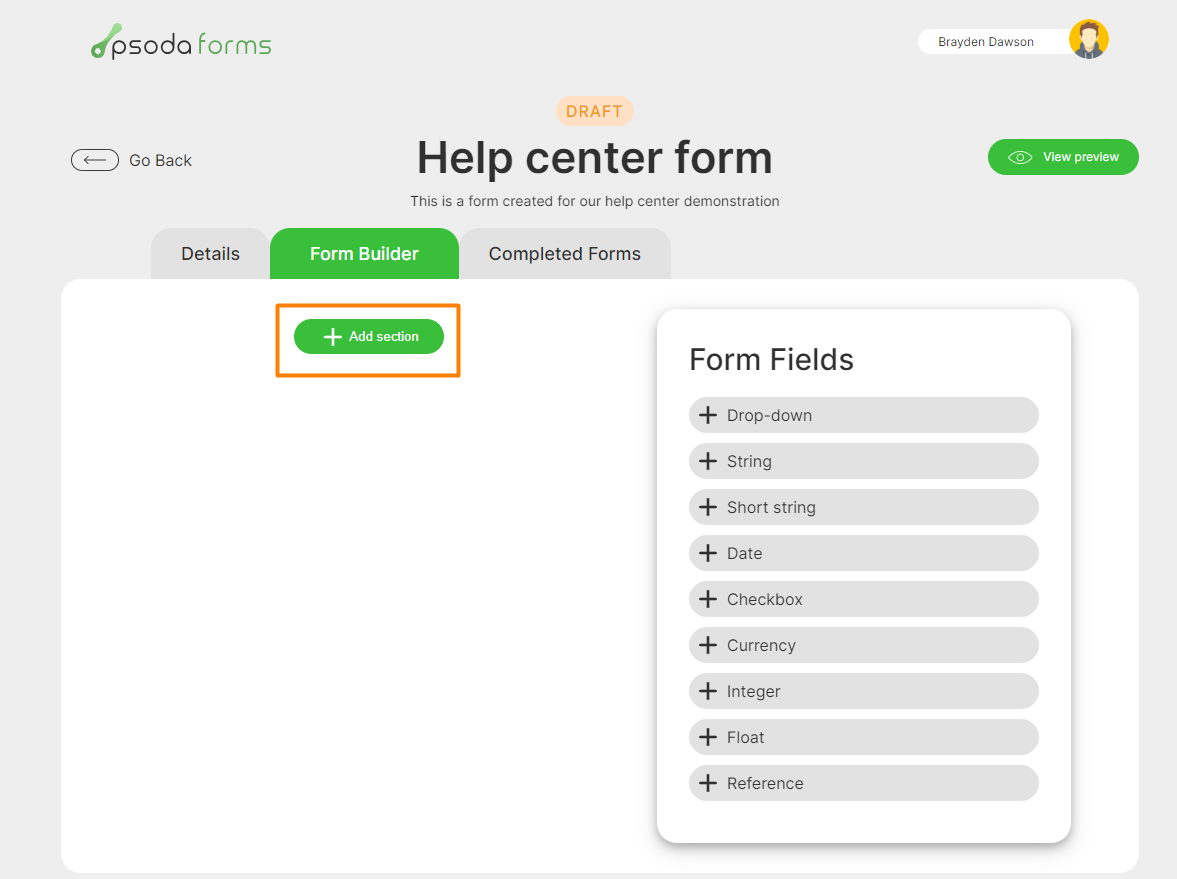
Figure 13 – Psoda Forms adding a section
3.2 – Editing a sectionBy default the section title will be an indication of the section number in ascending order, to edit this to display a section name of your choice, click on the section title and inline edit as indicated in Figure 13.1 below.
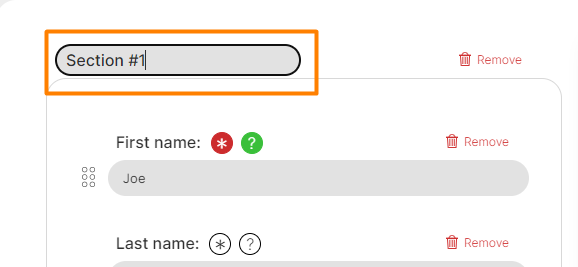
Figure 13 – Psoda Forms editing a section title
Each section will act as a new page when filling out a form using PsodaForms.3.3 – Removing a section
To remove a section, click on the remove icon as indicated in Figure 13.2 below. Note, all fields within a section will be deleted if that section is removed.
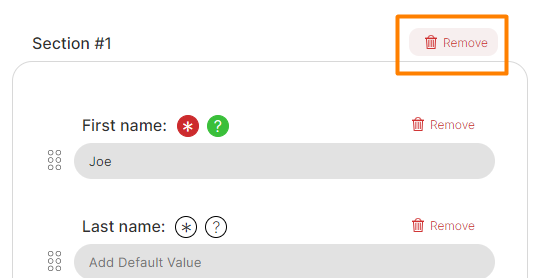
Figure 13 – Psoda Forms removing a section
3.4 – Adding a new field After adding a new section you will se an empty section appear, you can add new field to this section by either clicking on one of the field types available from the Field picker, or if you have multiple sections and fields already, you can insert your new field in any position you like by dragging on the field type and dropping it in your desired position. Below in Figure 14 highlights one of the available field types that can be clicked or dragged, in this example we are using the Short text field type.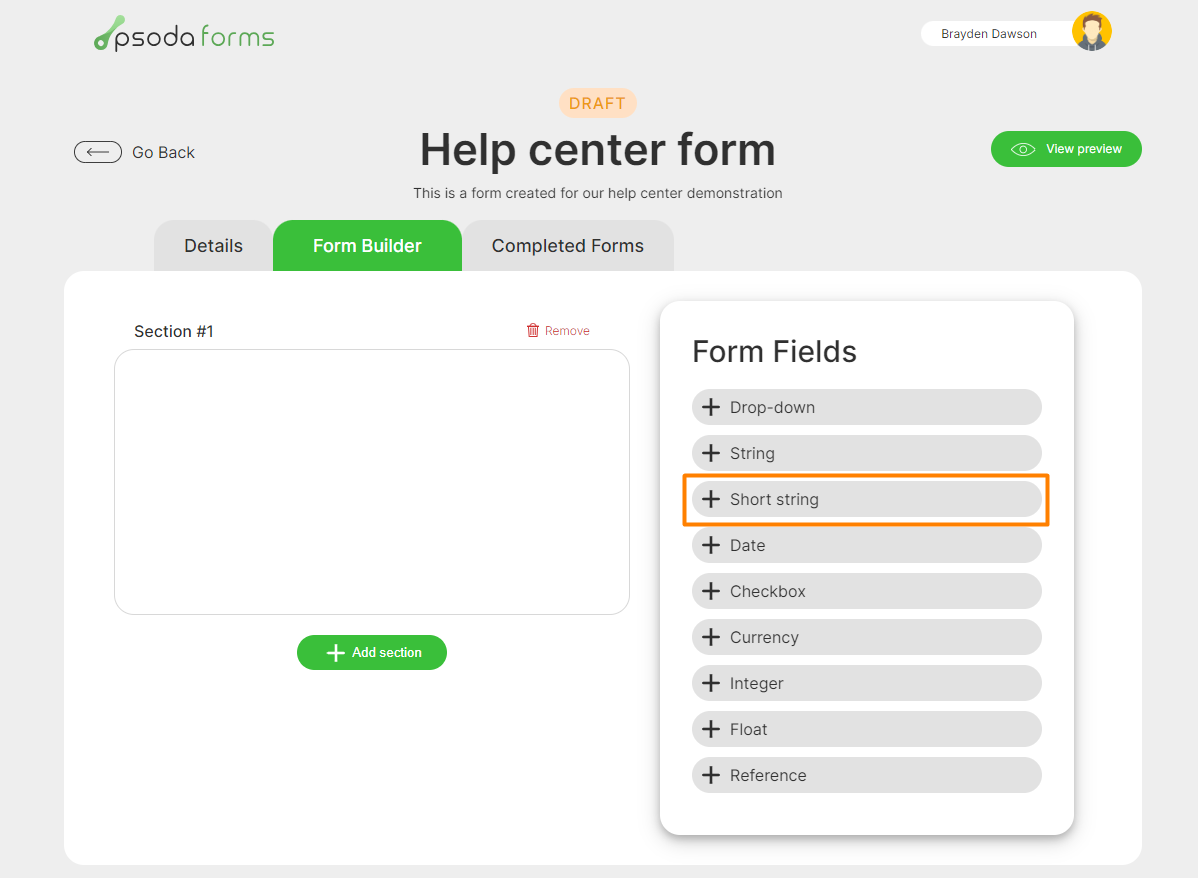
Figure 14 – Psoda Forms adding a short text field
3.5 – Editing a fieldTo edit any field title, simply click on the titles text which will allow inline editing, as indicated in Figure 15 below. When adding a new field this input will be in focus so you can edit its title right away. By default the fields title will be Add (field type) title.
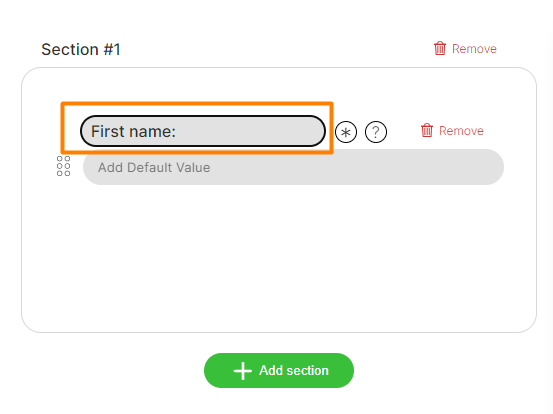
Figure 15 – Psoda Forms editing a fields title
To add or edit the default value of this field, click in the input located below the title as seen in Figure 16 below. By default this will be empty with the placeholder Add default value this indicates that this field will be empty by default.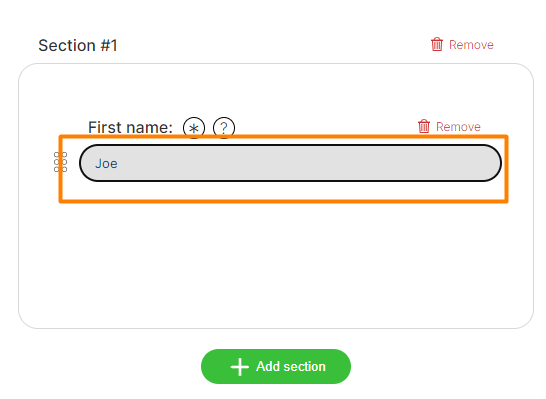
Figure 16 – Psoda Forms editing a fields default value
3.6 – Adding a field tooltipTo add or edit an existing field tooltip, click on the ? button, as highlighted in Figure 17 below. This will open up a small text area popup where you can add your description for this field. This description will act as a tooltip that can be displayed next to your field inside your form. The button will highlight green indicating that this field has an active tooltip.

Figure 17 – Psoda Forms – Adding a field tooltip
3.7 – Adding and editing a drop-down fieldAdd a new drop-down field by using one of the methods indicated in section 3.4. By default one option will be created with empty values. To edit the label and value, simply click into the provided inputs. To add a new drop-down option click on the button Add option as indicated in Figure 18 below. This will add a new empty option to this drop-down field.
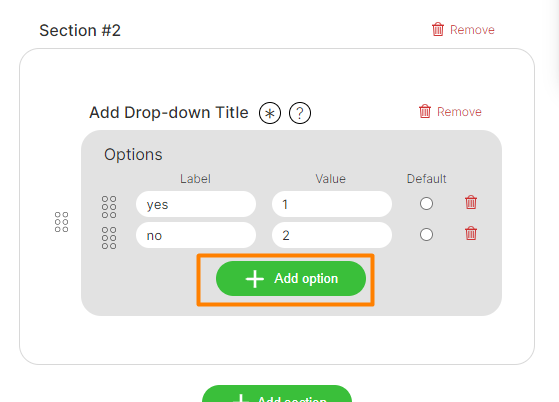
Figure 18 – Psoda Forms Adding a new option to a drop-down
To set the default value for this drop-down click on the options default value radio button as indicated in Figure 19 below. If no default has been chosen the first option will be displayed as a default.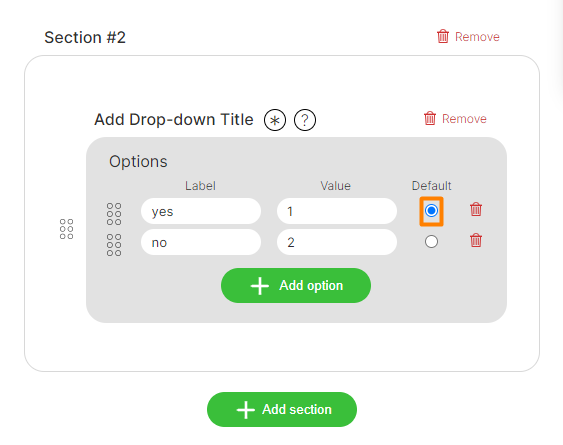
Figure 19 – Psoda Forms setting a default value for a drop-down
To remove an option from this drop-down, click on the red bin icon next that option, as indicated below in Figure 20. You can also drag and reorder the drop-down options by click and dragging on the drag icon.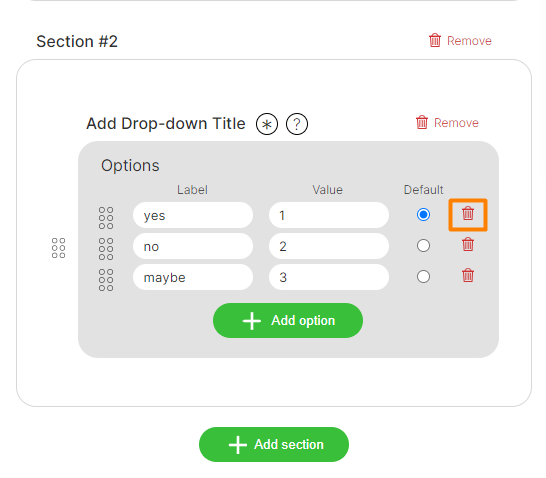
Figure 20 – Psoda Forms removing a drop-down option
4.1 – Previewing your formTo view a preview of what a form will look like from this template, click on the View preview button as indicated below in Figure 21.

Figure 21 – Psoda Forms view a preview of your form
This will redirect you to the form page for this form template. You can return back to the editing page at any time by clicking the Go back button located at the top left corner of the page, as indicated in Figure 22 below.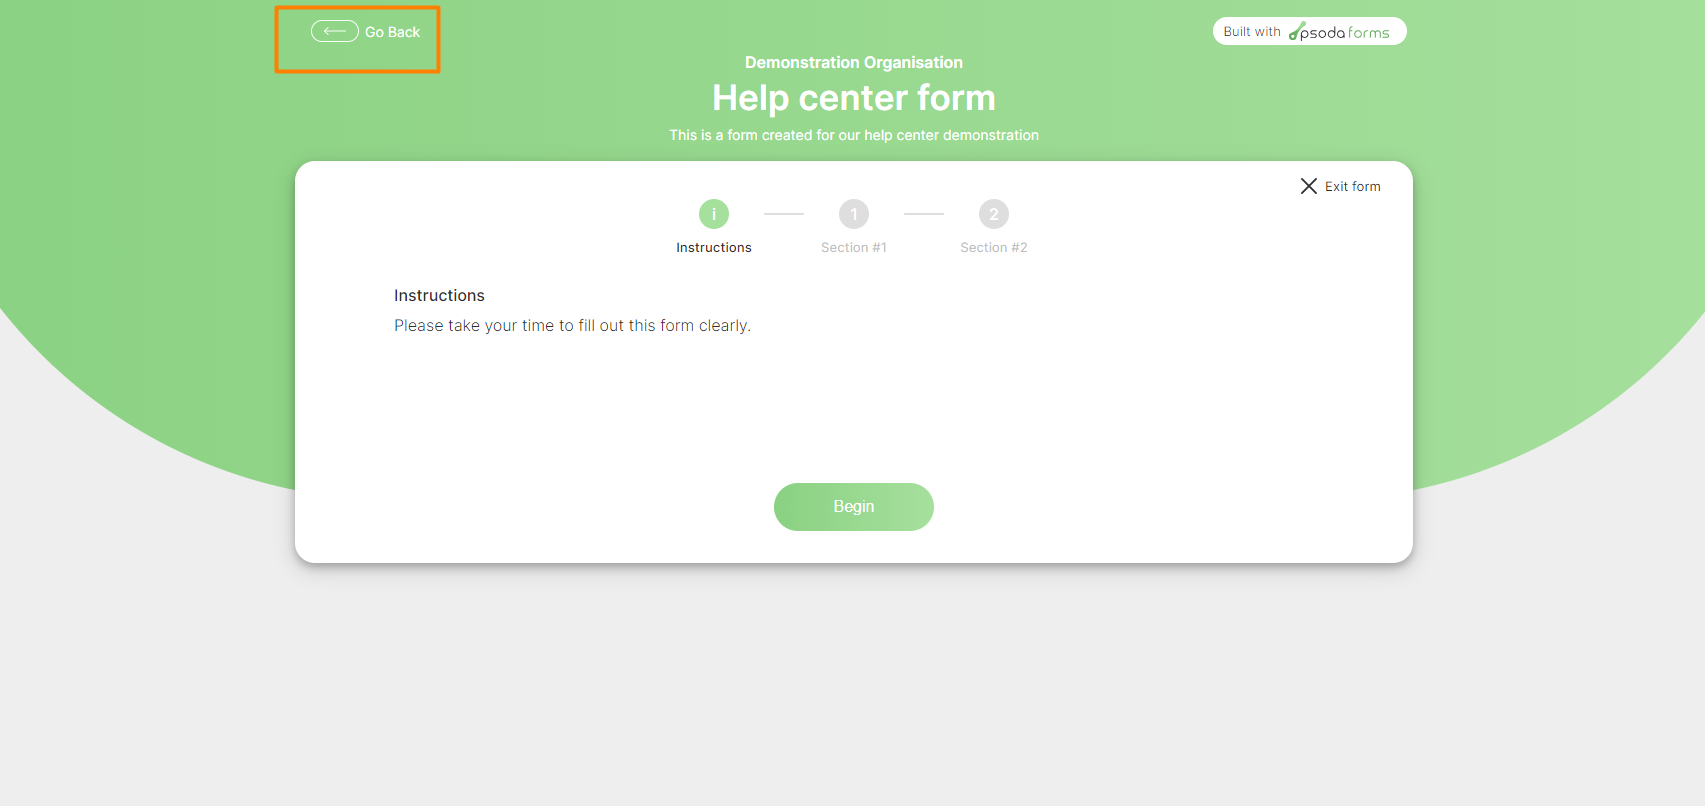
Figure 22 – Psoda Forms navigate back to edit page
Whilst viewing a form in preview mode, you can still fill out and complete just as you would normally as indicated on our help center page Psoda Forms – filling out a form.Congratulations you have created a new form template, from here you can set the form templates workflow state to an approved one, that way others in your organisation can start filling out forms, you can also set this form template to Public as indicated ins section 2.5 of this page and begin sharing that link.
4.2 – Viewing completed forms
To view a list of all forms created from this template, click the tab button Completed forms in the area indicated in Figure 4.
If you would like to see how to fill out a form, visit Psoda Forms – filling out a form.