This popup form can be used to import a number of vendors into a selected organisation and can be accessed via the  import icon at the bottom of the Vendors tab at the
  organisation view page, as shown in Figure 1.
 import consists of a number of phases:
The import popup is shown in conjunction with each phase below, and can be used to import a number of vendors from a Comma Separated Values (CSV) file into the selected organisation.
There are four steps when importing vendors:
import consists of a number of phases:
The import popup is shown in conjunction with each phase below, and can be used to import a number of vendors from a Comma Separated Values (CSV) file into the selected organisation.
There are four steps when importing vendors:
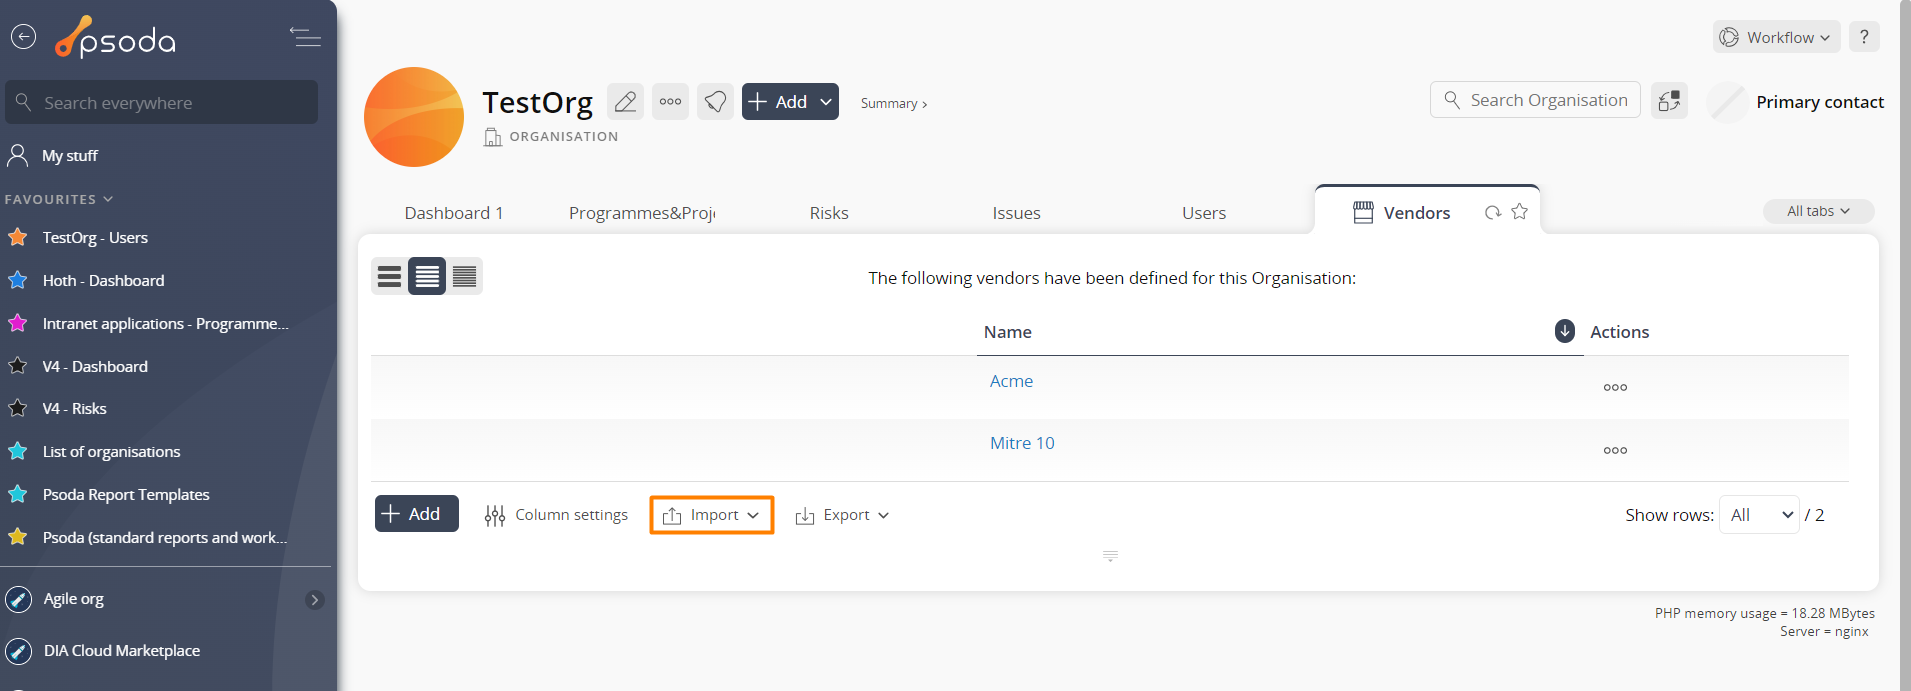
Figure 1 – Access via risks tab
Completing the vendorsPhase 1 – Import file
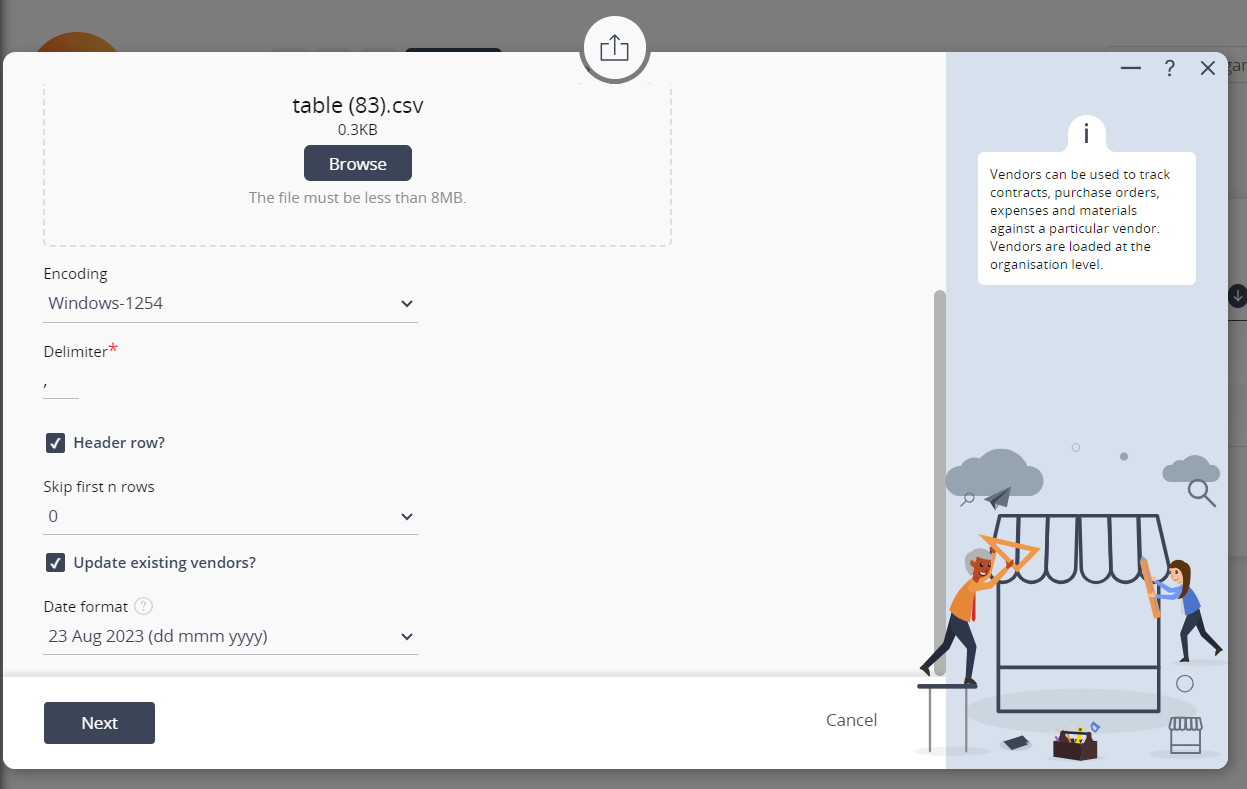 Figure 2 – Import vendors form (1)
Phase 2 – Mapping
 Figure 3 – Import vendors form (2)
Phase 3 – Default values
Phase 3 allows you to set default values for any fields you chose not to import from the file. The fields may be the same as for creating a new vendor, but the fields present in this phase are very much dependent on which options you selected in phase 2. Click the Import vendors button to start importing the vendors.Phase 4 – Importing…
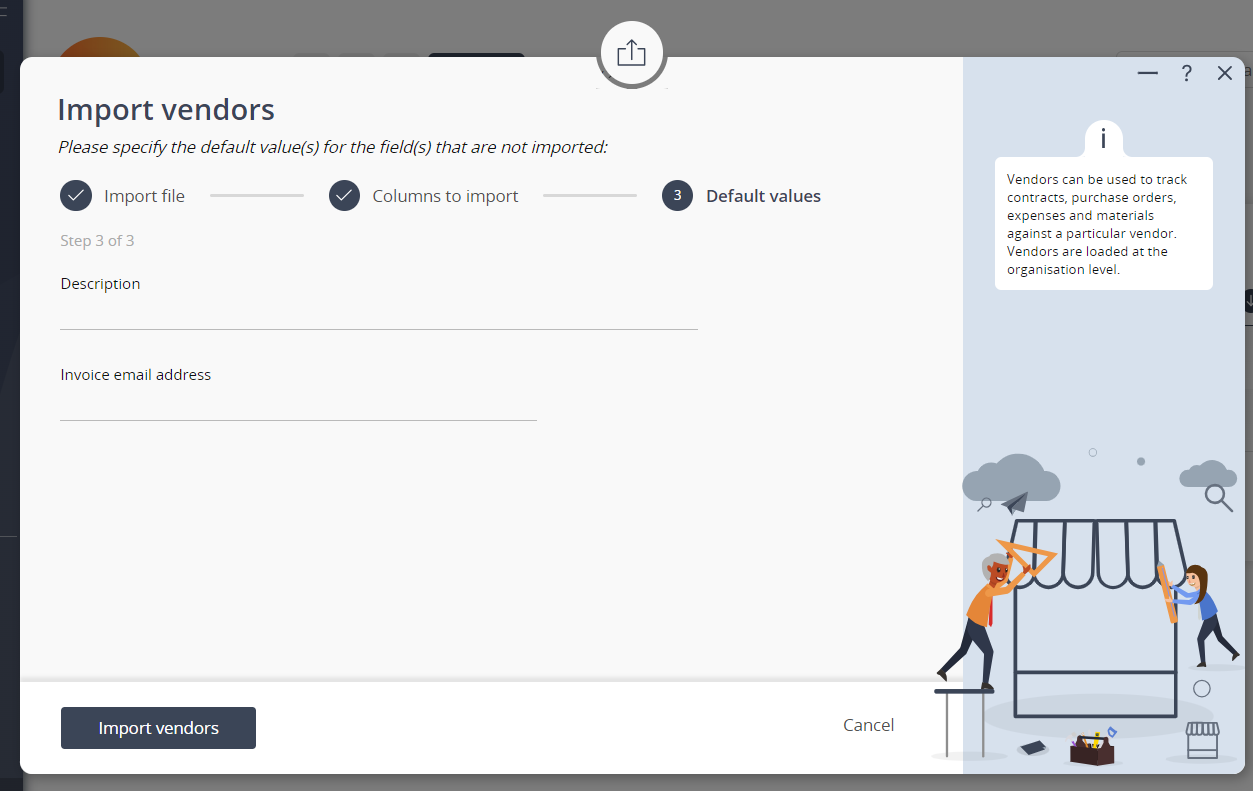
Figure 4 – Import vendors form (3)
Phase 4 performs the actual import. You will see a progress bar that will automatically update and show you how much of the file has been imported. If you do not see automatic updates then you can force a refresh with the Refresh button. Once the import is complete the Refresh button will change to a Next button.Phase 5 – Results
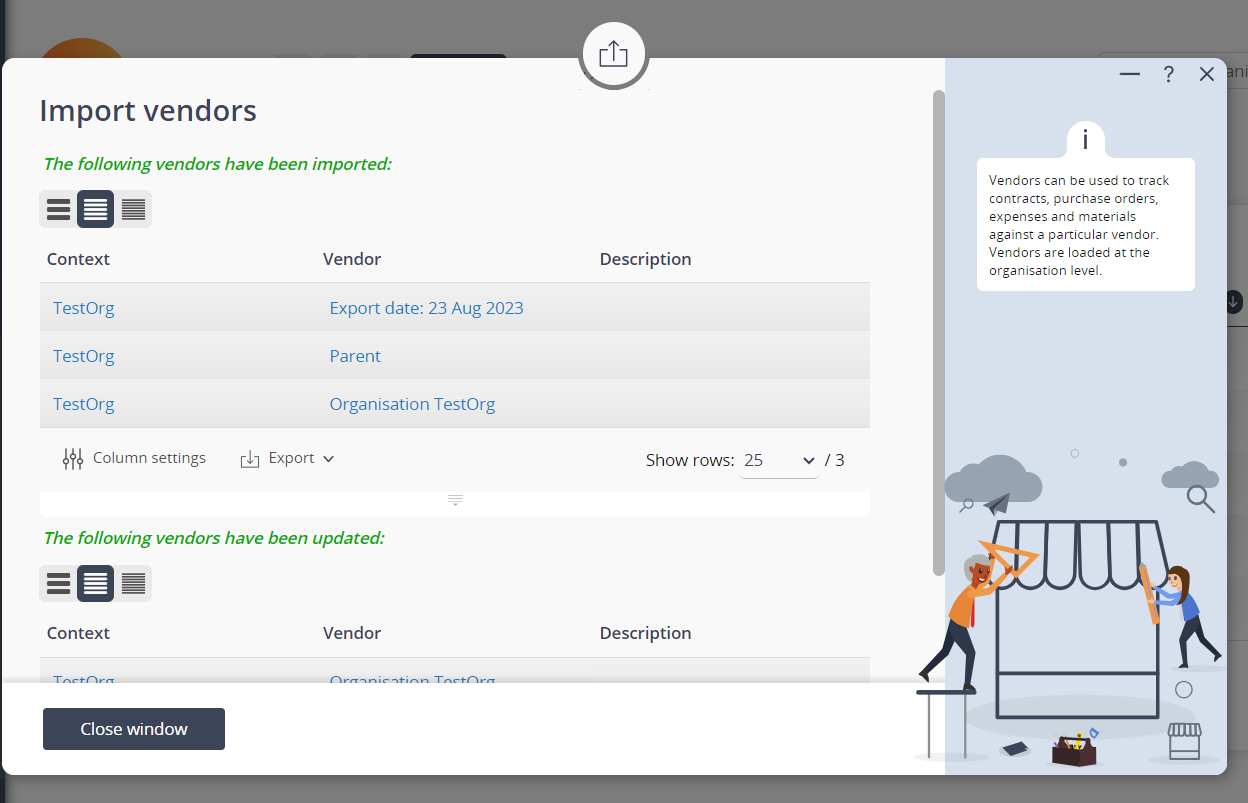 Figure 5 – Import vendors results