You will only be able to add timesheets if you have sufficient access rights.
This tutorial takes you through the steps to add a new timesheet for yourself, to add some tasks to your new timesheet, make changes and to submit your timesheet for approval.
 actions column menu for that task.


Adding a new timesheet
To add a new timesheet for yourself you have to make sure you are in your personal space first. In the navigator on the left-hand side of the page click on the ‘My stuff’ link. If you want to see which timesheets you have already you can select the ‘Timesheets’ tab in the main area of the page. Click on the ‘Add timesheet’ button in the add menu at the top of the page to open the Add timesheet form.Week starting
The first form field is a drop-down list that allows you to select starting date of the week you want to add a new timesheet for. Each timesheet spans one week and the start date depends on the first day of the week that you’ve configured for your organisation. By default the first day of the week is Sunday. If you already have a timesheet for a particular week then that date will not appear in the drop-down list.Include tasks from previous timesheet
If you’d like to automatically copy the tasks from your previous timesheet then leave this checkbox checked.Add more timesheets
If you’d like to add more than one timesheet you can check this checkbox. The form will remain open and automatically select the next start date after you click on the ‘Add timesheet’ button. Finally click on the ‘Add timesheet’ button to add the new timesheet. Of course if you do not want to add a timesheet at this stage you can click on the ‘Cancel’ button instead.Adding tasks to your timesheet
After you’ve added your new timesheet you can add tasks to it. Click on the timesheet’s start date to view its details. Select the ‘Timesheet tasks’ tab to view a list of the tasks already added to this timesheet. Click on the ‘Add timesheet task’ button in the add menu to open the Add timesheet task form.Task
If you have any tasks allocated to you, for example from a project, then you will be able to select a task from this drop-down list. If you do not have any tasks allocated to you then this field will not appear.Reference
If you have select ‘None’ in the Task drop-down list, or do not have any tasks allocated to you, then you can enter an ad-hoc reference number for your timesheet task in this field. If you selected a task from the drop-down list then this field will be ignored.Sunday – Saturday
The next 7 fields allows you to enter your number of hours worked for each day of the week.Add more timesheet tasks
Leave this checkbox checked if you’d like to add some more tasks to your timesheet. The form will be left open when you click on the ‘Add timesheet task’ button at the bottom of the form. Finally click on the ‘Add timesheet task’ button to add the new task to your timesheet. Of course if you do not want to add a task at this stage you can click on the ‘Cancel’ button instead.Making changes
If you want to change the hours you worked on a particular day for a task on your timesheet you can simply click on that cell in your timesheet. This will change the cell into an in-line editor. You can change the value and then press enter to save or you can press escape if you want to revert to the original value. In-line editing will only work if your browser supports JavaScript and AJAX. If your browser does not support in-line editing you can still edit the task’s hours by clicking on the pencil icon in theSubmitting your timesheet
If you have workflow enabled on your account then you should be able to submit your timesheet for approval. Look for the ‘Submit’ button in the three-dot options menu at the top of the view timesheet details page. If you have a line manager configured for your account then your timesheet will appear in your line manager’s dashboard for approval. They can use the ‘Approve’ or ‘Reject’ option to process your timesheet. You can also ‘Retract’ your timesheet if you want to make some changes. Remember to resubmit the timesheet after you’ve made the changes.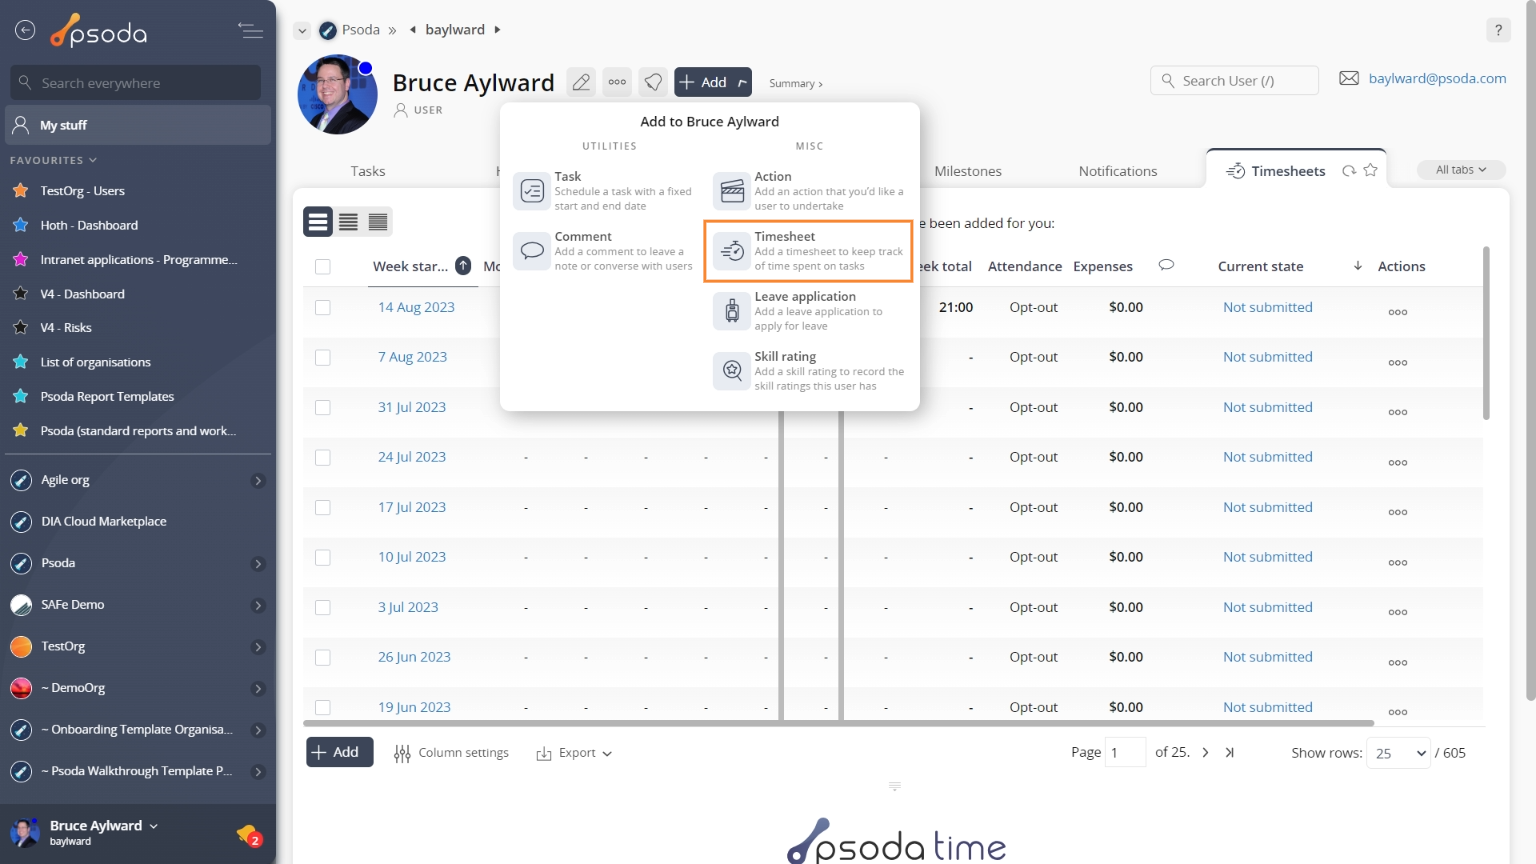
Figure 1 – Access via add menu
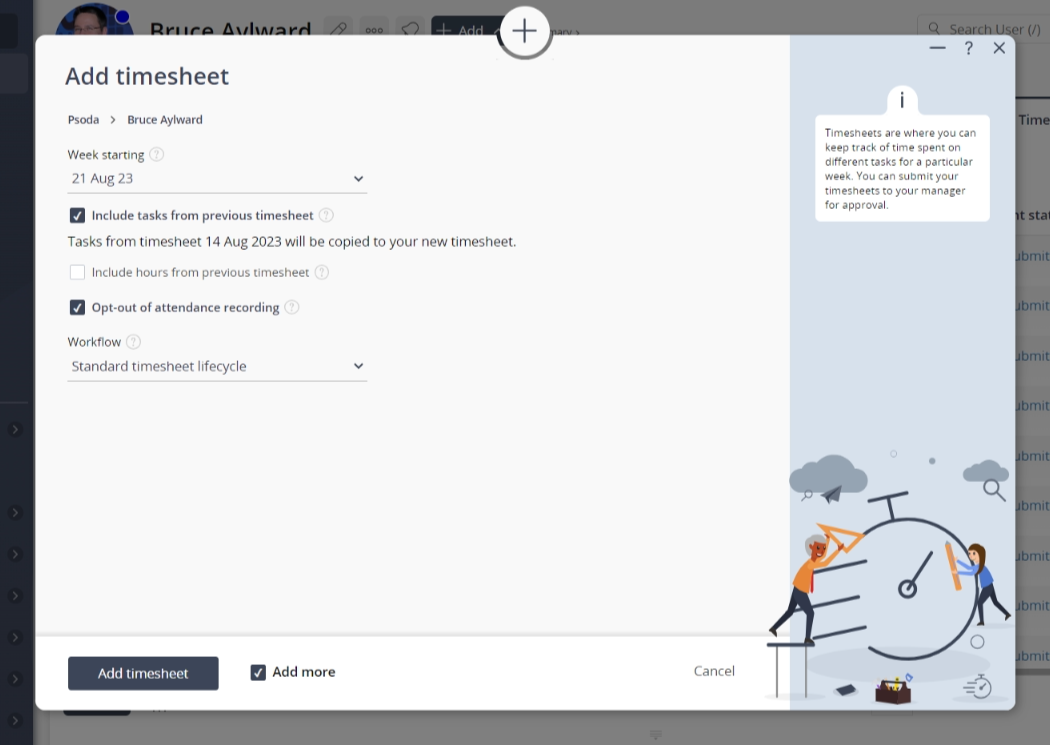
Figure 2 – Add timesheet form
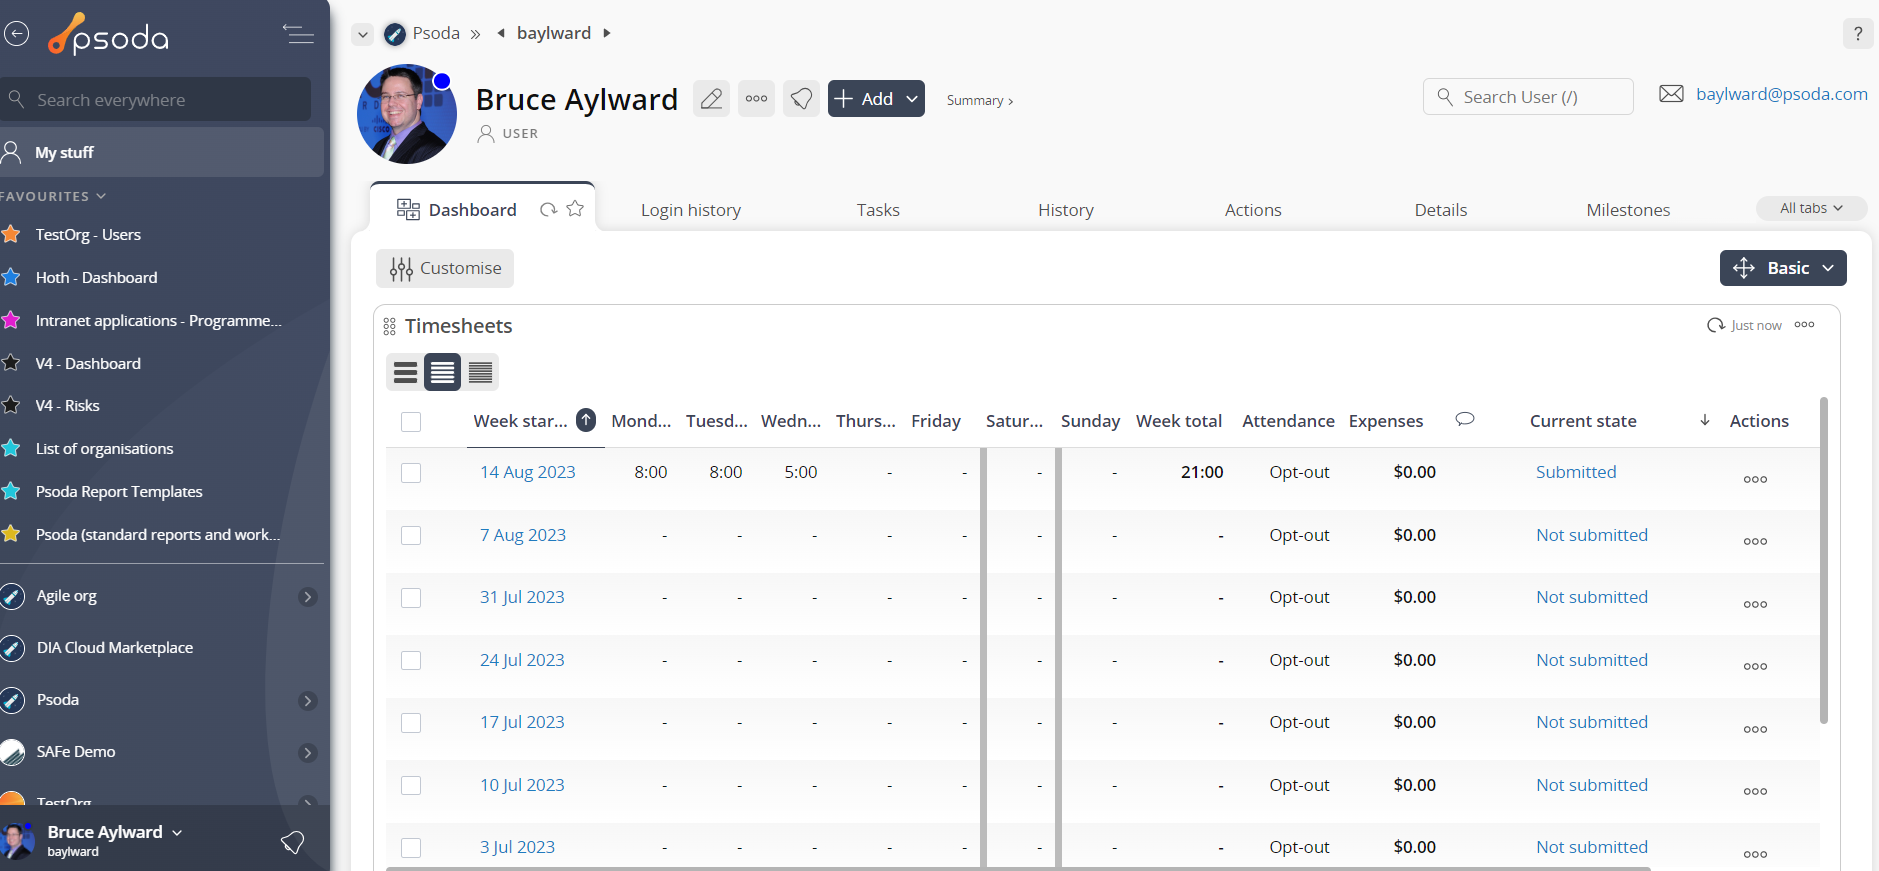
Figure 3 – View from Timesheets tab
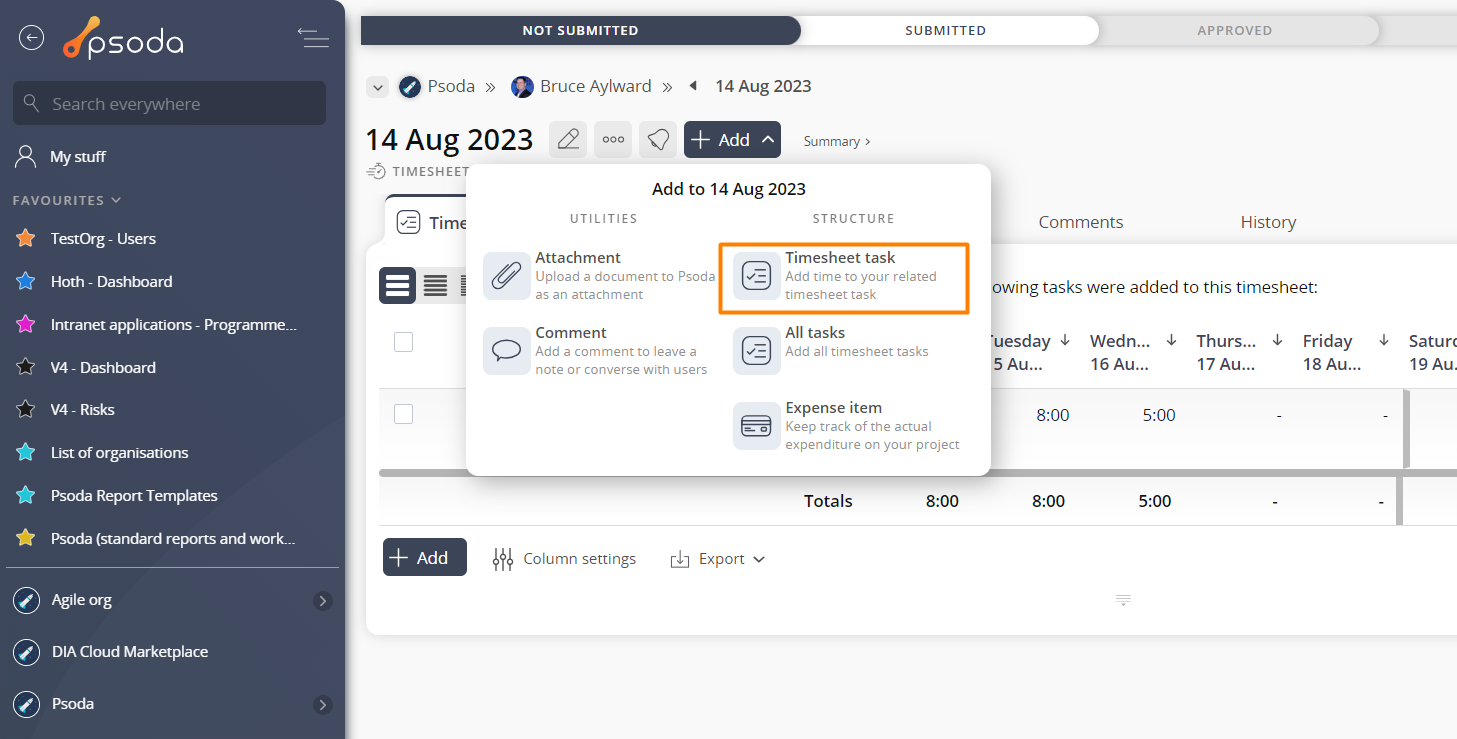
Figure 4 – Access via add menu