This popup form can be accessed via the  add menu in the top header area of the
  workflow view page, as shown in Figure 1. Alternatively, you can access the
  add popup form at the bottom of the States tab at this same view page, as shown in Figure 2.
 users to have this new workflow state allocated to them by holding the CTRL or SHIFT keys and clicking on the name of the additional user(s). To de-select, click on the highlighted name while still holding the CTRL or SHIFT keys so as not to lose all other selected users.
Once you are happy with your changes click the “Add workflow state” button at the bottom of the form. This will add a new workflow state with the details that you supplied.
The new workflow state can be viewed in the Workflow states tab asset listing at the parent workflow’s view page, as shown in Figure 6.
users to have this new workflow state allocated to them by holding the CTRL or SHIFT keys and clicking on the name of the additional user(s). To de-select, click on the highlighted name while still holding the CTRL or SHIFT keys so as not to lose all other selected users.
Once you are happy with your changes click the “Add workflow state” button at the bottom of the form. This will add a new workflow state with the details that you supplied.
The new workflow state can be viewed in the Workflow states tab asset listing at the parent workflow’s view page, as shown in Figure 6.

![]()
Figure 1 – Access via add menu
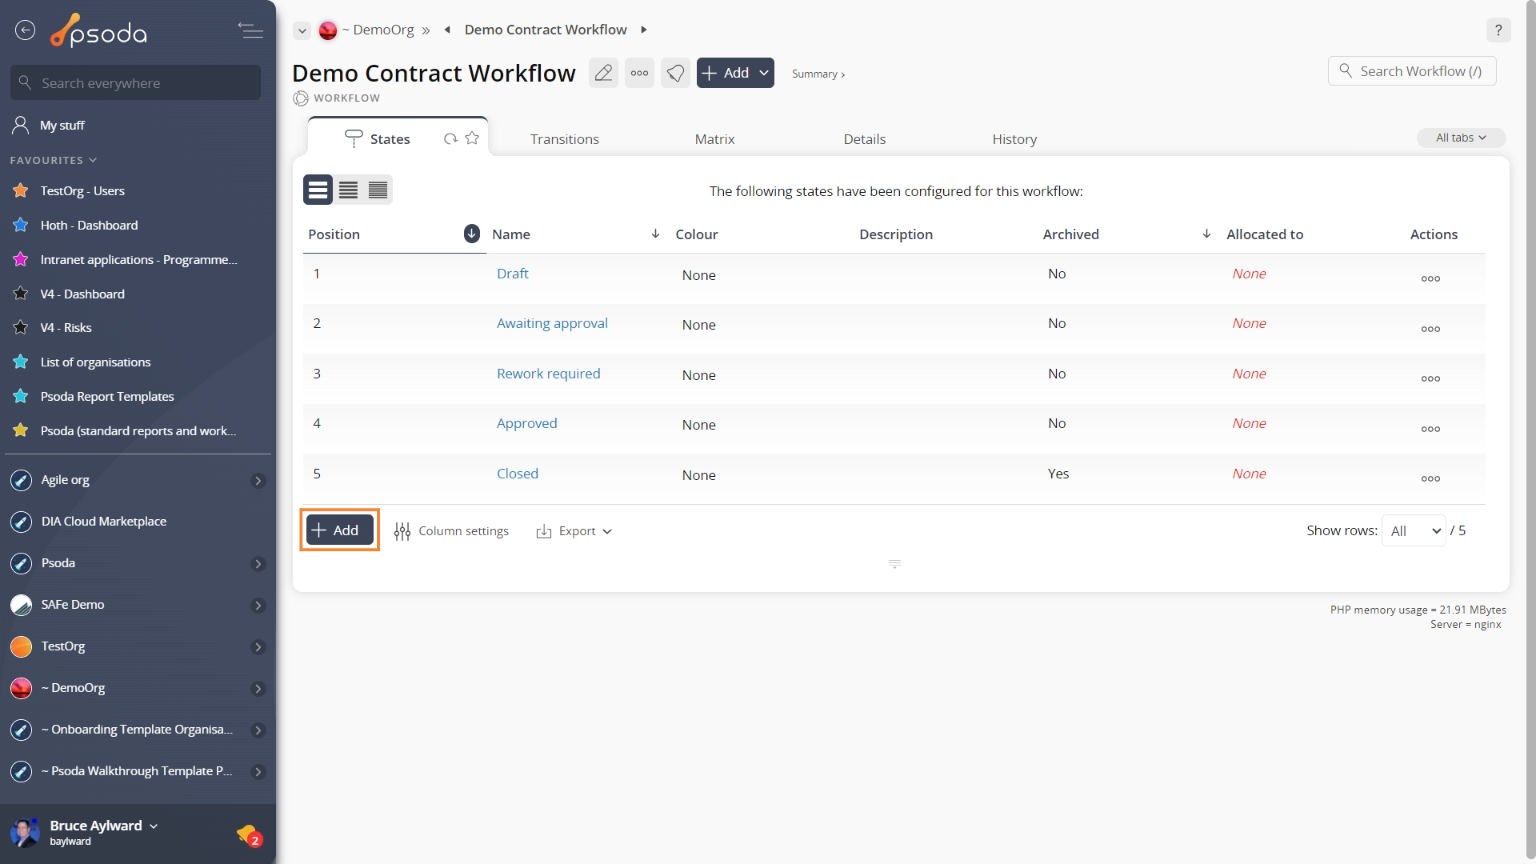
Figure 2 – Access via workflow states tab
This popup is shown in Figure 3 and is used to add a new ![]() state for a workflow. You will not normally have access to this form unless you are an administrator.
state for a workflow. You will not normally have access to this form unless you are an administrator.
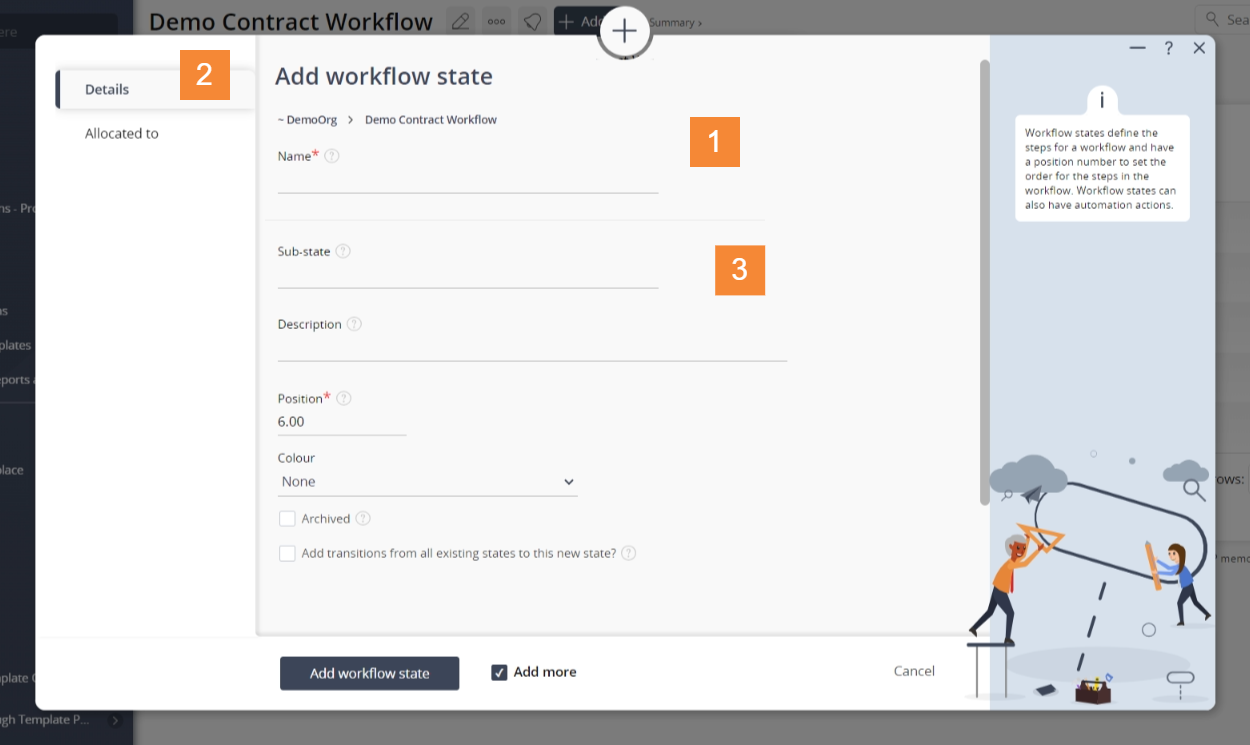
Figure 3 – Add workflow state form
In Figure 3 above, the form has been broken down into three sections:
| Section 1 | This section contains a selection of important top fields: Workflow: This read-only field shows which workflow you are adding this new workflow state to. Name*: This is a mandatory field where a unique name for this new workflow state must be entered. Add more: Select this check box if you’d like to keep the form open and add more workflow states to this workflow after the current one has been created. |
|---|---|
| Section 2 | These are the tabs that you can cycle through to edit each section of the workflow state.When you navigate to a new tabbed view in this popup, any information entered in Section 3 from the previous tabbed view will be saved. This means you do not need to click on any buttons to save each tab, but can instead click on the Add button at the bottom of the popup when you wish to add your new workflow state with the set details. |
| Section 3 | This information will change as you cycle through the tabs shown in Section 2, and the available fields will change accordingly. A breakdown of the field information for each tab is provided below. |
Tab breakdown
The following information provides a breakdown of each of the tabbed views that may be available for you to set the workflow state’s details under each section.Details
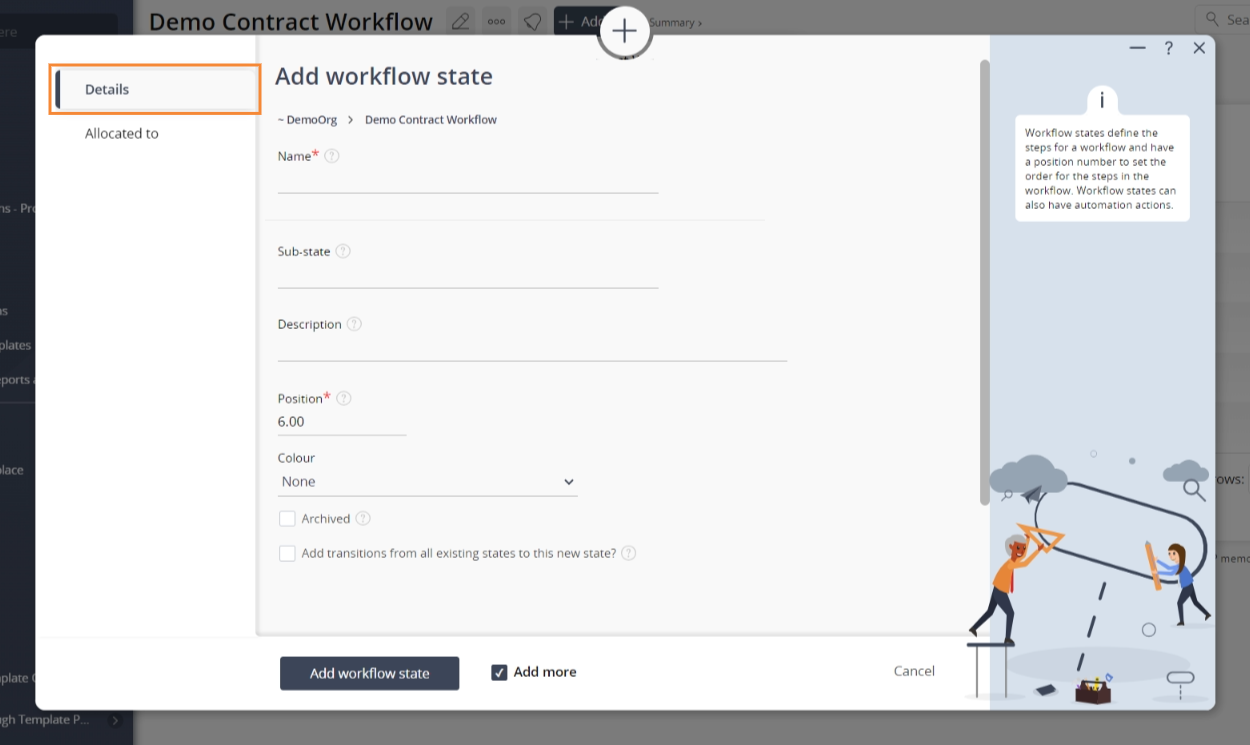
Figure 4 – Add workflow state details tab
The details for the workflow state can be assigned by clicking on the tab indicated in Figure 4 above.| Description: | Enter a description for this new workflow state here. |
|---|---|
| Position: | Enter the order number for this new workflow state here. |
| Archived: | Select this check box if you would like to set this workflow state as archived. |
Allocated to

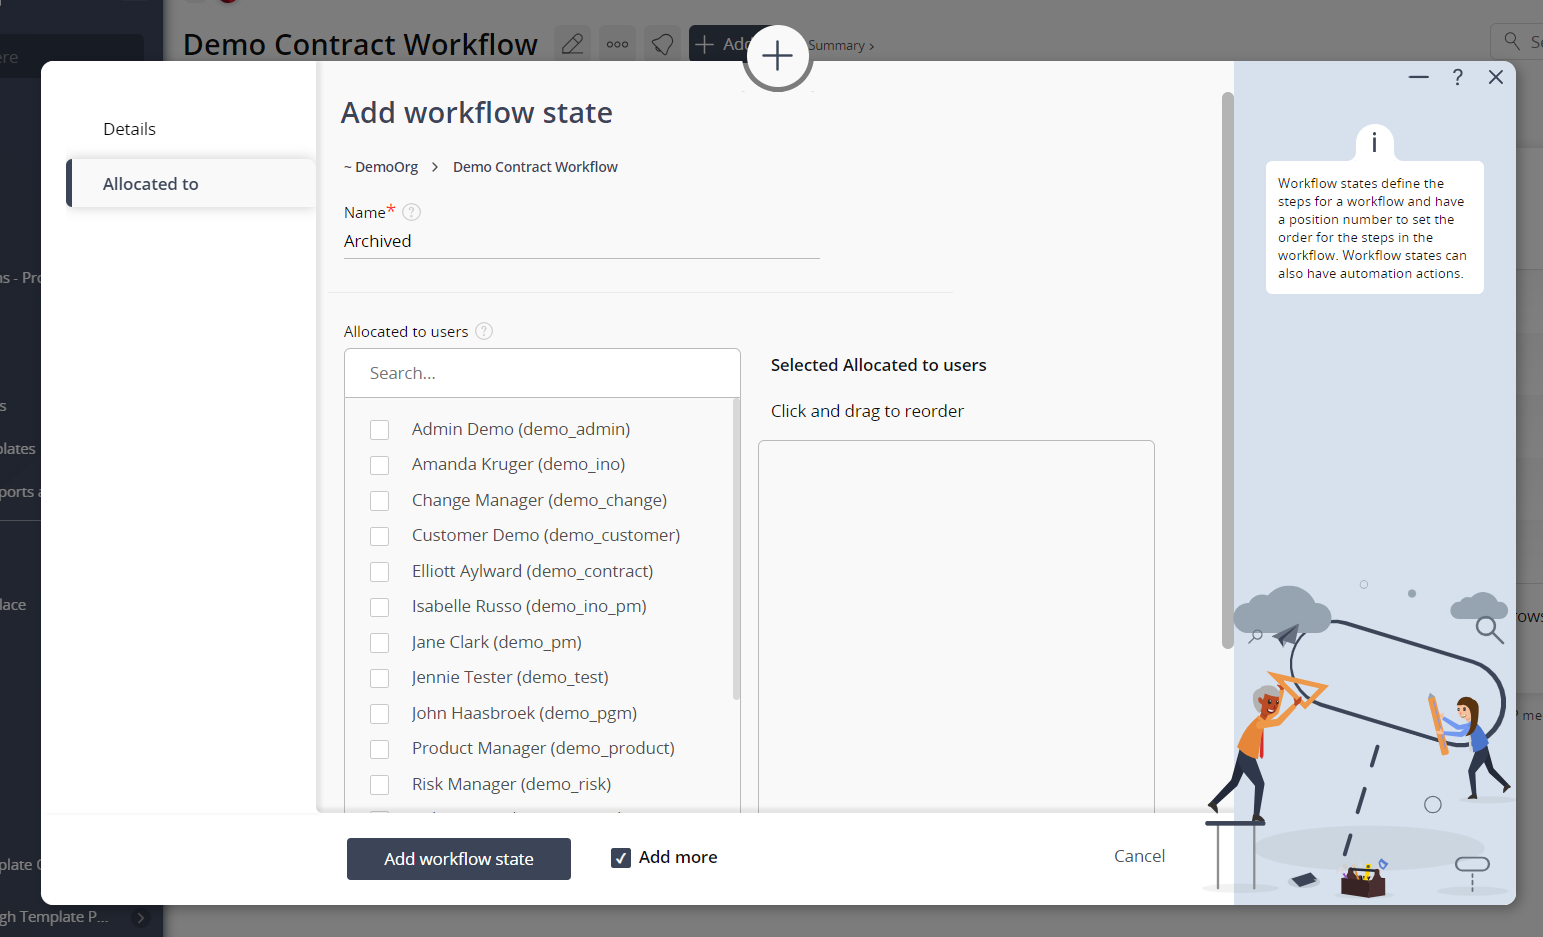
Figure 5 – Add workflow state allocated to tab
You may select multiple
Figure 6 – View from Workflow States tab
Click the “Cancel” button if you want to discard your changes.