This popup form can be accessed via the  import icon at the bottom of the Risks tab at any of the selected parent asset view pages (e.g.
  organisation,
  programme,
  project,
  sub-project, or
  change request), as shown in Figure 1.import consists of a number of phases:The import popup is shown in conjunction with each phase below, and can be used to import a number of risks from a Comma Separated Values (CSV) file into the selected parent asset.There are four steps when importing risks:
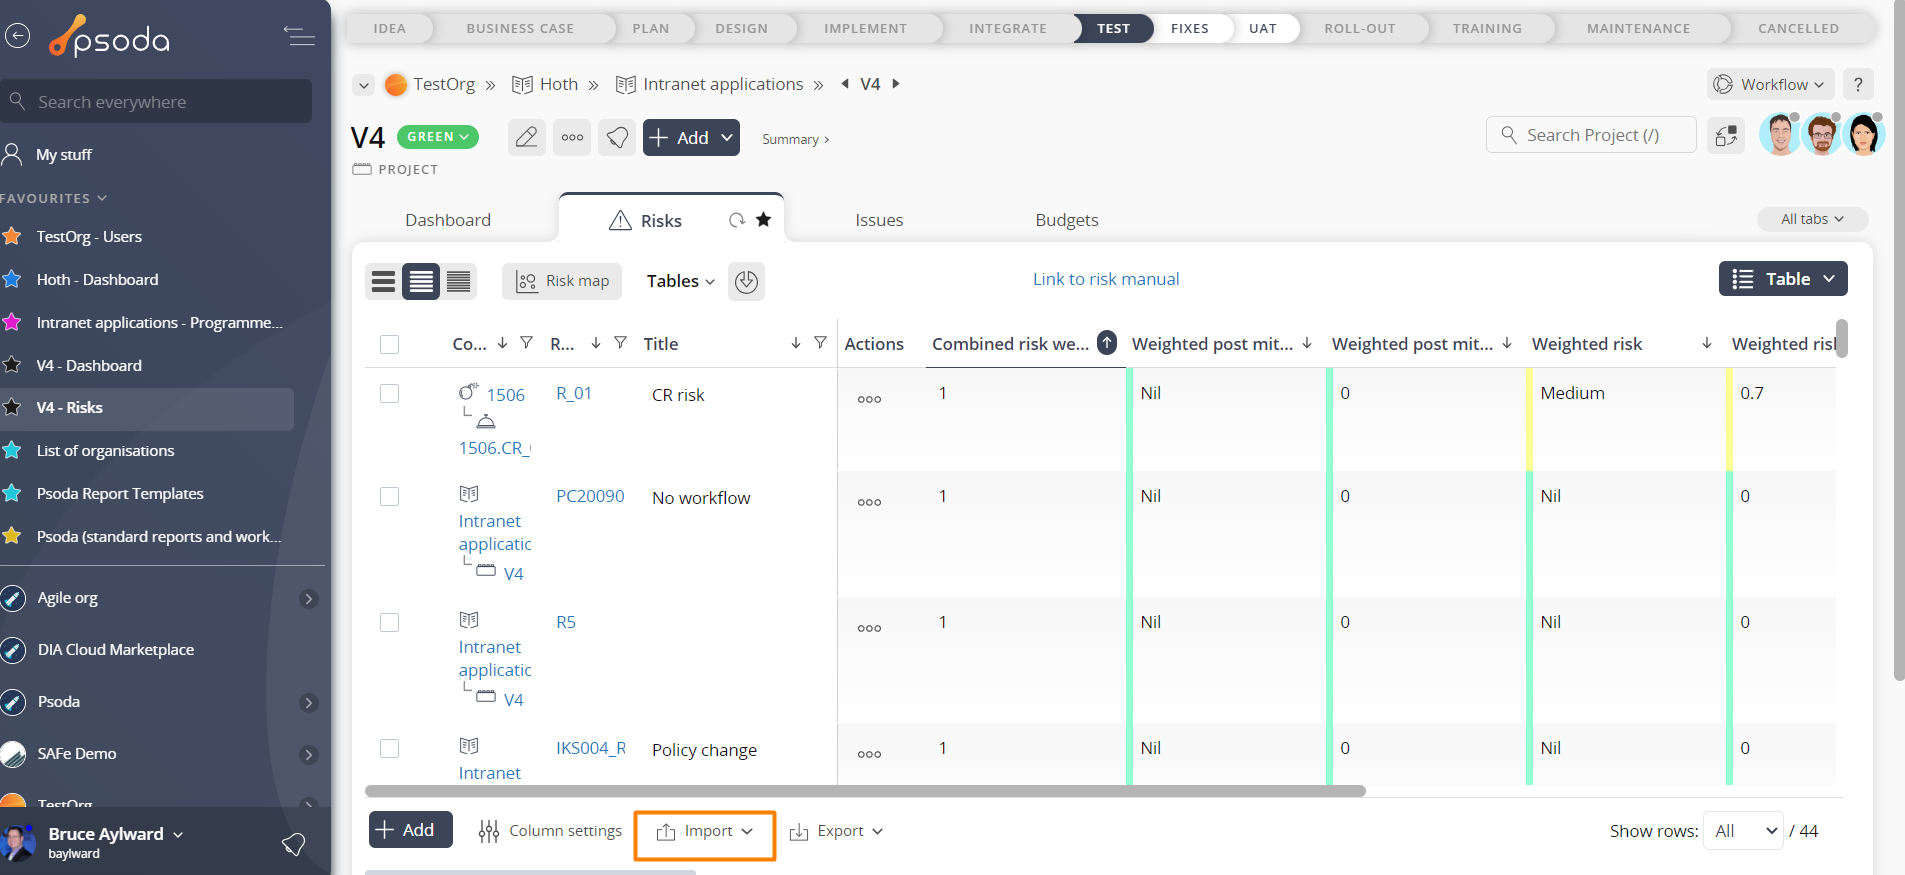 Figure 1 – Access via risks tab
Phase 1 – Import file
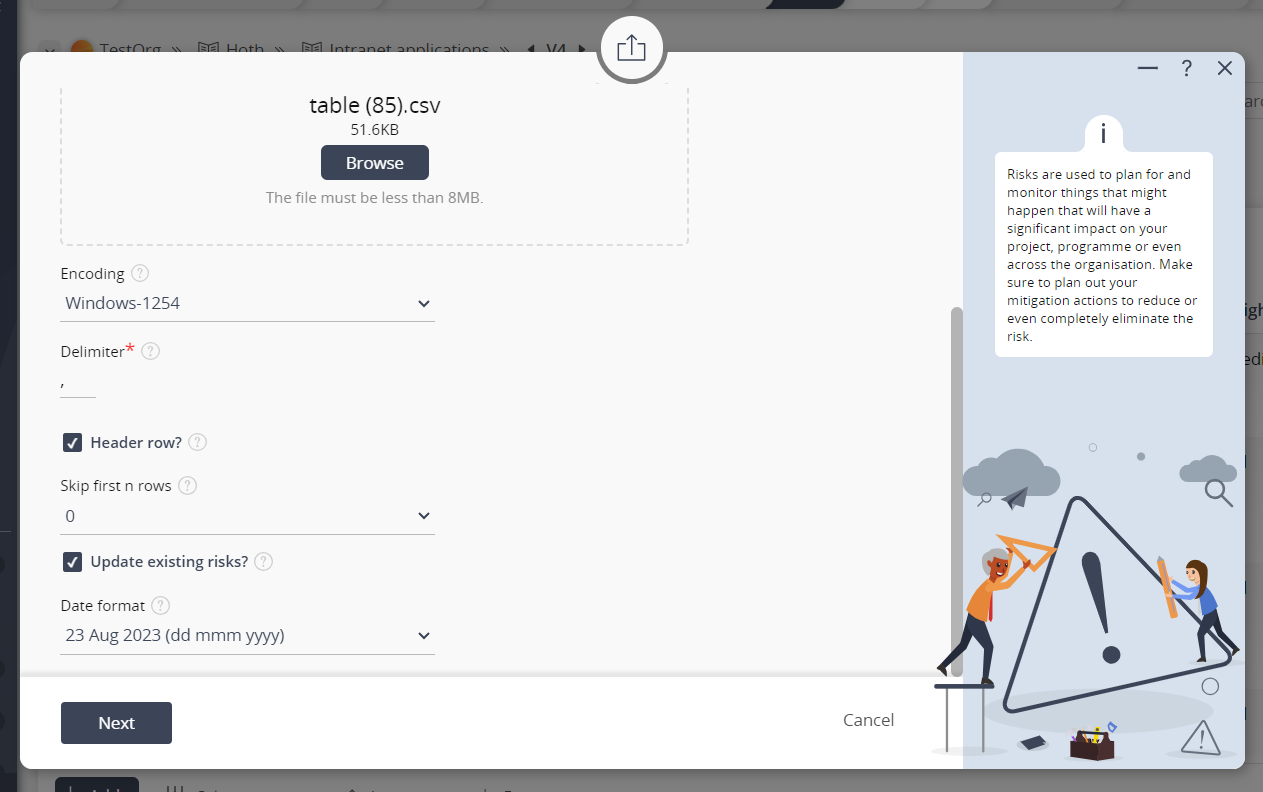
Figure 2 – Import risks form (1)
The first phase is to select file you want to import and some details about the file, using the browse option of the import file field. You can also set the delimiter used in the file, whether the file contains a header row and whether you want to skip a certain number of rows (e.g. if you have a surplus of lines before the header).You may also select the update existing check box if you want Psoda to match the entries in the file with existing risks and update those.Click the Next button to move to the next step.Phase 2 – Mapping
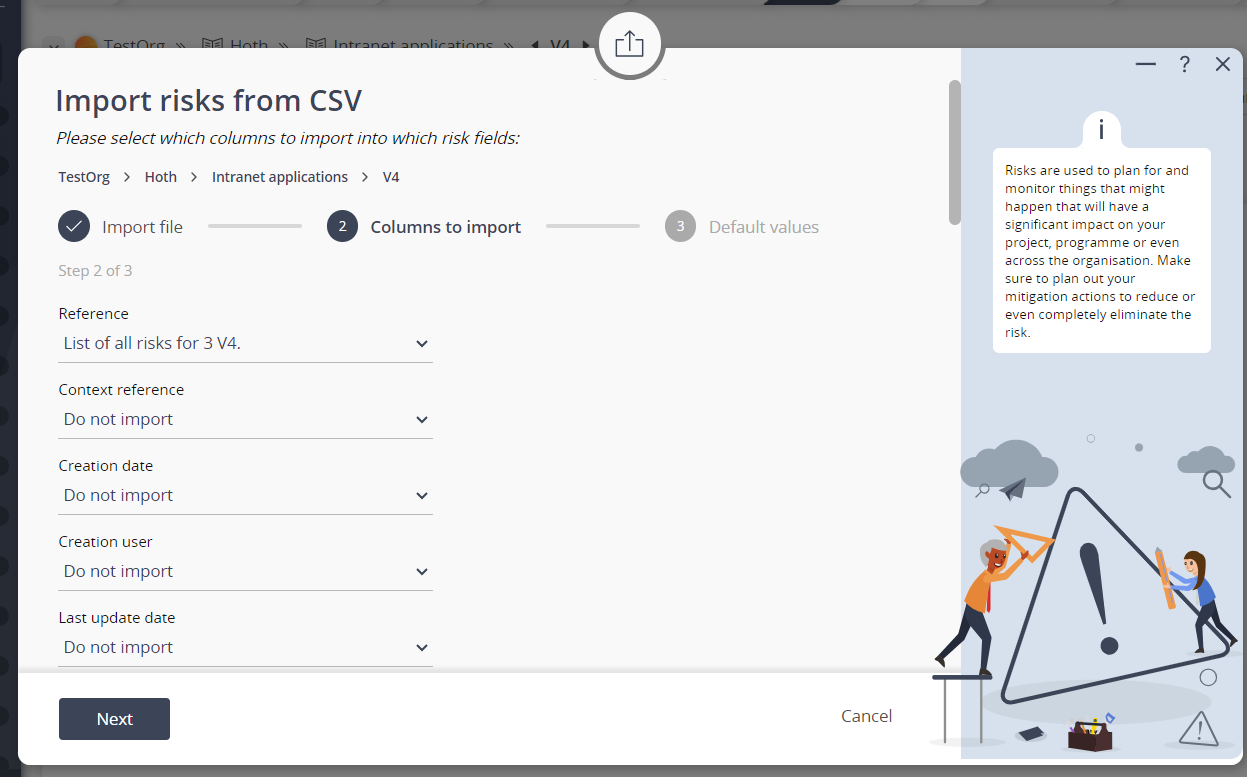
Figure 3 – Import risks form (2)
Phase 2 allows you to map or specify which columns from the import file should go into which fields of the new risks. For example the Reference field allows you to select which column to import into the reference field. The Category field allows you to select the category column, and so on. If the column headers already match the field names then Psoda will automatically select those.If you do not want to import a particular column from the file the just select the “Do not import” option from the list. You will be given an opportunity in the next step to specify default values for any fields you do not want to import.NOTE: The reference field must be unique for every risk in your asset so you cannot choose not to import the reference.Select the Next button to move to the next step. If you have selected columns for all the fields then you will skip over the next phase (default values) and go straight to the last phase (results).Phase 3 – Default values
Phase 3 allows you to set default values for any fields you chose not to import from the file.The fields may be the same as for creating a new risk, but the fields present in this phase are very much dependent on which options you selected in phase 2.Click the Import risks button to start importing the risks.Phase 4 – Importing…
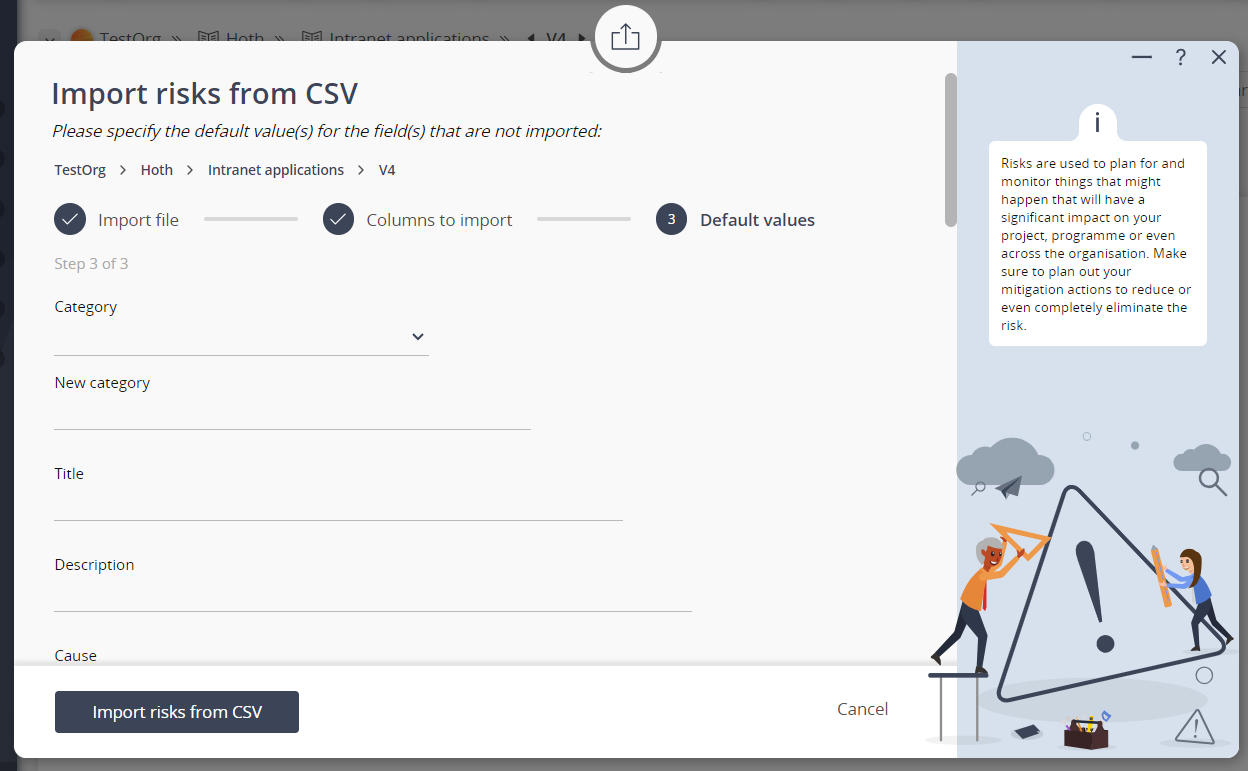
Figure 4 – Import risks form (3)
Phase 4 performs the actual import. You will see a progress bar that will automatically update and show you how much of the file has been imported. If you do not see automatic updates then you can force a refresh with the Refresh button.Once the import is complete the Refresh button will change to a Next button.