Figure 5 below shows the basic layout of the screen:
Area 2 is called this navigator. It shows you the organisational structure and allows you to easily navigate to particular programmes and projects that you may be interested in. The navigator is described in more detail in the Navigator page of this online help centre.
Area 3 is the top header area of the screen. This area includes: the workflow for this asset, the name of the asset as well as buttons (edit, follow, add, search etc.) related to this asset, and the list of tabs which you can navigate to. This area is described in more detail in the Top Header Area of this online help centre.
Area 4 is the main content area of the screen. The actual content of this area will depend on the item and tab that you have selected. In Figure 5 we see the actions table for the project: “Project V4”. This area will usually contain a table or a kanban board or a chart or a report etc.
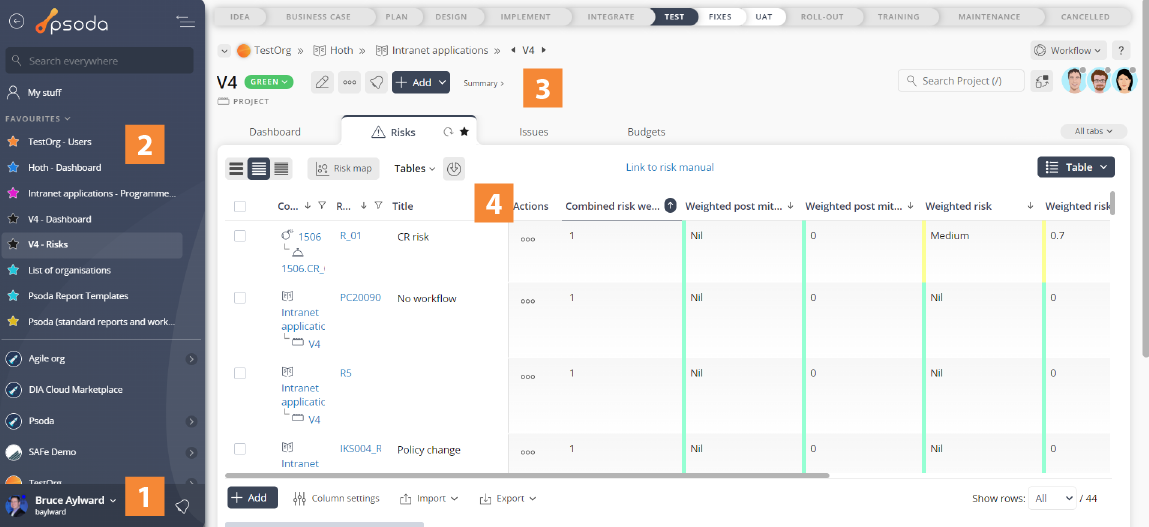
Figure 5 – Screen layout
Area 1 is called the sidebar and it provides various important menus. These menus are described in more detail in the Sidebar menus page of this online help centre.Area 2 is called this navigator. It shows you the organisational structure and allows you to easily navigate to particular programmes and projects that you may be interested in. The navigator is described in more detail in the Navigator page of this online help centre.
Area 3 is the top header area of the screen. This area includes: the workflow for this asset, the name of the asset as well as buttons (edit, follow, add, search etc.) related to this asset, and the list of tabs which you can navigate to. This area is described in more detail in the Top Header Area of this online help centre.
Area 4 is the main content area of the screen. The actual content of this area will depend on the item and tab that you have selected. In Figure 5 we see the actions table for the project: “Project V4”. This area will usually contain a table or a kanban board or a chart or a report etc.
Related topics