This popup form can be accessed via the  add menu in the top header area of the
  organisation view page, as shown in Figure 1. Alternatively you can access the
  add popup form from the bottom of the Groups tab at any of this same view page, as shown in Figure 2. You may also create sub-groups by selecting the sub-group icon in the
  actions column menu of the Groups tab, as shown in Figure 3, or from the add menu in the top header area of the group view page, as shown in Figure 4.
If you accidentally try to add a new group with the same name as an existing group for your organisation then you will get a warning message.
Once you are happy with your entries click the “Add group” button at the bottom of the form. This will add a new group with the details that you supplied.
The new group can be viewed in the Groups tab at the parent asset’s view pages, as shown in Figure 6.
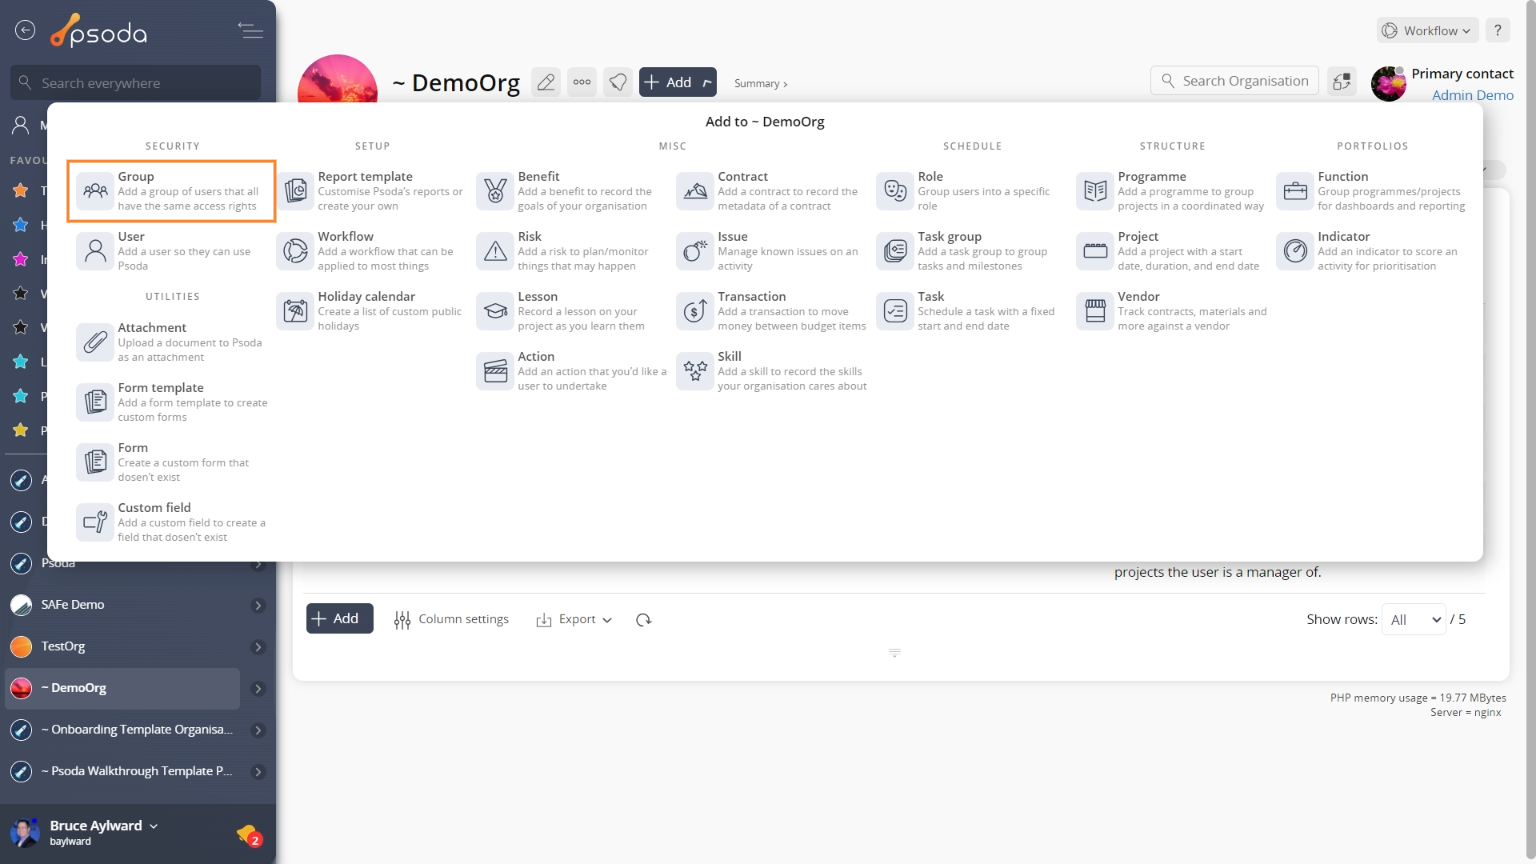
Figure 1 – Access via add menu

Figure 2 – Access via groups tab
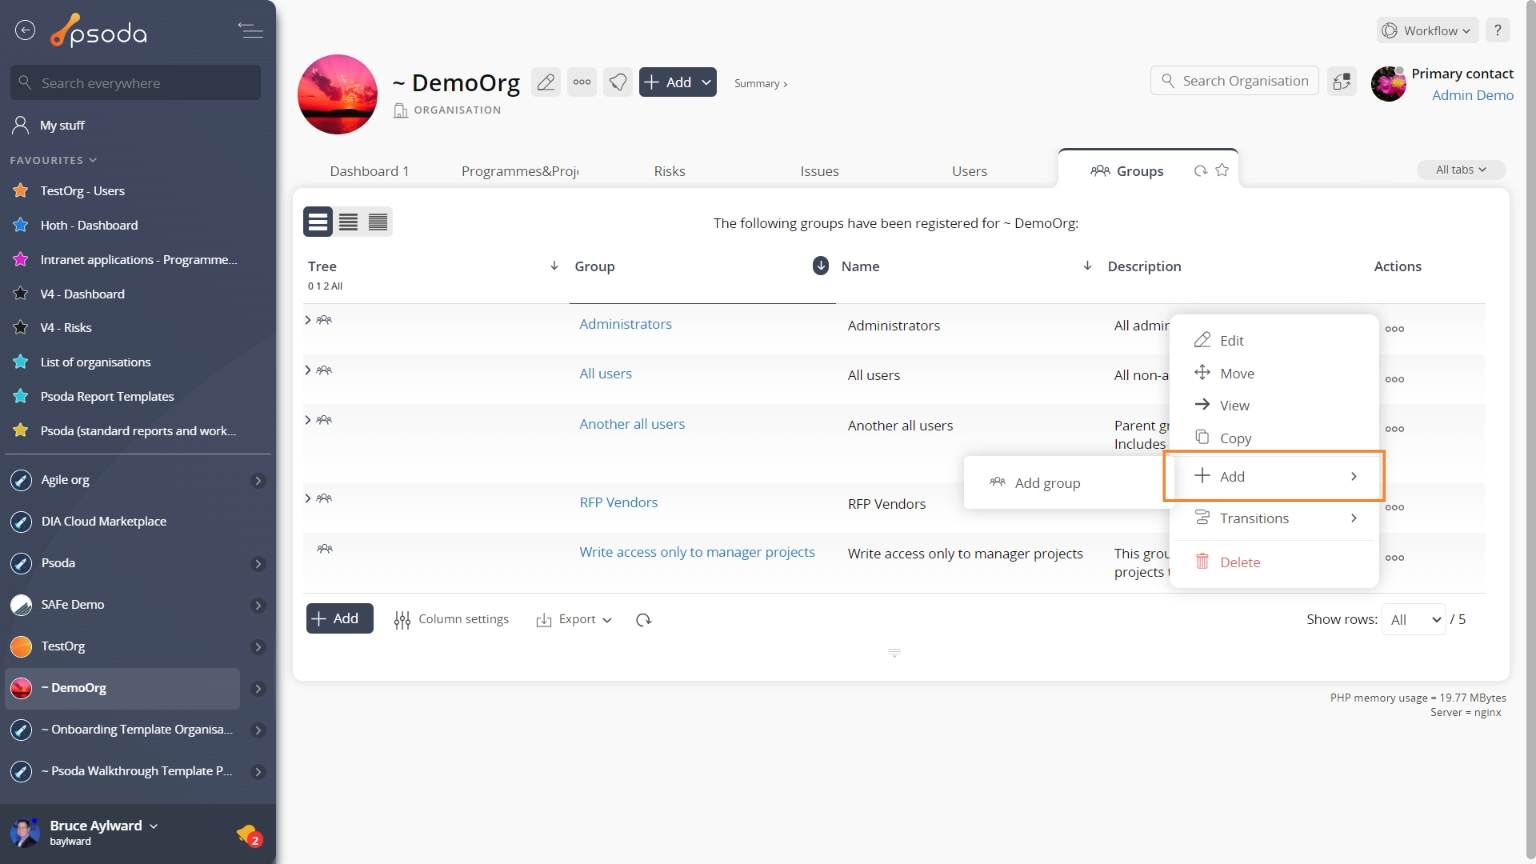
Figure 3 – Access via ![]() actions column menu
actions column menu
![]()
Figure 4 – Access via group add menu
This popup is shown in Figure 5 and is used to add a new security group for the selected organisation. This form is also used to add sub-groups for other groups.
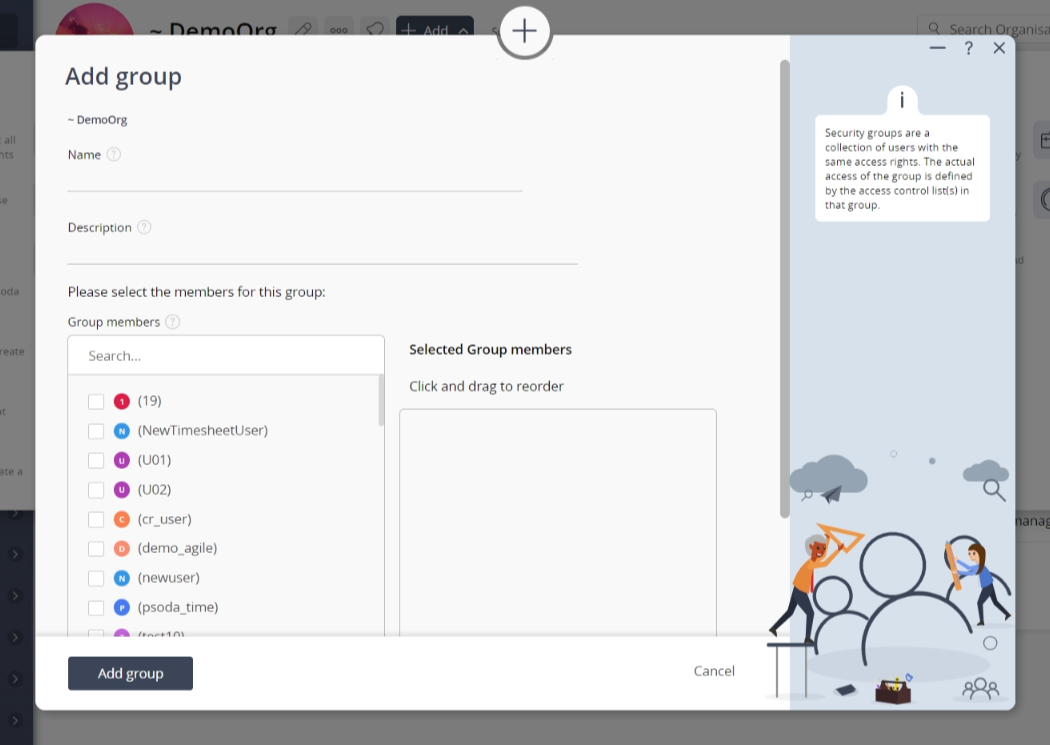
Figure 5 – Add group form
This form has the following fields:| Organisation: | This read-only field shows which organisation this group is being added to. |
|---|---|
| Parent group: | This field is only visible when creating sub-groups. This read-only field shows which parent group this sub-group is being added to. |
| Name: | Enter the name of the group you want to add, e.g. Customers. The name must be unique within your organisation. |
| Description: | Enter a short description for this new group here. |
| Member select area: | You can select multiple assets/users in the non-members field (left box) by clicking the checkbox or using the SHIFT keys to check multiple assets/users. These checked assets/users will be moved to the members field (right box) beside it. If you want to remove an asset/user, you can uncheck it in the non-members field (left box) or you can press the X button on the asset/user in the members field (right box). You can also drag and drop to rearrange the order in the members field (right box). |
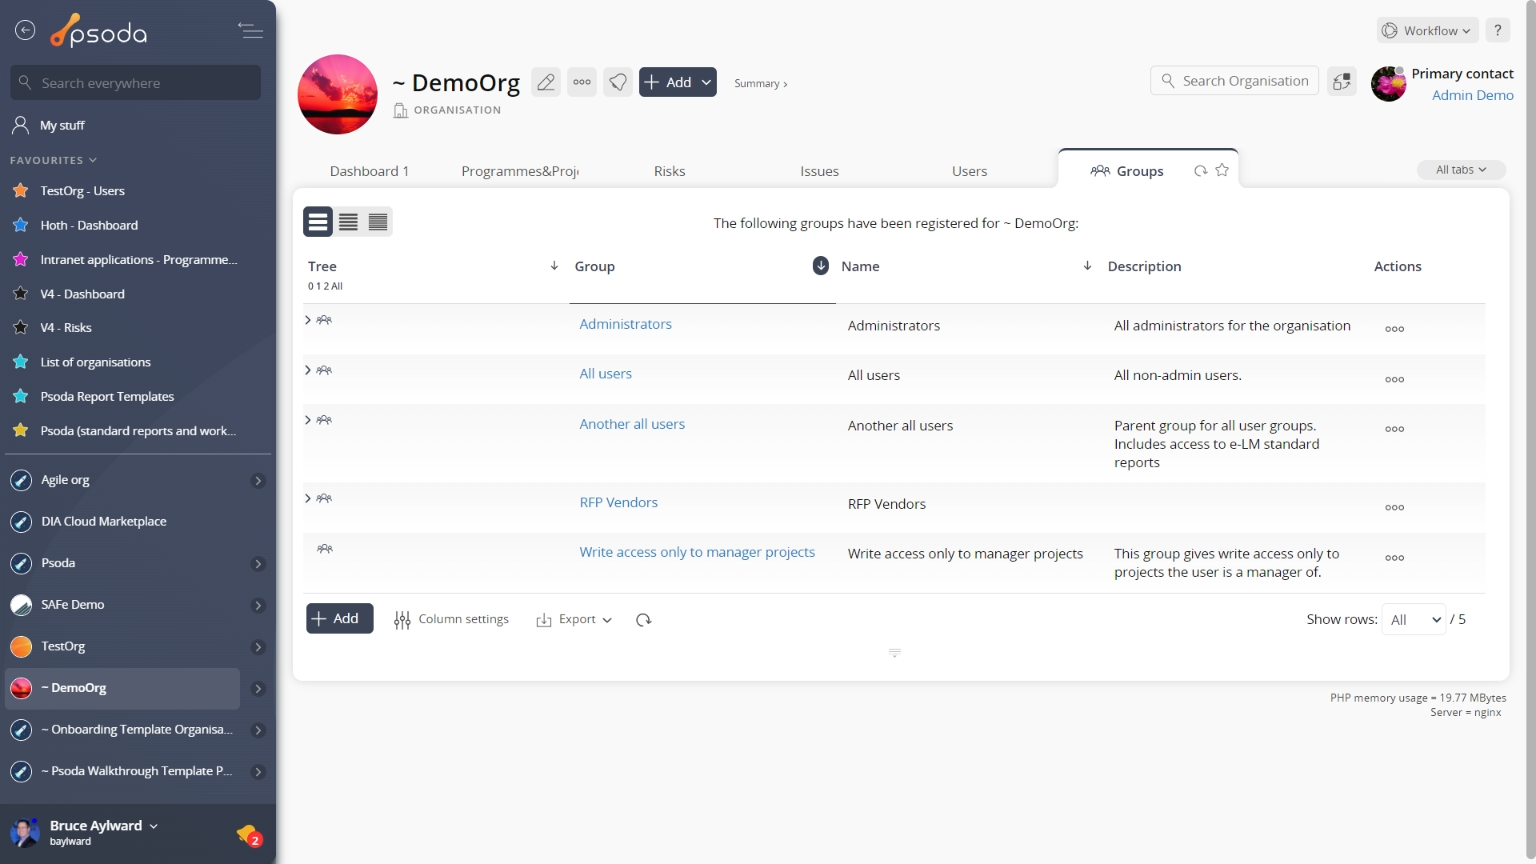
Figure 6 – View from groups tab
Click the “Cancel” button if you no longer want to add a new group.