This popup form can be accessed via the  add menu in the top header area of the selected asset view page (e.g.
  organisation,
  programme or
  project), as shown in Figure 1. Alternatively you can access the
  add popup form at the bottom of the Contracts tab at these same view pages, as shown in Figure 2.
 contract for the selected asset.
*The reference is mandatory,but all others are optional.If you accidentally try to add a contract with the same reference as an existing contract in your project then you will get a warning message.Once you are happy with your entries click the “Add contract” button at the bottom of the form. This will add a new contract with the details that you supplied.The new contract can be viewed in a number of locations, including the Contracts tab at the parent asset’s view page, as shown in Figure 4. Alternatively you can view the new contract from the parent asset’s dashboard in the Open Contracts dashlet, as shown in Figure 5.
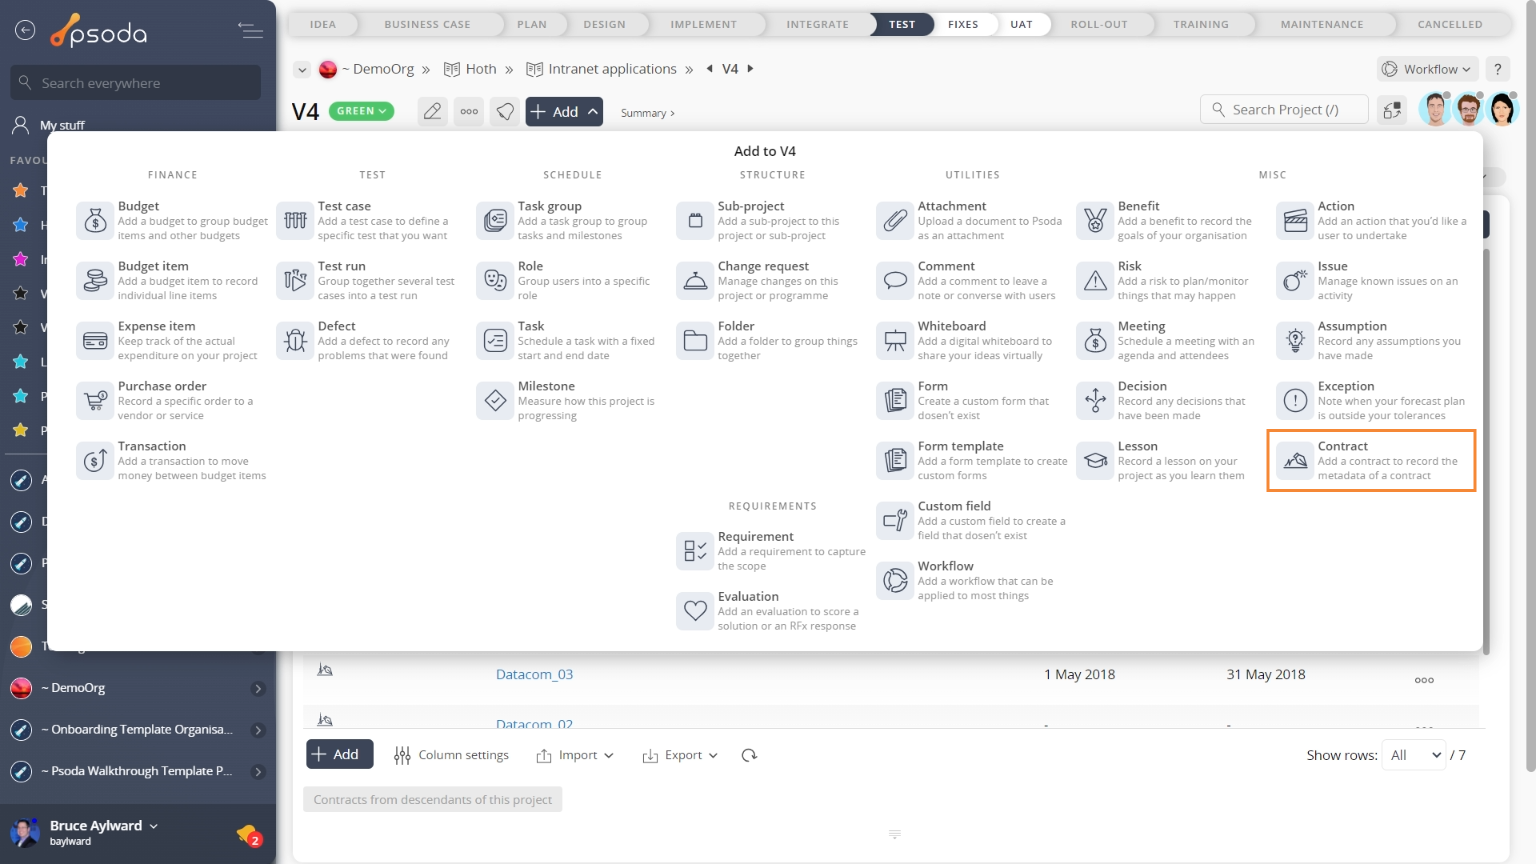
Fig 1 – Access via add menu
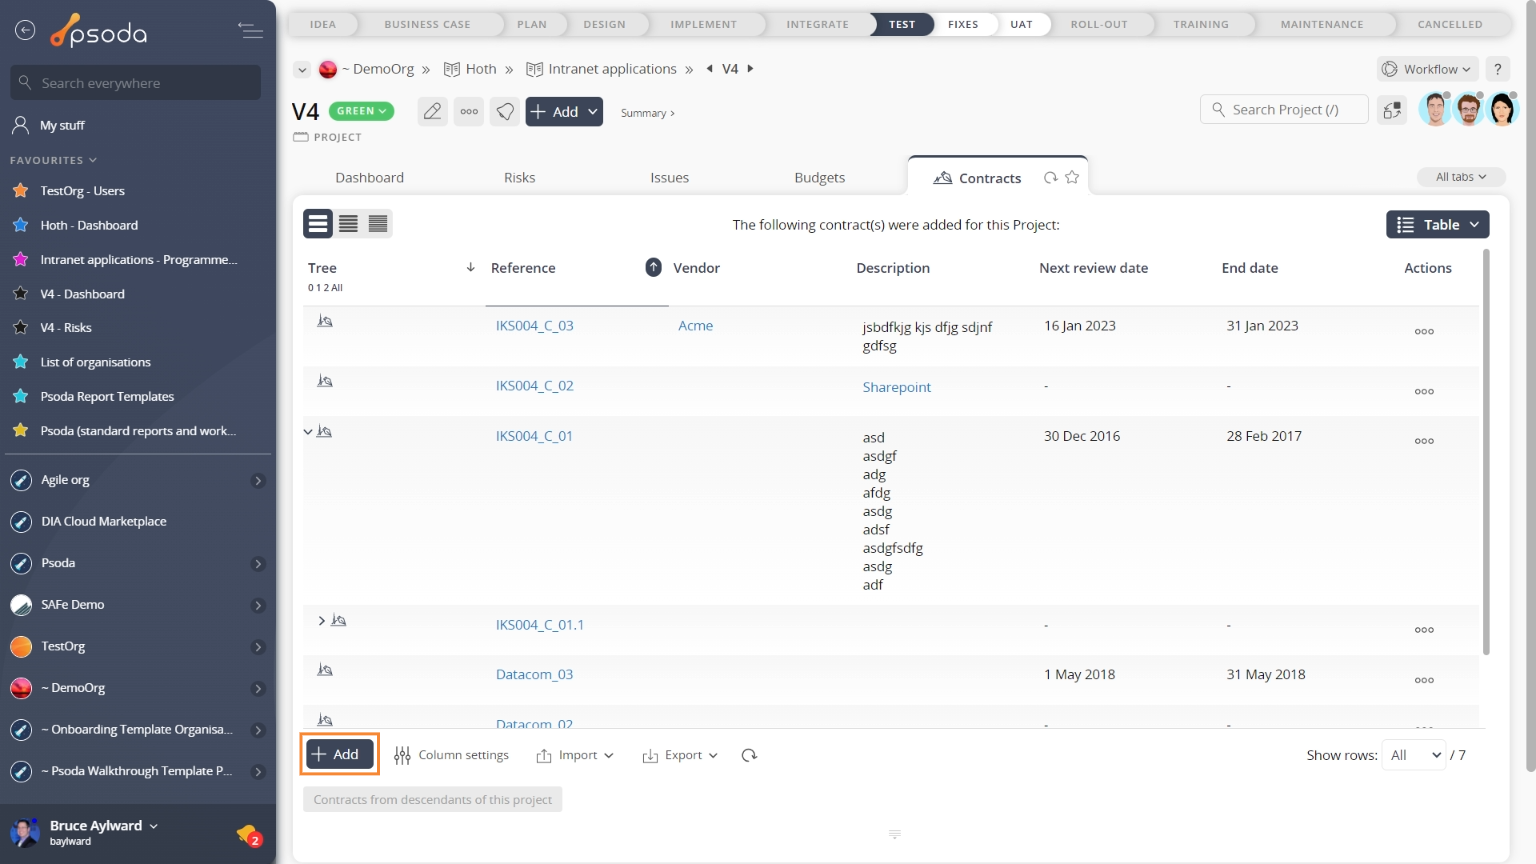
Fig 2 – Access via contracts tab
This popup is shown in Figure 3 and is used to add a new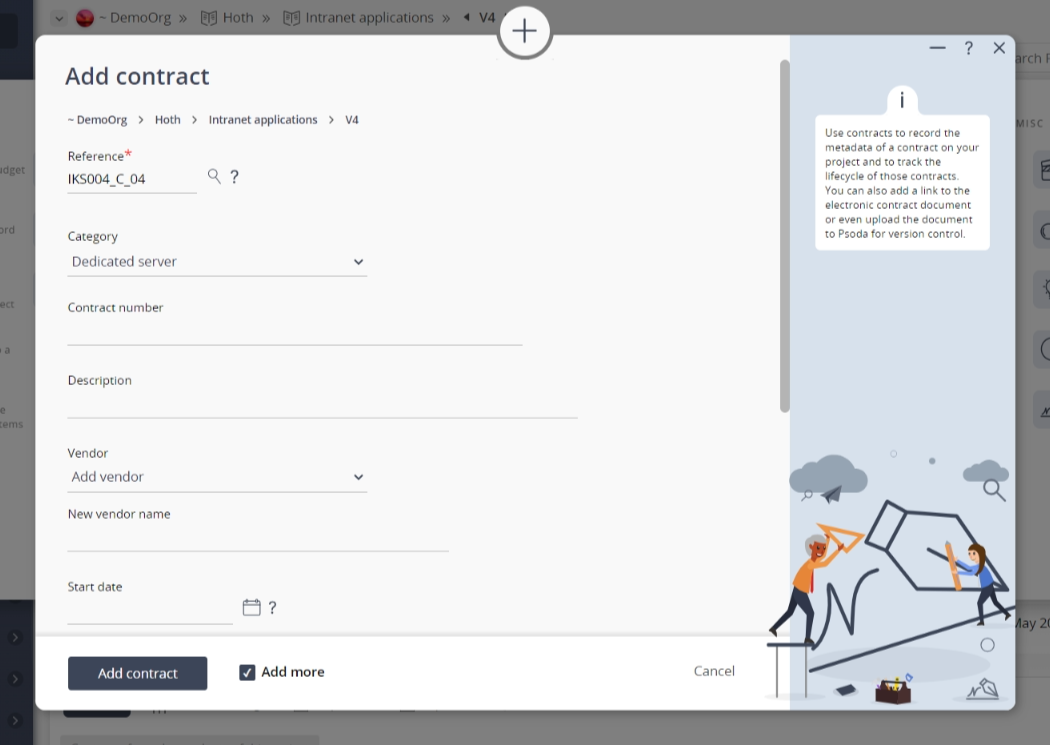
Figure 3 – Add contract form
This form has the following fields:| Parent asset: | This read-only field shows which programme or project you are adding this new contract to. |
|---|---|
| Reference*: | Use this field to enter a reference for this new contract. If you enter a prefix and end it with one or more zeros, e.g. C_00, then you can click on the |
| Category: | Use this drop-down to select a category for this contract. |
| (New category name): | If you have selected the “Add new category” option in the category field above, you will be presented with this field where you can add a new category to group this contract under. |
| Title: | Enter a short title for this new contract here. |
| Description: | Enter a longer description of this new contract here. |
| Vendor: | Use this drop-down to select a vendor for this contract. |
| (New vendor name): | If you have selected the “Add new vendor” option in the vendor field above, you will be presented with this field where you can add a new vendor to allocate to this contract. |
| Start date: | Enter the start date for this contract manually using the date formats or select the date using |
| Next review date: | Enter the next review date for this contract manually using the date formats or select the date using |
| End date: | Enter the end date for this contract manually using the date formats or select the date using |
| Budget intervals: | Enter the number of budget intervals you would like this contract to have. |
| Manager: | Use this drop-down to select the manager for this contract. |
| Add more contracts: | Leave this check box selected if you would like to keep this form open and add more contracts to this asset once the current contract has been created. |
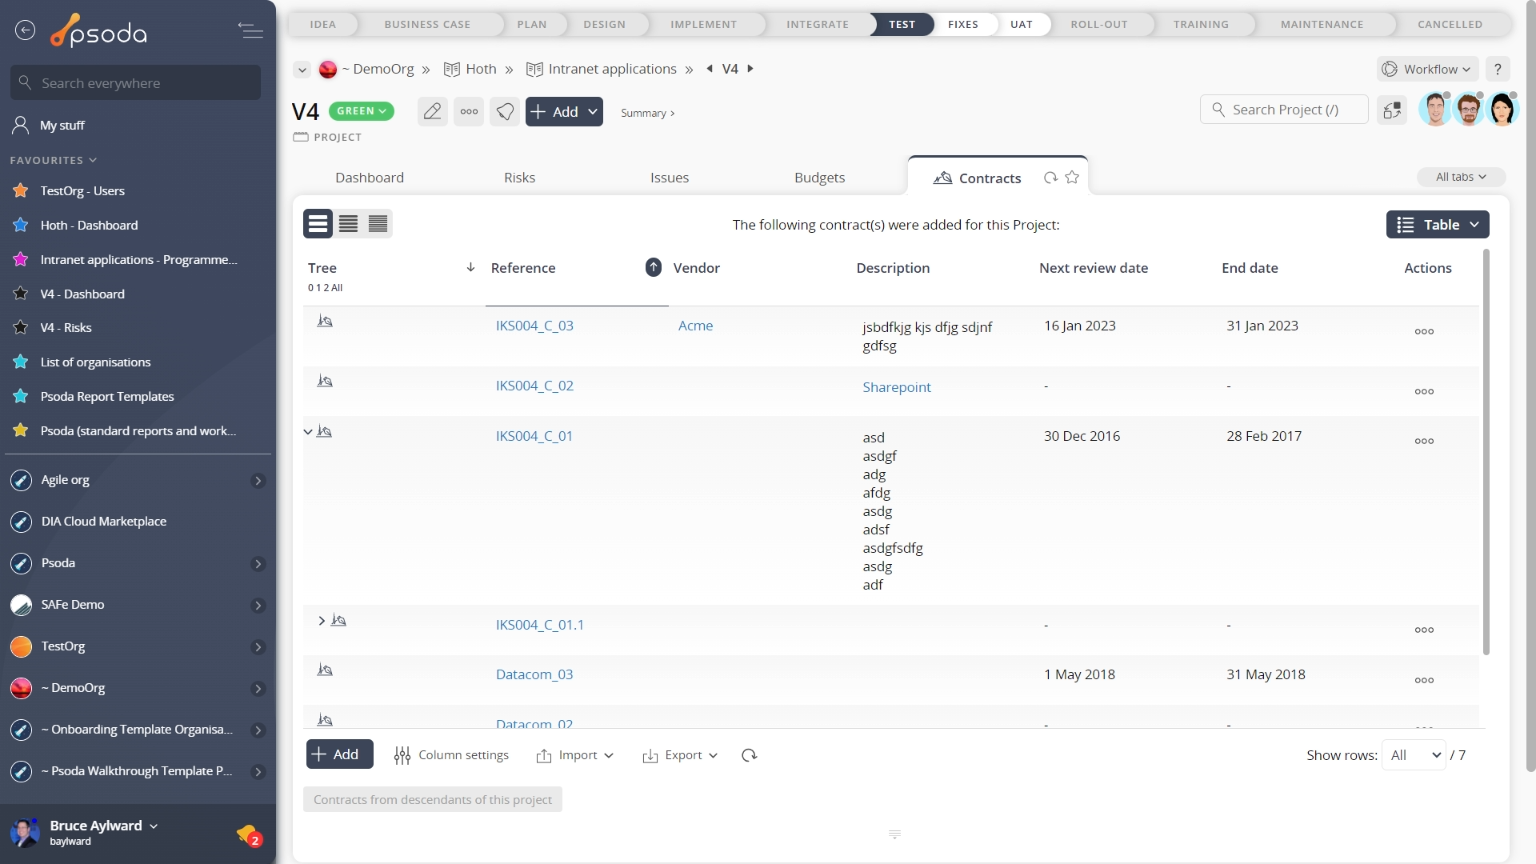
Figure 4 – View from contracts tab
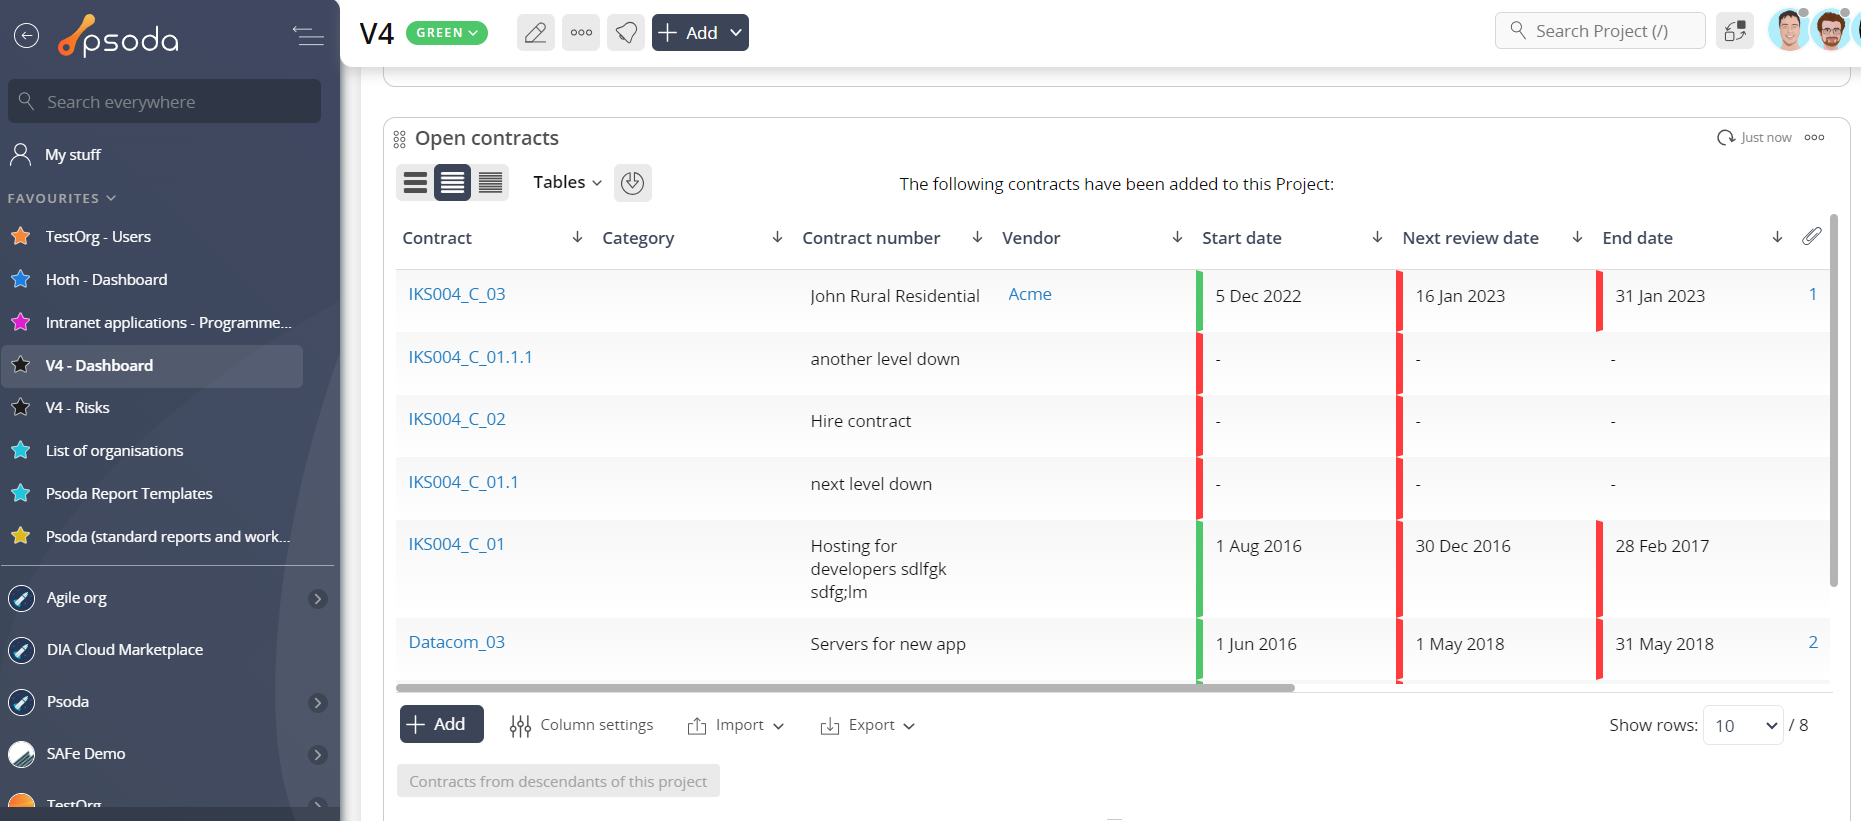
Figure 5 – View from Open Contracts dashlet
Click the “Cancel” button if you no longer want to add a new contract.